
Sonata GL V6-3.0L (1997)
2. Install bolts by length as shown in the illustration, then tighten to specification as follows:
Oil pump case bolt, 12-15 Nm (120-150 kg. cm, 9-10 ft. lbs.).
Oil pump cover screw, 8-12 Nm (80-120 kg. cm, 6-9 ft. lbs.).
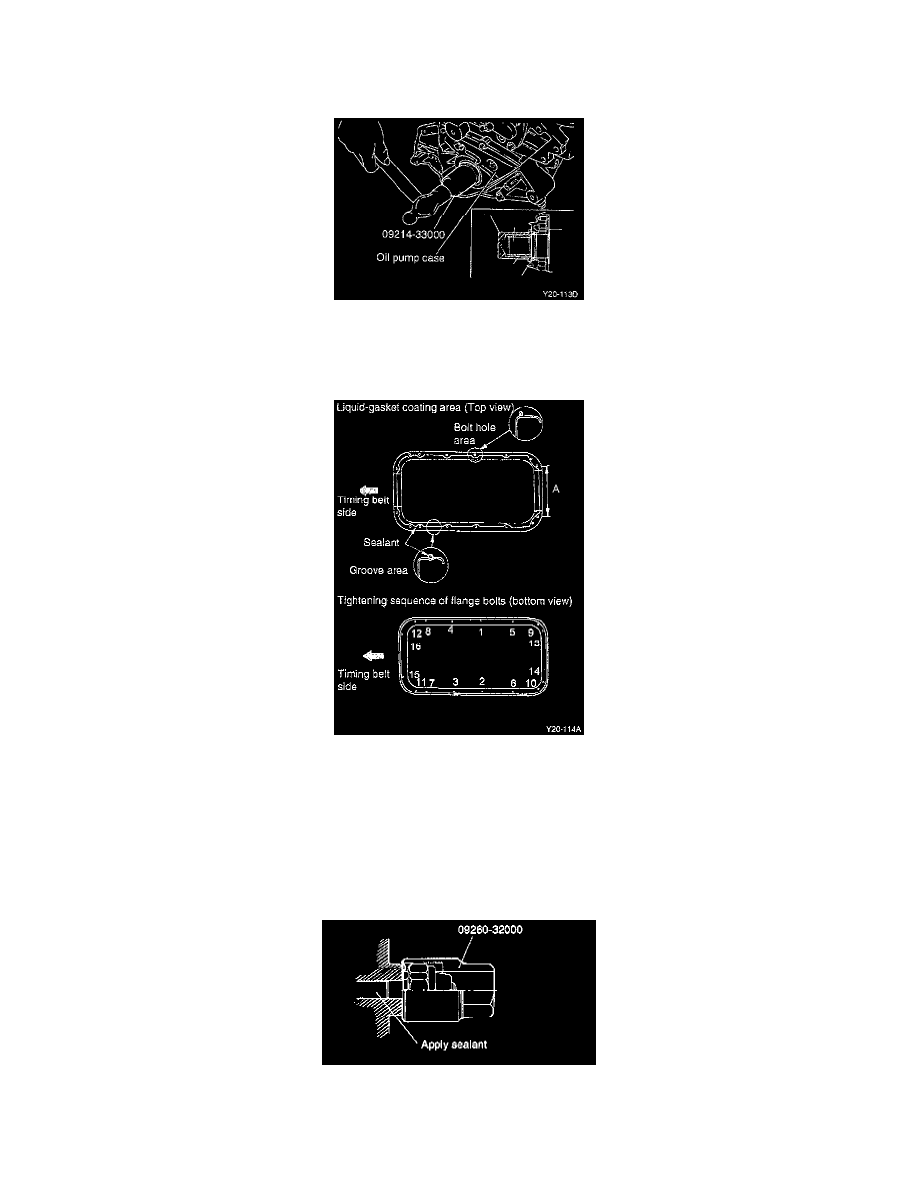
3. Install the oil seal into the oil pump case as far as possible, using driver tool No. 09214-33000, or equivalent.
4. Install the relief plunger and spring, and tighten the oil relief valve plug to 40-50 Nm (400-500 kg. cm, 29-36 ft. lbs.).
5. Install the oil screen and a new gasket, then tighten to 15-22 Nm (150-220 kg. cm, 11-15 ft. lbs.).
6. Clean the gasket surfaces of the cylinder block and the oil pan.
7. Apply sealant into the groove of the oil pan flange as follows.
a. Make the first cut from the end of the nozzle furnished with the sealant approx. 4 mm. After applying the sealant, install the oil pan within 15
minutes.
b. Do not allow the sealant into the range A shown in the illustration on the oil pan flange.
8. Install the oil pan using the sequence shown, then tighten the bolts to 5-7 Nm (50-70 kg. cm, 3.7-5.0 ft. lbs.).
9. Install oil filter bracket with a new gasket, then tighten bolts to 12-15 Nm (120-150 kg. cm, 9-10 ft. lbs.).
10. Clean the oil filter mounting surface, apply a thin coat of engine oil to the oil filter O-ring, then tighten the oil filter to 17-25 Nm (170-250 kg. cm,
12-18 ft. lbs.).
11. Apply sealant Threebond 1104, or equivalent, to the threaded area of the oil pressure switch, then install using socket tool No. 09260-32000, or
equivalent.
12. Tighten to 8-12 Nm (80-120 kg. cm, 6- 9 ft. lbs.).