
Sonata GLS V6-2.5L (2000)
-
Rear pillar trim
-
Rear window lower cover molding
-
Roof assist handle
2. Disconnect the rear window defogger connector and window antenna connector.
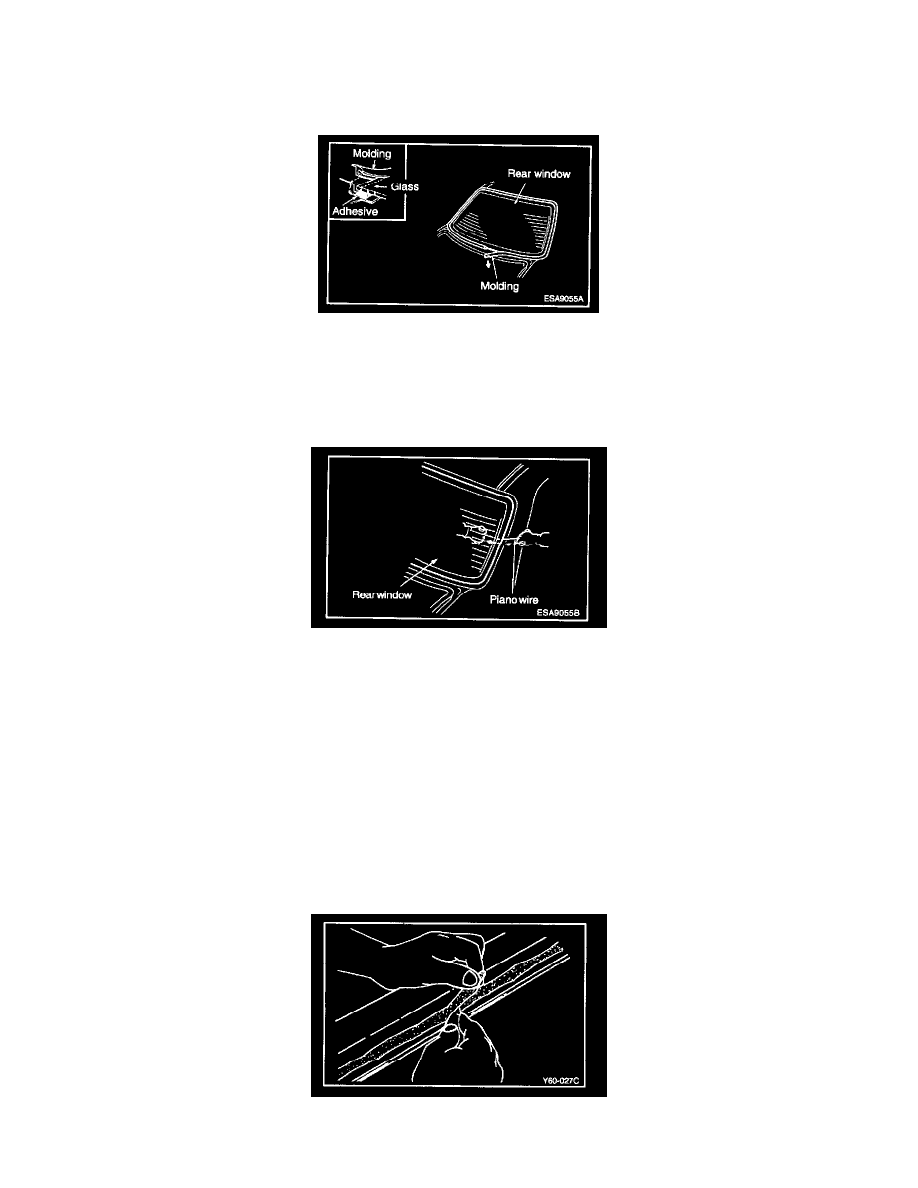
3. Remove the rear window glass molding.
NOTE: When molding removal is difficult, cut the molding with a knife.
4. Pull down the rear of the headlining.
5. In order to protect the body (paint surface), apply cloth tape around to body flange the installed rear window glass.
6. Using a sharp-point drill, make a hole in the rear window glass adhesive. Pass the piano wire from the inside of the vehicle through the hole. Pull
the piano wire alternately from the inside and outside along the rear window glass to cut the adhesive.
CAUTION: Do not let the piano wire touch the edge of the rear window.
Hold the piano wire as close to the rear window glass as possible to prevent damage to the body.
7. Make mating marks on the glass and body if the glass is to be reinstalled.
NOTE: Use chalk or equivalent to make mating marks on the glass and body.
8. Take out the windshield glass with the Special Tool, Glass holder.
9. Check the body flange for deformation.
INSTALLATION
1. Using a knife, scrape the old adhesive smooth to a thickness of about 2 mm (0.080 in) on the bonding surface around the entire rear window body
flange.