
Veracruz FWD V6-3.8L (2009)
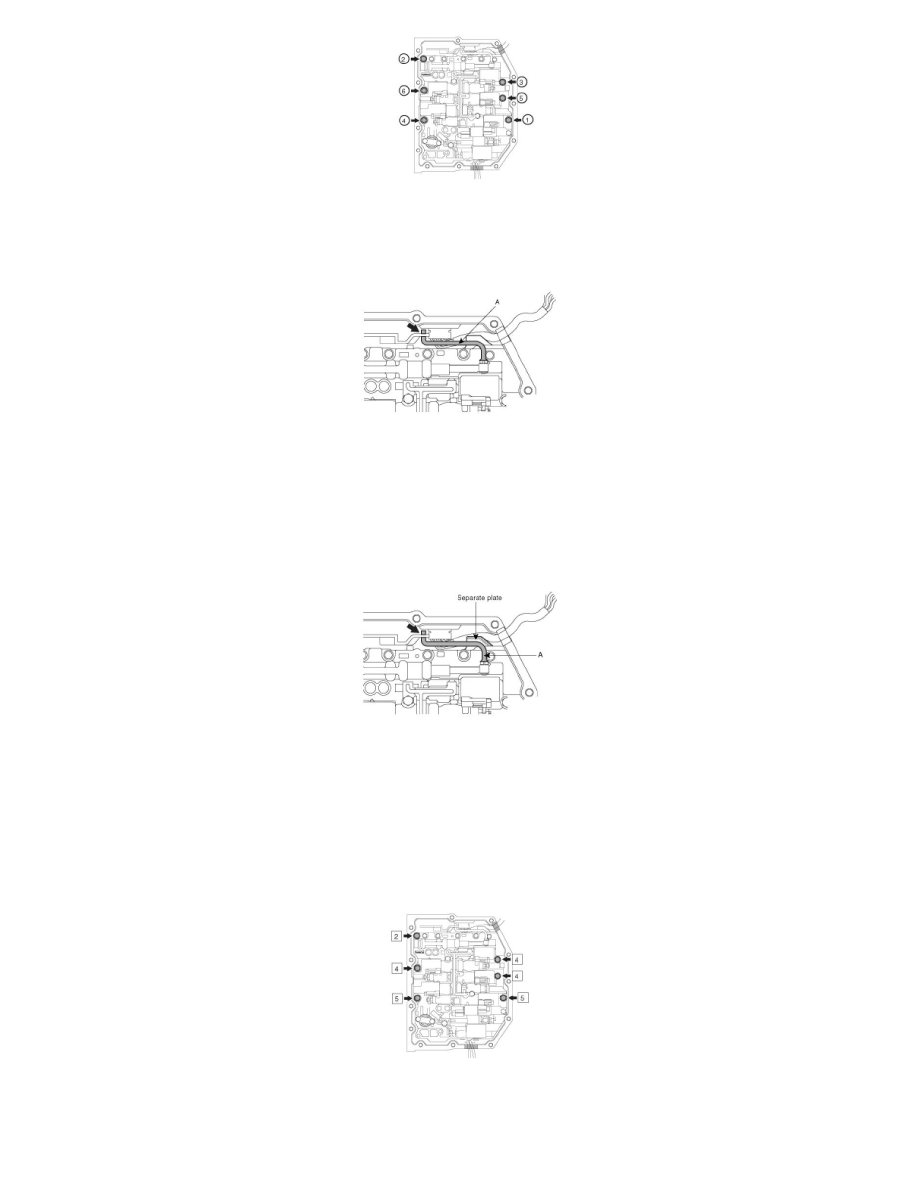
12. Disconnect the manual valve link (A) and remove the valve body assembly.
CAUTION:
Be careful not to drop the valve body assembly.
Installation
1. Connect the manual valve link (A) and install the valve body assembly.
CAUTION:
-
When installing the valve body assembly, be sure to put the wire in the open space of the separate plate in the valve body assembly.
-
Do not pinch the wire between the separate plate and the valve body assembly.
2. Temporarily install the valve body assembly with the 6 bolts.
Bolt size :
(5) :M6x1.0x31mm
(4) :M6x1.0x21mm
(2) :M6x1.0x17mm
NOTE:
Aligning the bolt holes, temporarily tighten the 6 bolts by hand.
3. Temporarily install the suction cover (A) and a new gasket with the 2 bolts.
Bolt size (6) :M6x1.0x41mm