
XJ-6 L6-4.2L (1983)
Brake Pedal Assy: Service and Repair
REMOVE
1.
Disconnect battery.
2.
Disconnect fluid delivery pipes from master cylinder. Tape or plug pipes to prevent loss of fluid and ingress of dirt.
3.
Peel cover from brake reservoir cap and disconnect leads from fluid level indicator switch.
4.
Slacken clip securing brake vacuum hose to servo adaptor and remove hose.
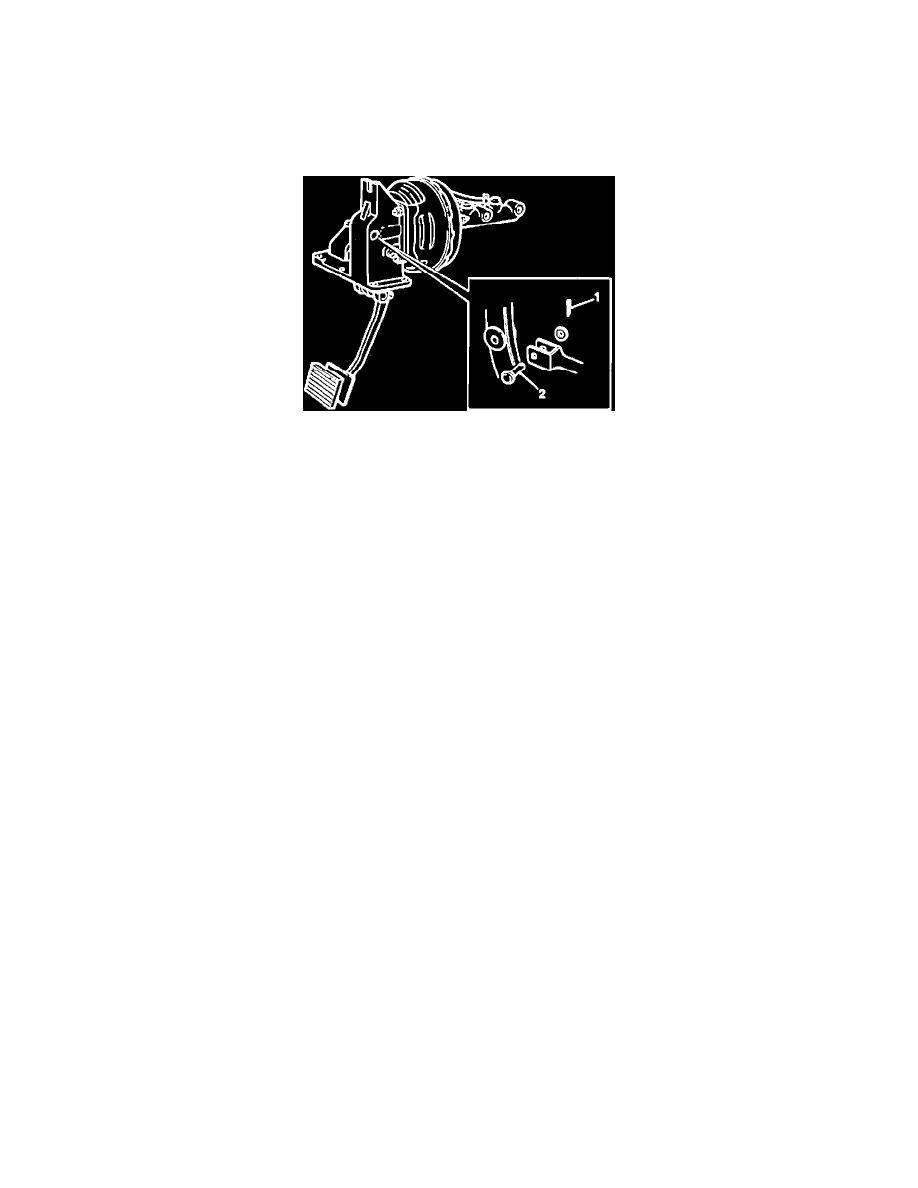
Fig. 2 Booster Removal
5.
Remove bolt, oval washer and spacer securing upper portion of pedal box to bulkhead.
6.
Position driver's seat to rear as far as possible. Remove seat cushion and lift out footwell carpets.
7.
Remove brake stop light switch.
8.
Remove six bolts, flat washers and spring washers securing pedal box base to bulkhead. Recover clips retaining footwell noise absorbing mats.
9.
Remove rubber pad from brake pedal.
10.
Carefully raise servo unit, pedal box and master cylinder. Draw complete assembly forward and lift from car.
11.
Pry two rubber sealing plugs from sides of pedal box.
12.
Remove split pin, washer and clevis pin securing brake pedal lever to servo operating rod.
13.
Remove nuts securing pedal box to servo unit. Detach pedal box from servo unit.
REFIT
1.
Reverse above operations. Fit new sealing rubber to vacuum pipe connector.
2.
Bleed brake system.