Cherokee 4WD L6-4.0L VIN S (1998)

Radiator: Service and Repair
WARNING: Do Not Remove The Cylinder Block Drain Plugs Or Loosen The Radiator Draincock With The System Hot And Pressurized.
Serious Burns From The Coolant Can Occur.
DO NOT WASTE reusable coolant. If solution is clean, drain coolant into a clean container for reuse.
WARNING: Constant Tension Hose Clamps Are Used On Most Cooling System Hoses. When Removing Or Installing, Use Only Tools
Designed For Servicing This Type Of Clamp, Such As Special Clamp Tool (number 6094). Snap-on Clamp Tool (number Hpc-20) May Be Used
For Larger Clamps. Always Wear Safety Glasses When Servicing Constant Tension Clamps.
CAUTION: A number or letter is stamped into the tongue of constant tension clamps. If replacement is necessary, use only an original equipment
clamp with matching number or letter.
REMOVAL
1. Disconnect battery negative cable.
2. Observe the previous WARNINGS.
3. Remove radiator pressure cap.
4. For access to radiator draincock, remove radiator grill mounting screws and remove grill.
5. Attach one end of a 24 inch long X 1/4 inch ID hose to the radiator petcock. Put the other end into a clean container. Open petcock and drain
radiator.
6. Disconnect electric cooling fan electrical connector, if equipped.
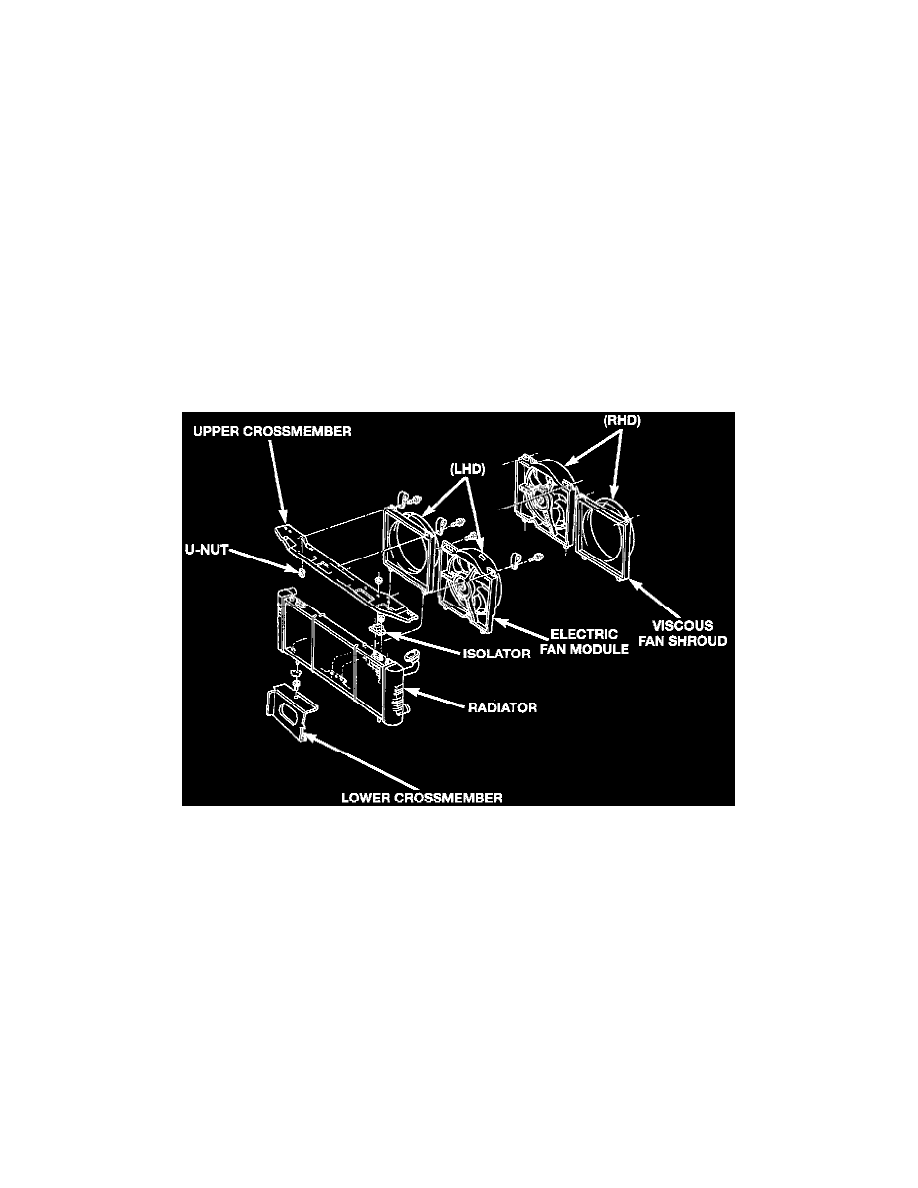
Fig.33 Radiator Removal/Installation-4.0L
7. If equipped, remove two electric cooling fan mounting bolts. Lift cooling fan straight up until alignment tabs at the bottom are clear of slots in
bracket at bottom of radiator.
8. Remove the two mechanical (non-electrical) fan shroud mounting bolts. Lift shroud straight up until alignment tabs at the bottom are clear of slots
in bracket at bottom of radiator. Place shroud over mechanical fan.
9. If equipped, disconnect and plug automatic transmission fluid cooler lines. Quick Connect Fitting Release Tool 6935 may be needed. If equipped
with remote transmission cooler, remove line to cooler from bracket at bottom of radiator.
10. Disconnect radiator upper and lower hoses clamps. Disconnect radiator upper and lower hoses.
11. Mark the position of the hood latch striker on the radiator crossmember and remove hood latch striker.
12. Remove two radiator upper crossmember to isolator nuts.
13. Remove four radiator upper crossmember bolts and remove upper crossmember.
