
Comanche 4WD L6-242 4.0L VIN L FI (1990)
Intake Manifold: Service and Repair
Installation
INSTALLATION
1. Loosely attach the EGR tube to the intake and exhaust manifolds. Do not tighten the fasteners at this time.
2. Install a new exhaust/intake manifold gasket over the alignment dowels on the cylinder head.
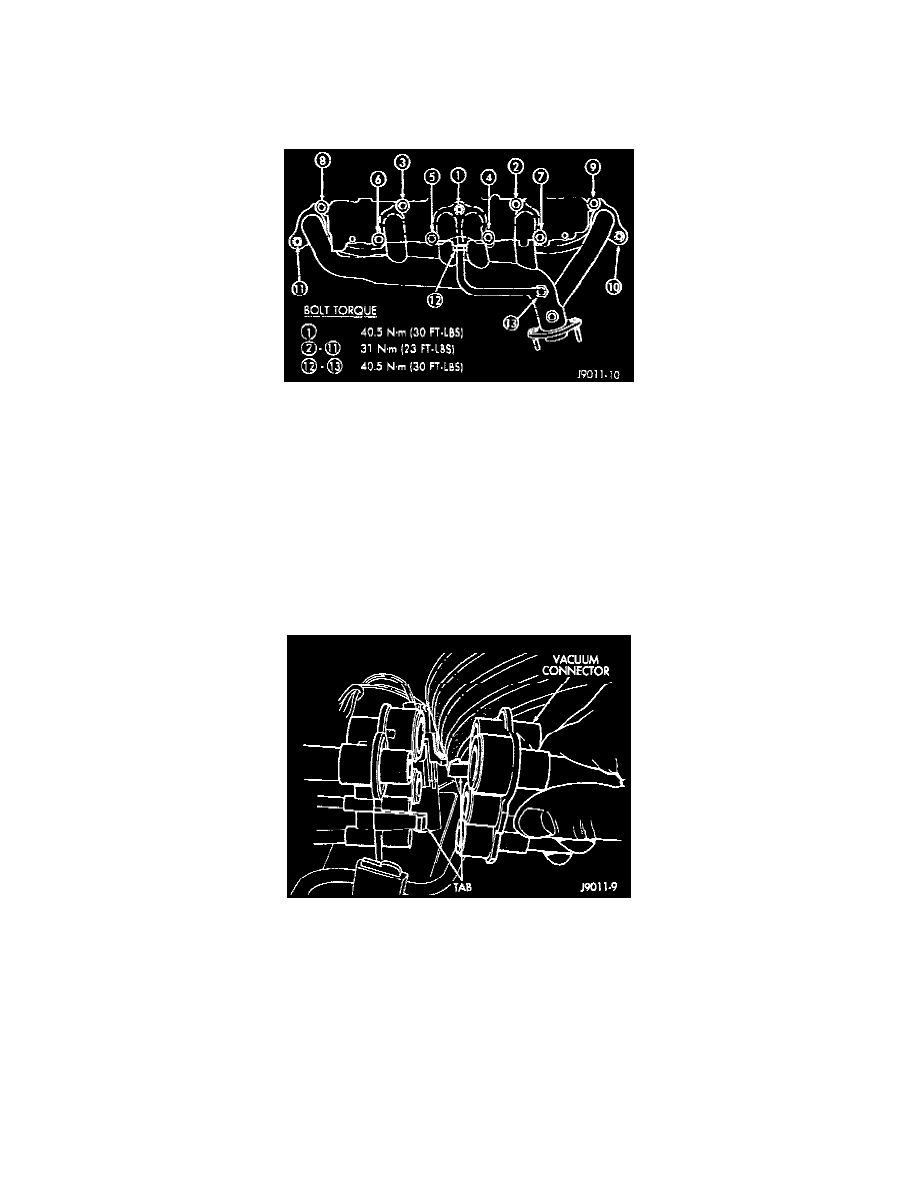
Fig. 19 Intake/Exhaust Manifold Installation
3. Install the intake manifold/exhaust manifold/EGR tube assembly Fig. 19.
4. Tighten bolt # 1 to 41 N.m (30 ft. lbs.) torque.
5. Tighten bolts # 2 through # 9 to 31 N.m (23 ft. lbs.) torque.
6. Tighten bolts # 10 and # 11 to 23 Nm (17 ft. lbs.) torque.
7. Tighten nuts # 12 and # 13 (EGR tube) to 41 N.m (30 ft. lbs.) torque.
8. Install the intake manifold heat shield.
9. Install the fuel rail and injectors.
10. Install the power steering pump and bracket to the intake manifold. Tighten the belt to specifications.
11. Install the fuel supply and return lines to the fuel rail assembly. Before connecting the fuel lines to the fuel rail replace the O-rings in the
quick-connect fuel line couplings. Refer to Fuel System for the proper procedure.
12. Connect all electrical connections in the intake manifold.
Fig. 16 Vacuum Connector Removal
13. Connect the vacuum connector on the intake manifold and install it in the bracket.
14. Install throttle cable. Cruise control cable (if equipped).
15. Install the transmission line pressure cable (if equipped).
16. Install air cleaner assembly.
17. Connect air inlet hose to the throttle plate assembly.
18. Raise the vehicle on a side mounted hoist.