
Commander 2WD V8-4.7L VIN P Flex Fuel (2007)
NOTE: On 4X4 vehicles install the C-4212-F between the axle shaft and the lower control in order to allow the tool clearance to press the
bushing in and out.
NOTE: Extreme pressure lubrication must be used on the threaded portions of the tool. This will increase the longevity of the tool and
insure proper operation during the removal and installation process.
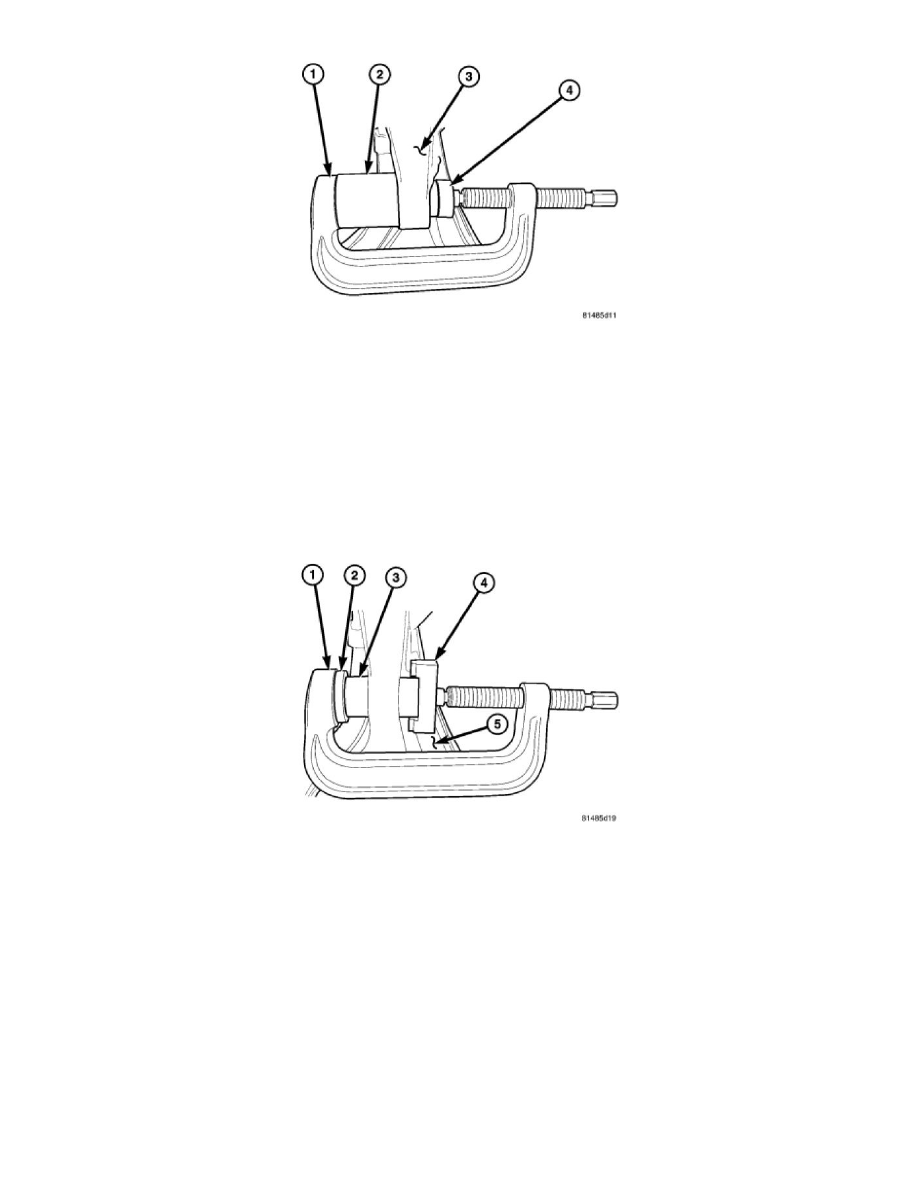
2. Press the bushing out using special tools C-4212-F (Press) (1), 9653-1 (driver) (4) and 9653-2 (Receiver) (2) from the lower control arm (3).
Installation
CLEVIS BRACKET BUSHING
NOTE: On 4X4 vehicles install the C-4212-F between the axle shaft and the lower control in order to allow the tool clearance to press the
bushing in and out.
NOTE: Extreme pressure lubrication must be used on the threaded portions of the tool. This will increase the longevity of the tool and insure
proper operation during the removal and installation process.
1. Install the new clevis bracket bushing (3) into the lower control arm (5) using tools C-4212-F (Press) (1), 9653-3 (driver) (2), 9653-4 (Depth
gauge) (4) the depth gauge will automatically set the depth of the bushing (3) in the control arm (5).