Commander 4WD V6-3.7L VIN K (2007)

Wiper Motor: Service and Repair
Wiper Motor
Front
FRONT
CAUTION: Do not apply pressure to, or pry on, the plastic drive link bushings. When removing a drive link from, or installing a drive link
onto the ball stud on the wiper motor crank arm, apply pressure to, or pry on, only the metal portions of the drive link around the bushing. If
the bushing is damaged, the entire front wiper module MUST be replaced.
CAUTION: Do not remove the crank arm nut from the wiper motor output shaft. The crank arm is indexed to the output shaft with the motor
in the park position during the manufacturing process, but there are no provisions made for correctly indexing this connection in the field. If
the crank arm to output shaft indexing is incorrect, the entire front wiper motor and crank arm unit MUST be replaced.
1. Disconnect and isolate the battery negative cable.
2. Remove the front wiper module from the cowl plenum and place it on a suitable work surface.
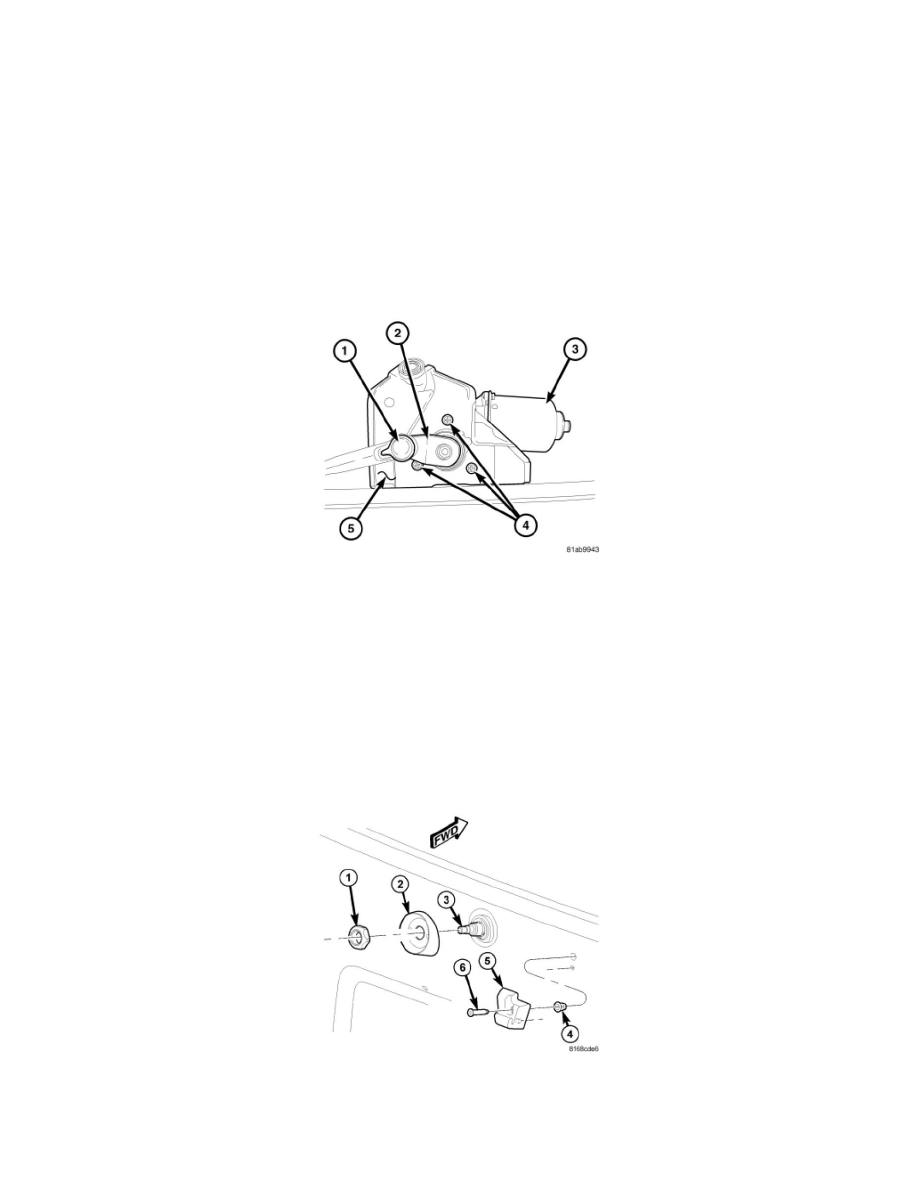
3. Disengage the socket bushing (1) of the wiper drive link from the ball stud on the wiper motor crank arm (2) using two large screwdrivers, one on
each side of the ball stud. Pry between the crank arm and the metal portion of the drive link until the socket unsnaps from the ball.
4. Remove the three screws (4) that secure the wiper motor (3) to the motor mounting bracket (5) of the wiper module.
5. Remove the wiper motor and crank arm as a unit from the motor mounting bracket of the wiper module.
Rear
REAR
1. Disconnect and isolate the battery negative cable.
2. Remove the rear wiper arm from the rear wiper motor output shaft.
