
Commander 4WD V8-4.7L VIN N (2006)
REPAIR PROCEDURE:
1.
Open liftgate.
2.
Disconnect and isolate negative battery cable.
3.
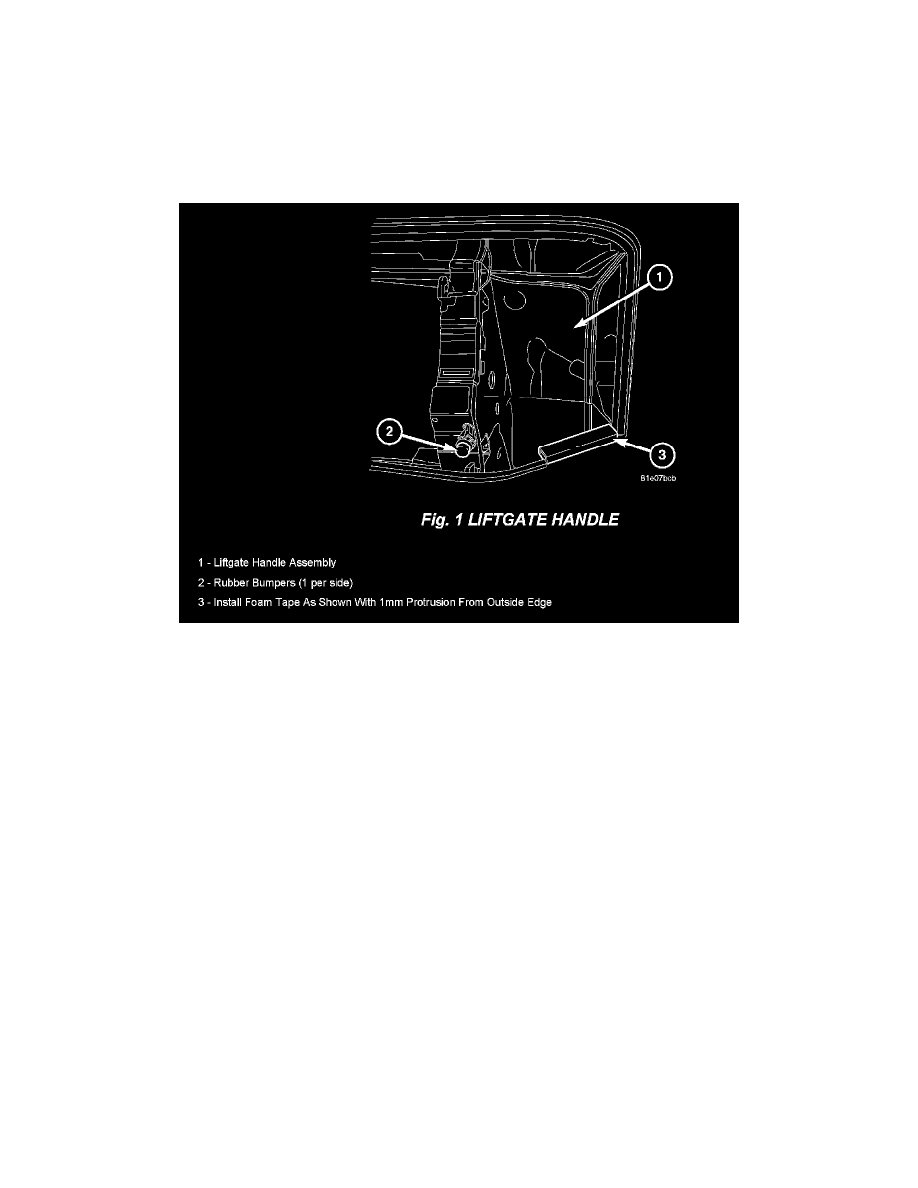
Remove the liftgate handle. Refer to the detailed removal procedures available in DealerCONNECT > TechCONNECT under: Service Info > 23 -
LIFTGATE > HANDLE > HANDLE REMOVAL. Place liftgate handle on protected surface.
4.
Cut 2 pieces of foam tape (p/n 05019056AA), 10 mm (.39 in.) wide x 35 mm (1.37in.) long and install at both lower corners with 1 mm (.040in.)
protrusion from edge as shown in (Fig 1).
NOTE:
Clean surface before applying tape.
5.
Set handle aside for installation after paint repair.
6.
Inspect paint surface at liftgate handle. Perform the necessary repair based on extent of damage:
a.
For touch-up procedure, proceed to REPAIR PROCEDURE "A" FINESSE below.
b.
For repaint procedure, proceed to REPAIR PROCEDURE "B" REFINISH below.
REPAIR PROCEDURE "A" FINESSE:
1.
Clean with Mopar Car Wash Concentrate, and water.
2.
Wipe with an alcohol based cleaner
3.
Evaluate the paint condition.
4.
Measure and record paint film thickness in areas to be sanded using an electronic mil gauge (PSE).
5.
Use 2000 grit sand paper mounted to a ridged backer to remove all etching.
6.
If you remove more than 0.5 mil of clear coat you will need to refinish using repair procedure "B" refinish.
7.
If refinishing is not required polish sanded areas using Mopar Compound Power Cleaner # BSMM8432.