
Commander 4WD V8-4.7L VIN N (2006)
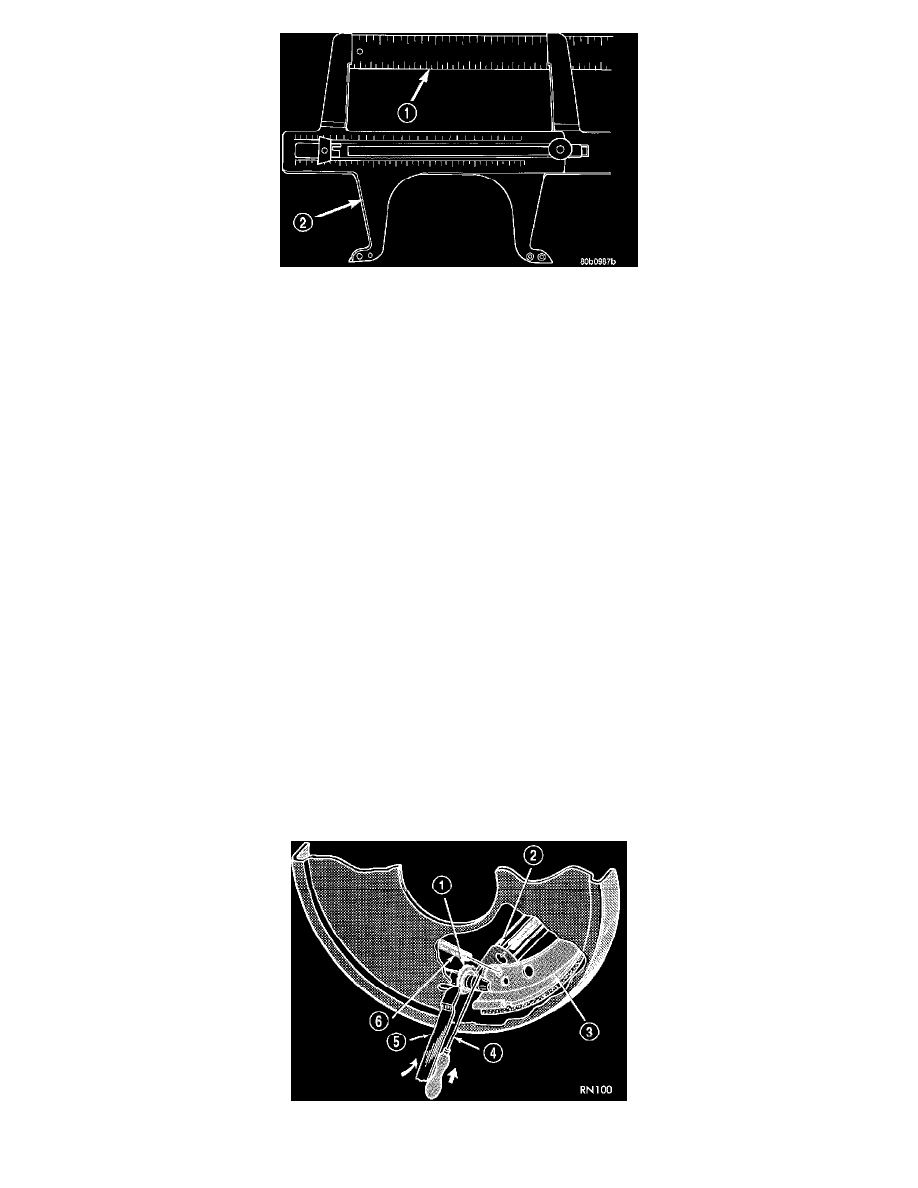
7. Reduce the inside diameter measurement of the brake drum that was taken using Special Tool C-3919 (2) by 1/64 of an inch. Reset Gauge, Brake
Shoe, Special Tool C-3919 (2) or the equivalent used, so that the outside measurement jaws are set to the reduced measurement.
8. Place Gauge, Brake Shoe, Special Tool C-3919 (2) , or equivalent over the park brake shoes. The special tool must be located diagonally across at
the top of one shoe and bottom of opposite shoe (widest point) of the park brake shoes.
9. Using the star wheel adjuster, adjust the park brake shoes until the lining on the park brake shoes just touches the jaws on the special tool.
10. Repeat step 8 above and measure shoes in both directions.
11. Install brake rotor on the axle shaft.
12. Rotate rotor to verify that the park brake shoes are not dragging on the brake drum. If park brake shoes are dragging, remove rotor and back off
star wheel adjuster one notch and recheck for brake shoe drag against drum. Continue with the previous step until brake shoes are not dragging on
brake drum.
13. Install disc brake caliper on caliper adapter.
14. Install wheel and tire.
15. Tighten the wheel mounting nuts in the proper sequence until all nuts are torqued to half the specified torque. Then repeat the tightening sequence
to the full specified torque of 129 Nm (95 ft. lbs.).
16. Lower vehicle.
CAUTION: Before moving vehicle, pump brake pedal several times to ensure the vehicle has a firm enough pedal to stop the vehicle.
NOTE: After parking brake lining replacement, it is recommended that the parking brake system be conditioned prior to use. This is done by
making one stop from 25 mph on dry pavement or concrete using light to moderate force on the parking brake hand lever.
17. Road test the vehicle to ensure proper function of the vehicle's brake system.
ADJUSTMENT - WITH ADJUSTING TOOL
Adjustment can be made with a standard brake gauge or with adjusting tool. Adjustment is performed with the complete brake assembly installed on
the backing plate.
1. Be sure parking brake lever is fully released.
2. Raise vehicle so rear wheels can be rotated freely.
3. Remove plug from each access hole in brake support plates.
4. Loosen parking brake cable adjustment nut until there is slack in front cable.
5. Insert adjusting tool through support plate access hole and engage tool in teeth of adjusting screw star wheel.
6. Rotate adjuster screw star wheel (move tool handle upward) until slight drag can be felt when wheel is rotated.