
Commander 4WD V8-4.7L VIN N (2006)
Valve Cover: Service and Repair
Right
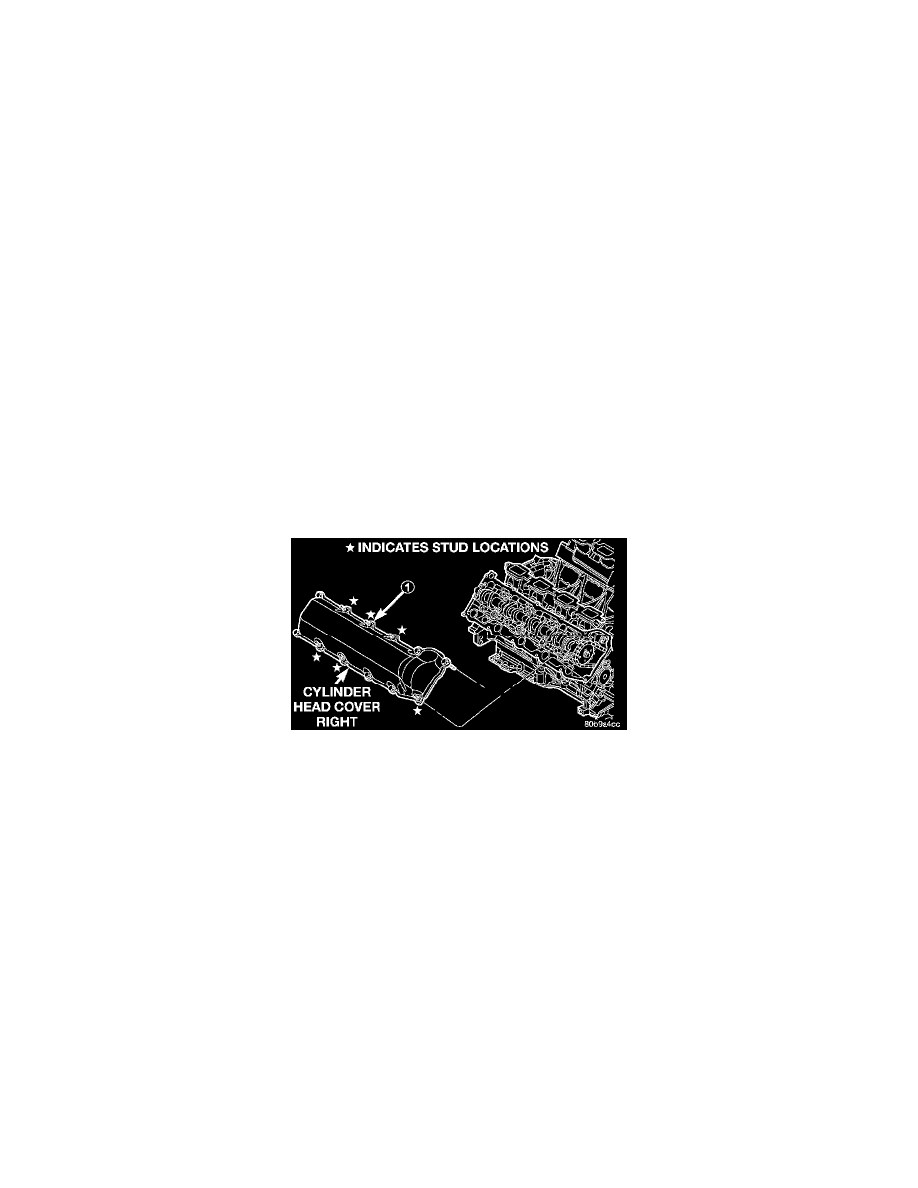
COVER - CYLINDER HEAD - RIGHT
REMOVAL
1. Disconnect battery negative cable.
2. Disconnect battery positive cable.
3. Remove the battery tray.
4. Drain cooling system.
5. Remove accessory drive belt.
6. Remove air conditioning compressor retaining bolts and move compressor to the left.
7. Remove heater hoses.
8. Disconnect injector and ignition coil connectors.
9. Disconnect and remove positive crankcase ventilation (PCV) hose.
10. Remove oil fill tube.
11. Un-clip injector and ignition coil harness and move away from cylinder head cover.
12. Remove right rear breather tube and filter assembly.
13. Remove cylinder head cover retaining bolts.
14. Remove cylinder head cover.
NOTE: The gasket may be used again, provided no cuts, tears, or deformation has occurred.
CLEANING
Clean cylinder head cover gasket surface.
Clean head rail, if necessary.
INSTALLATION
CAUTION: Do not use harsh cleaners to clean the cylinder head covers. Severe damage to covers may occur.
1. Clean cylinder head cover and both sealing surfaces. Inspect and replace gasket as necessary
2. Install cylinder head cover and hand start all fasteners (1). Verify that all double ended studs are in the correct location shown in.
3. Tighten cylinder head cover bolts and double ended studs to 12 Nm (105 inch lbs.).
4. Install right rear breather tube and filter assembly.
5. Connect injector, ignition coil electrical connectors and harness retaining clips.
6. Install the oil fill tube.
7. Install PCV hose.
8. Install heater hoses.
9. Install air conditioning compressor retaining bolts.
10. Install accessory drive belt.
11. Fill Cooling system.
12. Install air cleaner assembly, resonator assembly and air inlet hose.
13. Connect battery negative cable.