
Commander 4WD V8-4.7L VIN N (2006)
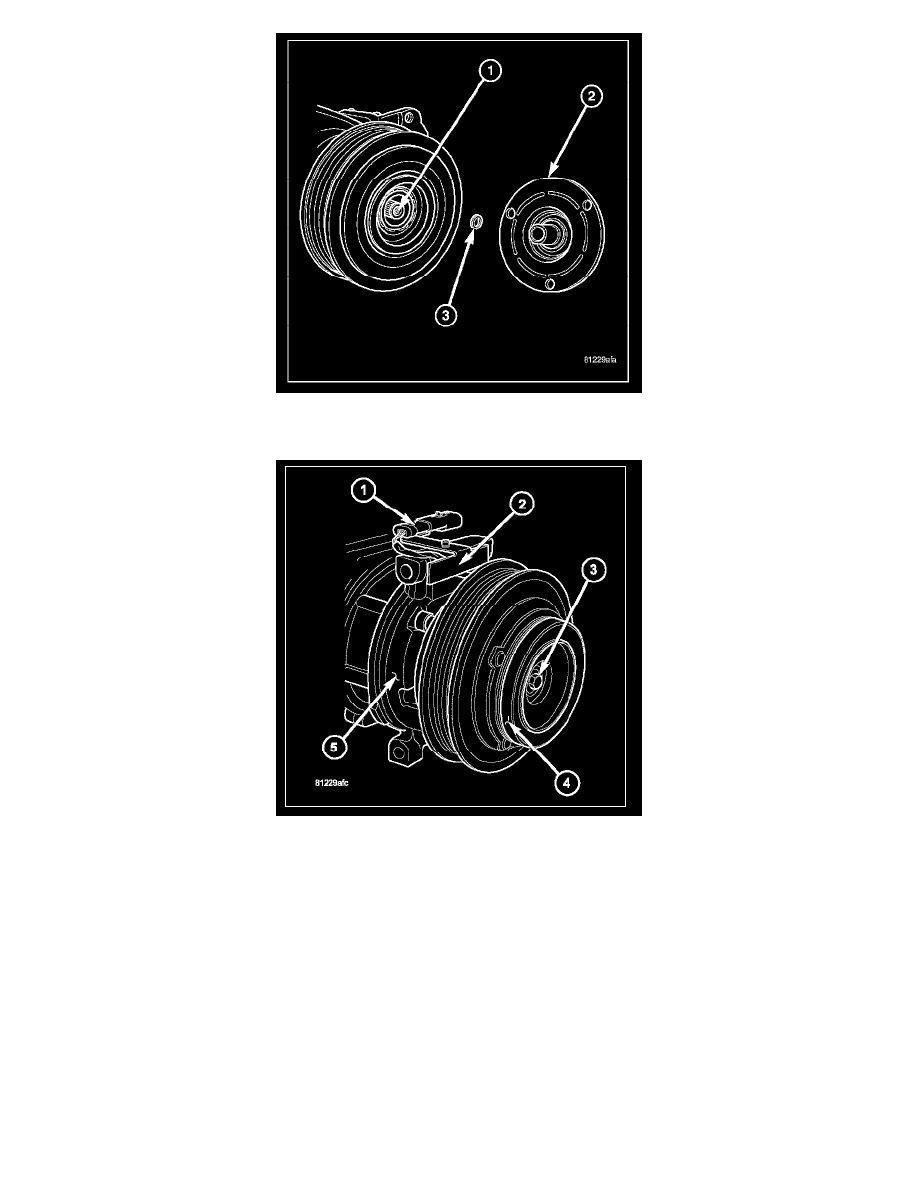
5. If the original clutch plate (2) and pulley and bearing assembly are to be reused, reinstall the original shim(s) (3) onto the compressor shaft (1). If a
new clutch plate and pulley and bearing assembly are being used, install a trial stack of shims 2.54 mm (0.010 in.) thick onto the compressor shaft.
6. Install the clutch plate (4) onto the front of the A/C compressor (5).
7. Install the compressor shaft bolt (3). Tighten the bolt to 19 N.m (168 in. lbs.).
NOTE:
-
The shims may compress after tightening the shaft bolt. Check the air gap in four or more places to verify the air gap is correct. Spin the pulley
before performing a final check of the air gap.
-
On models with the clutch plate recessed into the pulley, use a 90° wire gap gauge to measure the clutch air gap. On other models, use a blade
type feeler gauge to measure the air gap.
8. With the clutch plate assembled tight against the shim(s), measure the air gap between the clutch plate and the pulley and bearing assembly. The
air gap should be between 0.35 - 0.60 mm (0.014 -0.024 in.). If the air gap is not between specifications, add or subtract shims as needed until the
correct air gap is obtained.
CAUTION: Be certain that the compressor clutch field coil wire harness is properly routed so that it is not pinched between the A/C compressor
and the field coil connector bracket.
9. Carefully route the compressor clutch field coil wire lead behind the connector bracket (2).
10. Install the compressor clutch field coil connector (1) onto the connector bracket.