
Commander 4WD V8-4.7L VIN N (2006)
Marker Lamp Bulb: Service and Repair
Bulb - Side Marker
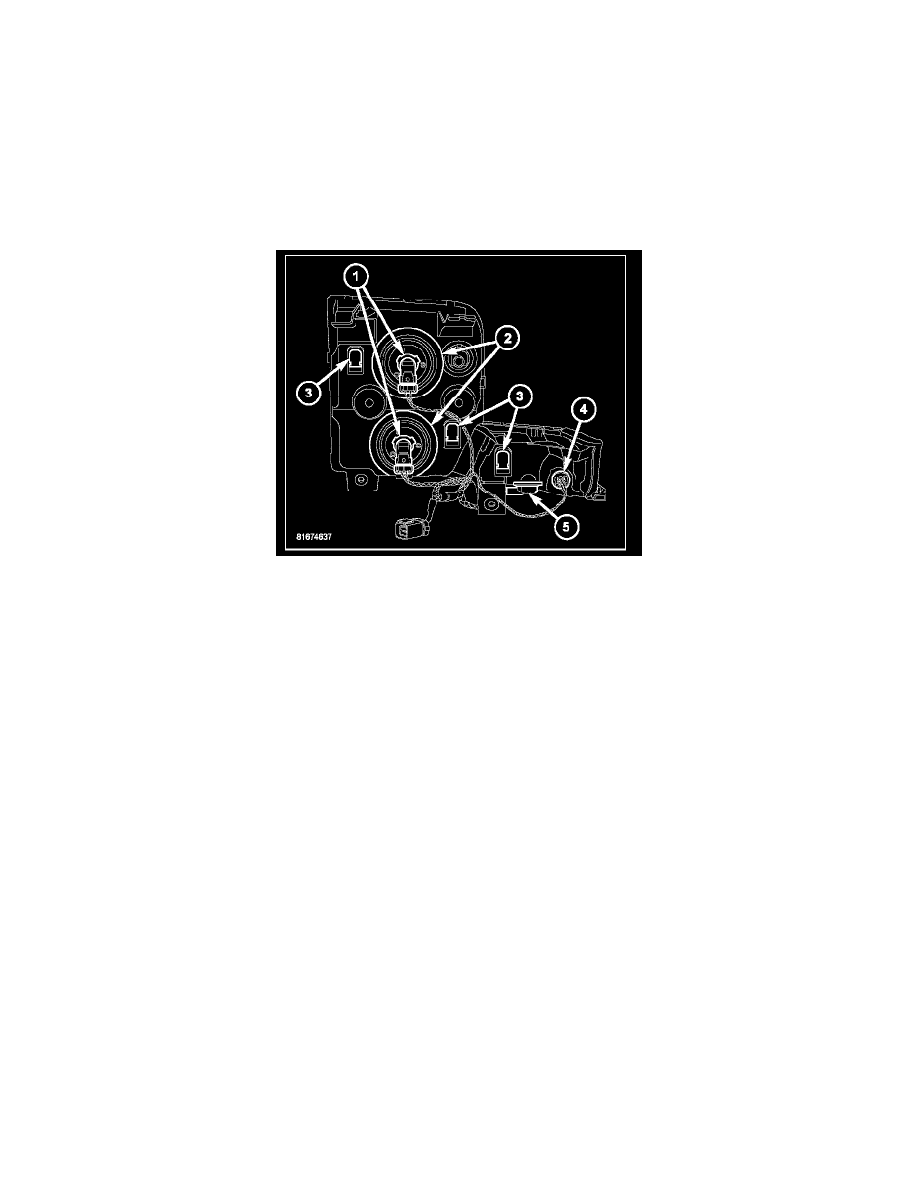
FRONT LAMP UNIT
BULB - SIDE MARKER
REMOVAL
NOTE: The following procedure applies only to vehicles manufactured for the North American market. Vehicles manufactured for export markets do
not have a bulb, socket or wiring provided to illuminate the front side marker compartment of the front lamp unit. The front side marker lens is present,
but serves only as a reflector on export market vehicles.
1. Disconnect and isolate the battery negative cable.
2. Raise and support the vehicle.
3. Reach into the front wheel house ahead of the front wheel to unsnap and lift the cover over the access hole in the front of the wheel house splash
shield.
4. Reach through the access hole in the splash shield to access the front side marker bulb socket (4) on the back of the front lamp unit housing.
5. Firmly grasp the front side marker bulb socket on the back of the housing and rotate it counterclockwise about 30 degrees to unlock it.
6. Pull the socket and bulb straight out from the keyed opening in the housing.
7. Pull the base of the bulb straight out of the socket.
INSTALLATION
CAUTION: Always use the correct bulb size and type for replacement. An incorrect bulb size or type may overheat and cause damage to the lamp, the
socket and/or the lamp wiring.
NOTE: The following procedure applies only to vehicles manufactured for the North American market. Vehicles manufactured for export markets do
not have a bulb, socket or wiring provided to illuminate the front side marker compartment of the front lamp unit. The front side marker lens is present,
but serves only as a reflector on export market vehicles.