
Grand Cherokee 2WD L6-242 4.0L VIN S MFI (1993)
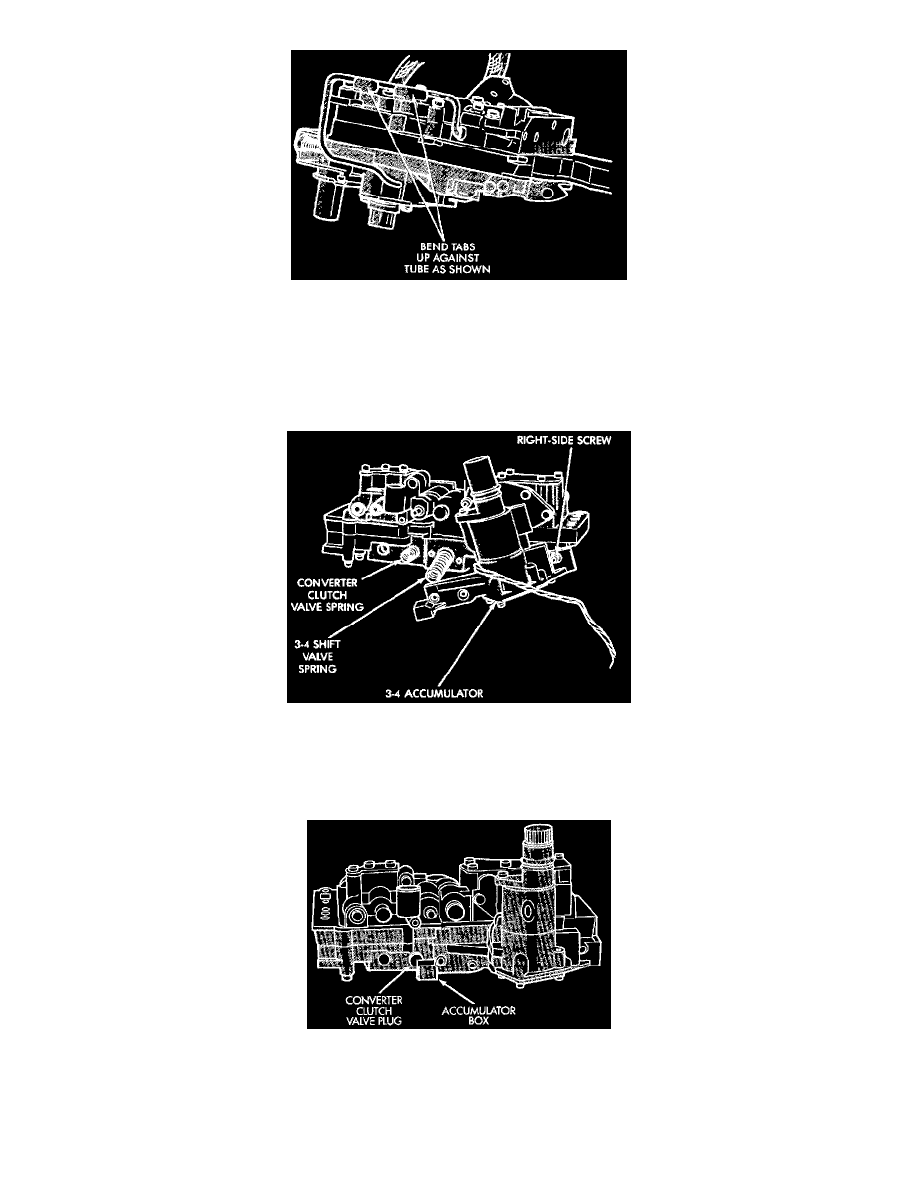
Fig. 134 Securing Boost Valve Tube With Brace Tabs
(7) Bend tube brace tabs up and against tube to hold it in position (Fig. 134).
(8) Tighten all valve body housing screws to 4 N.m (35 in. lbs.) torque after tube and brace are installed. Tighten screws in diagonal pattern starting at
center and working outward.
3-4 Accumulator Installation
(1) Position converter clutch valve and 3-4 shift valve springs in housing (Fig. 135).
Fig. 135 Installing Clutch And 3-4 Shift Valve Springs
(2) Loosely attach accumulator housing with right-side screw (Fig. 135). Install only one screw at this time as accumulator must be free to pivot
upward for ease of installation.
(3) Position plug on end of converter clutch valve spring. Then compress and hold springs and plug in place with fingers of one hand.
(4) Swing accumulator housing upward over valve springs and plug.
Fig. 136 Seating 3-4 Accumulator On Lower Housing
(5) Hold accumulator housing firmly in place and install remaining two attaching screws. Be sure springs and clutch valve plug are properly seated
(Fig. 136).
(6) Attach solenoid case connector to 3-4 accumulator with shoulder-type screw. Connector has small locating tang that fits in dimple at top of
accumulator housing (Fig. 95). Seat tang in dimple before tightening connector screw.