
Grand Cherokee 2WD L6-4.0L VIN S (1997)
Lock Cylinder Switch: Service and Repair
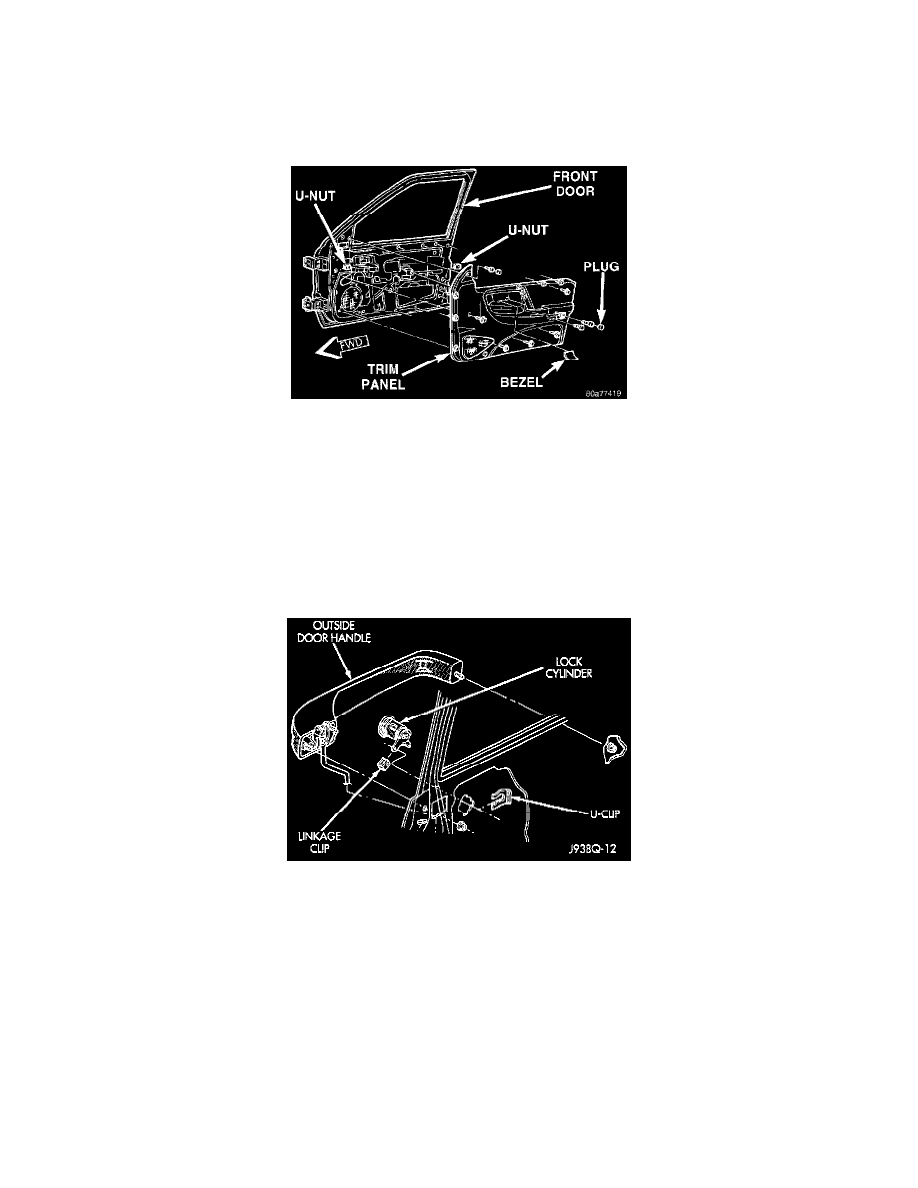
Door Lock Cylinder Switch
REMOVAL
1. Disconnect and isolate the battery negative cable.
2. Remove the bezel near the inside door latch release handle by inserting a straight-bladed screwdriver in the notched end and prying gently
upwards.
Front Door Trim Panel Remove/Install
3. Remove the door trim panel mounting screw located in the bezel opening near the inside door latch release handle.
4. Remove the trim cap and screw near the rear of the door armrest.
5. Remove the trim cap and screw at the upper front corner of the trim panel.
6. Using a wide flat-bladed tool such as a trim stick, pry the trim panel away from the door around the perimeter and remove the trim panel.
NOTE: To aid in the removal of the trim panel, start at the bottom of the panel.
7. Unplug the wire harness connectors from the door module and set the trim panel aside.
8. Pull the watershield away from the rear access holes in the inner door panel.
9. Remove the U-clip retainer that secures the lock cylinder to the outer door panel.
10. Disconnect the lock cylinder rod from the door latch by unsnapping the retainer from the rod.