
Grand Cherokee 2WD V8-4.7L VIN N (2000)
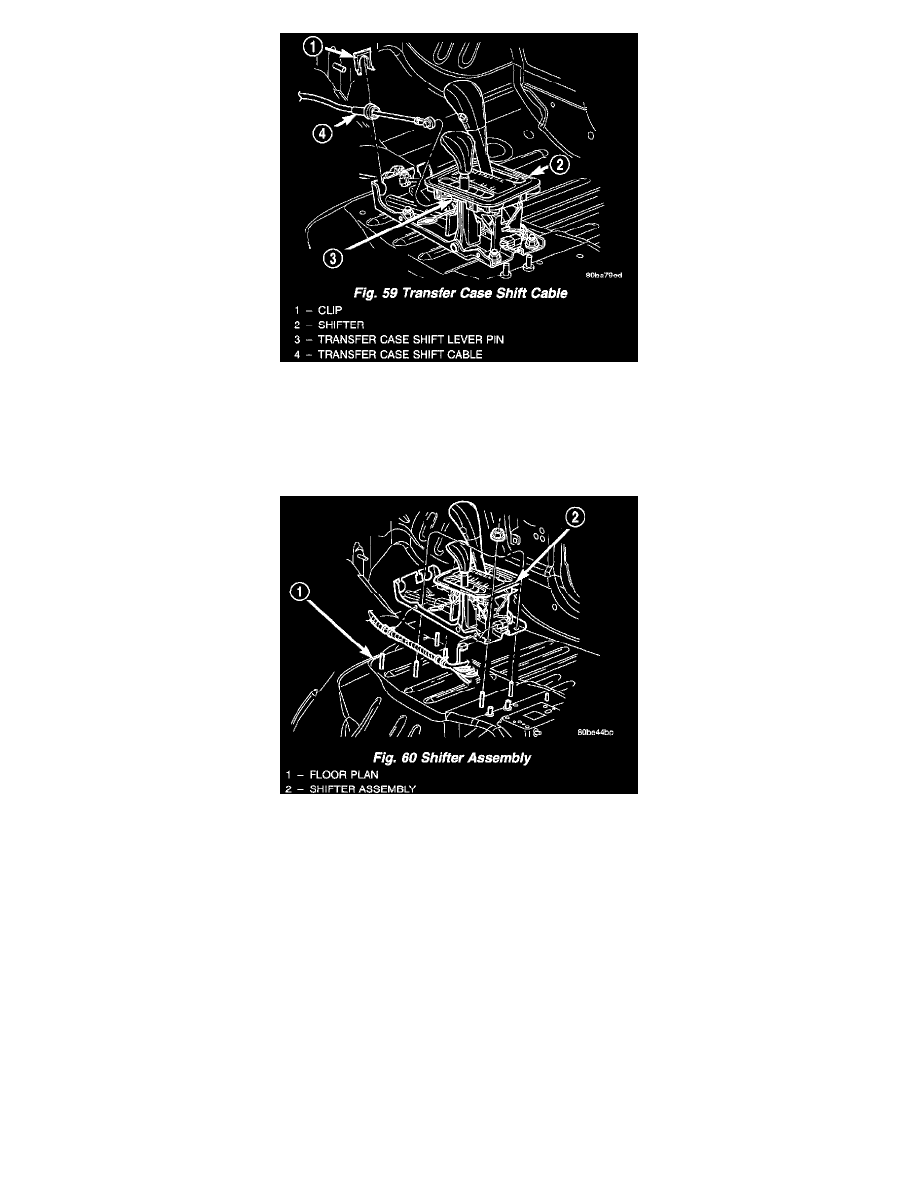
Fig. 59
5. Disconnect the transfer case shift cable from the transfer case shift lever pin (Fig. 59).
6. Remove the clip holding the transfer case shift cable to the shifter assembly bracket.
7. Remove the transfer case shift cable from the shifter assembly bracket.
8. Disengage all wiring connectors from the shifter assembly.
Fig. 60
9. Remove all nuts holding the shifter assembly to the floor pan (Fig. 60).
10. Remove the shifter assembly from the vehicle.
INSTALLATION
1. Install shifter assembly onto the shifter assembly studs on the floor pan.
2. Install the nuts to hold the shifter assembly onto the floor pan. Tighten nuts to 28 Nm (250 inch lbs.).
3. Install wiring harness to the shifter assembly bracket. Engage any wire connectors removed from the shifter assembly
4. Install the transfer case shift cable to the shifter assembly bracket. Install clip to hold cable to the bracket.
5. Snap the transfer case shift cable onto the transfer case shift lever pin.
6. Install the brake transmission interlock cable into the shifter assembly bracket and into the shifter BTSI lever.
7. Install the shift cable to the shifter assembly bracket. Push cable into the bracket until secure.
8. Place the floor shifter lever in park position.
9. Loosen the adjustment screw on the shift cable.
10. Snap the shift cable onto the shift lever pin.
11. Verify that the shift lever is in the PARK position.
12. Tighten the adjustment screw to 7 Nm (65 inch lbs.).
13. Verify correct shifter operation.
14. Install shift lever bezel and any console parts removed for access to shift lever assembly and shift cables.