
Grand Cherokee 2WD V8-5.2L VIN Y (1998)
Engine Mount: Service and Repair
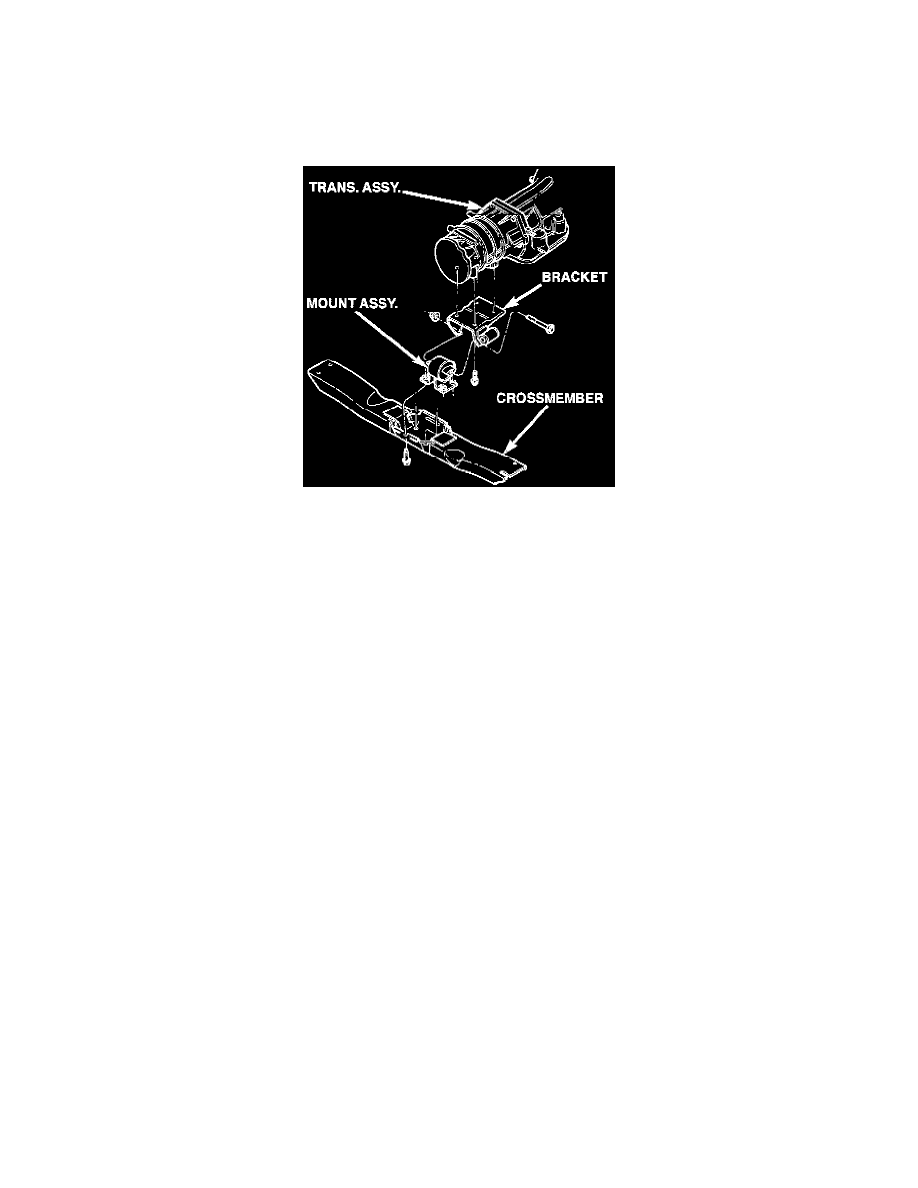
Rear Mount
REMOVAL
1. Disconnect the negative cable from the battery.
2. Raise the vehicle on a hoist.
3. Support the transmission with a jack.
4. Remove stud nuts attaching engine mount to crossmember. Remove mount.
5. Raise the transmission and engine SLIGHTLY.
6. Remove engine mount bracket thru-bolt.
7. Remove the engine mount assembly from the adaptor.
8. If required, remove the transmission support bracket adaptor.
INSTALLATION
1. Position the rear mount bracket onto the exhaust hanger (if previously removed). Position the rear mount bracket assembly onto the transmission
and install the bolts. Tighten the bolts to 46 Nm (34 ft. lbs.).
2. Position mount into mount bracket and install thru-bolt and nut. DO NOT tighten the bolt at this time.
3. Lower the transmission until the mount fastening studs are in position in the crossmember.
4. Remove transmission jack.
5. Install the mount fastening nuts and tighten the nuts to 54 Nm (40 ft. lbs.) torque.
6. Tighten the thru-bolt nut to 65 Nm (48 ft. lbs.) torque.
7. Lower the vehicle.