
Liberty 2WD V6-3.7L (2008)
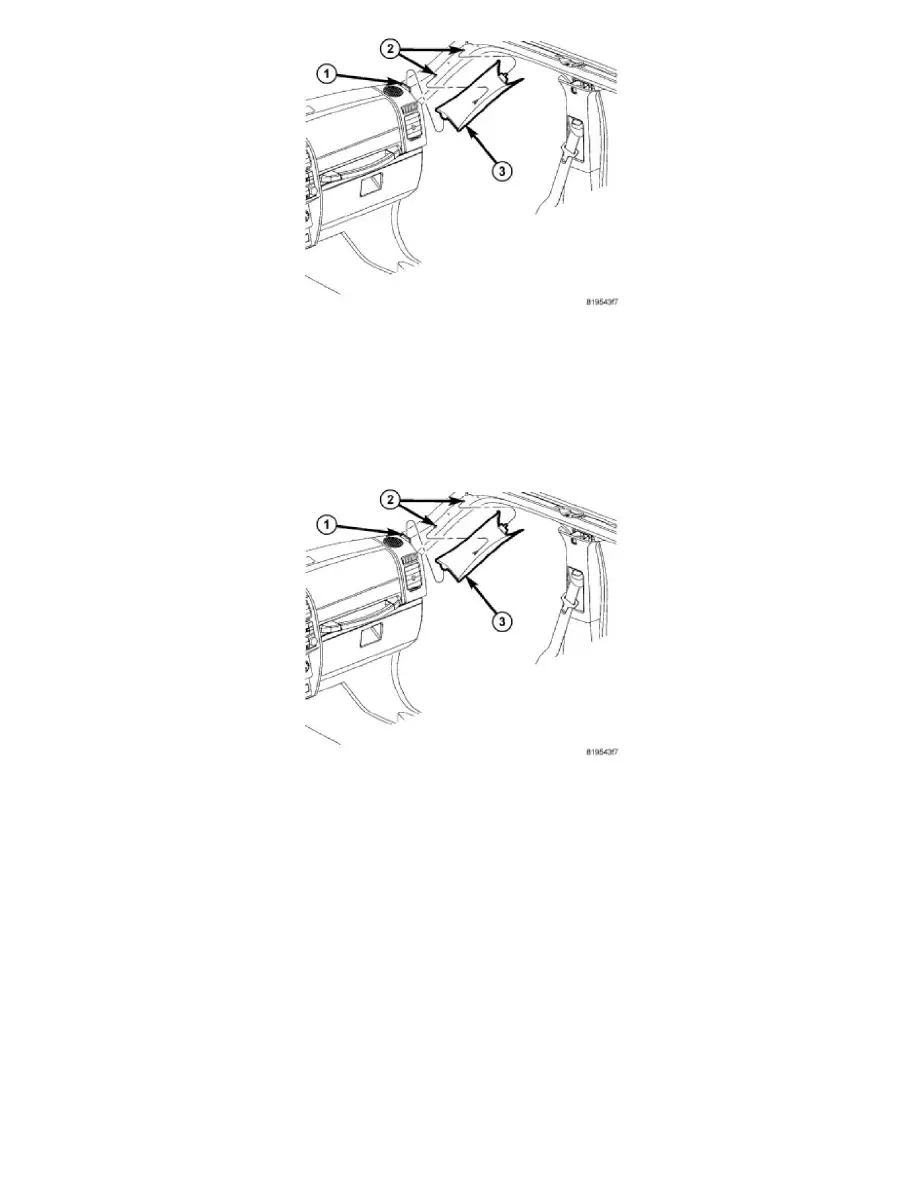
1. Using a small pry tool or equivalent, lift the A-pillar trim molding (3) from the A-pillar slots (2) releasing the clips on the molding.
NOTE: The top tethered clip has a locking tab that needs to be lifted in order for clip to slide out of the trim attachment point.
2. Remove the top clip from the trim molding.
A-Pillar Trim Panel-Installation
INSTALLATION
1. Align the A-pillar trim tab on the molding (3) to the top cover slot of the instrument panel (1).
2. Install the top clip on the trim molding.
3. Align the two clips on the molding to the slots (2) on the A-pillar. Snap the A-pillar trim molding (3) into place using hand pressure.
Lower Cover
REMOVAL