
Liberty 4WD V6-3.7L (2009)
1. Position the passenger airbag, airbag door and instrument panel bracket to the opening in the face of the instrument panel base trim as a unit.
2. Reconnect the two connector insulators of the instrument panel wire harness take outs to the airbag inflator connector receptacles on each side of
the airbag housing by pressing straight in on the connectors. Be certain to engage each keyed and color-coded connector to the matching connector
receptacle. You can be certain that each connector is fully engaged in its receptacle by listening carefully for a distinct, audible click as the
connector latches snap into place.
3. Slide the passenger airbag forward being certain that the instrument panel bracket is engaged between the dash panel and the instrument panel
structural support at the lower windshield fence line and that the two lower studs of the airbag are engaged in the holes of the instrument panel
base trim. It may be necessary to angle the forward end of the unit slightly downward and then roll it upward to engage the instrument panel
bracket properly between the fence line and the structural support.
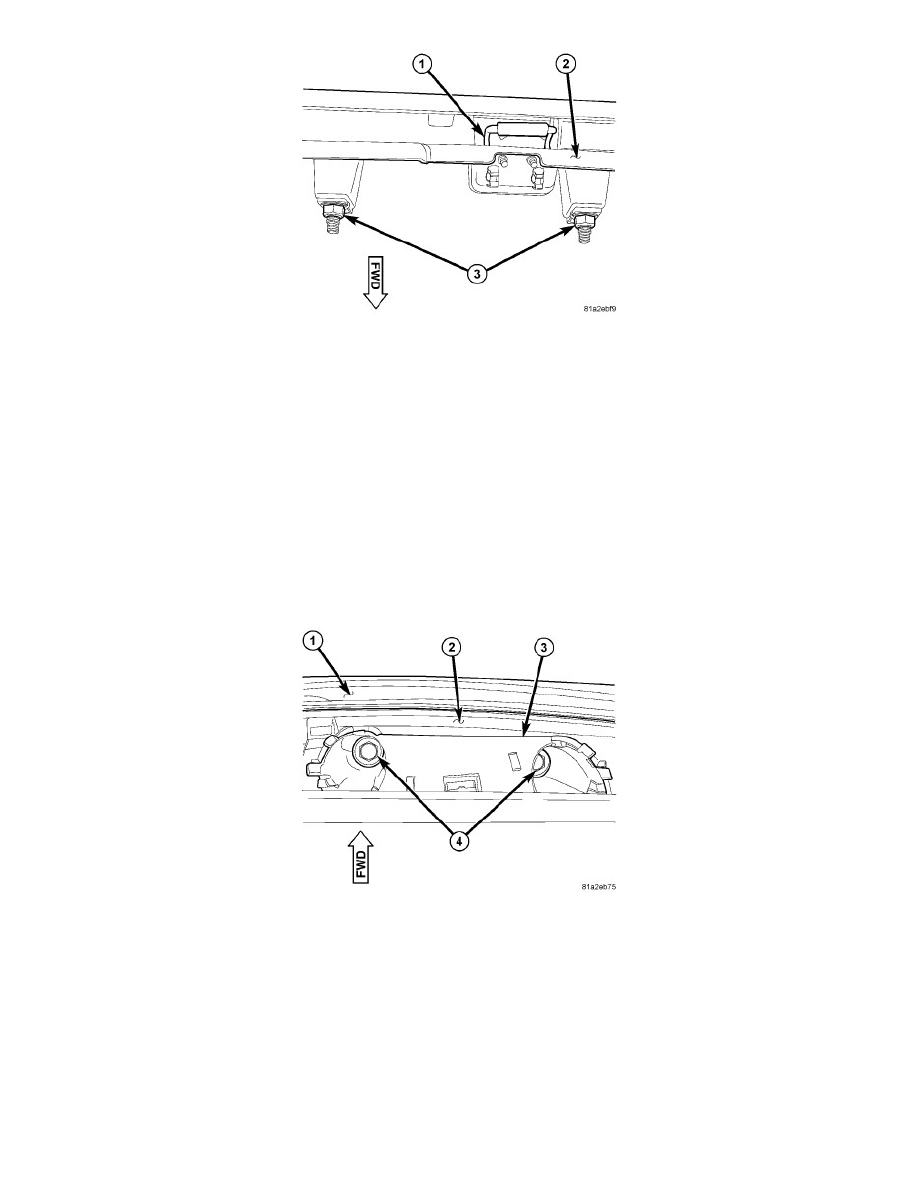
4. Reach up into the instrument panel above the upper glove box opening (2) to install and tighten the two nuts (3) that secure the passenger airbag
lower studs to the instrument panel base trim on each side of the glove box latch striker (1). Tighten the nuts to 7 Nm (62 in. lbs.).
5. Reinstall the grab handle onto the instrument panel. See: Body and Frame/Interior Moulding / Trim/Glove Compartment/Service and
Repair/Instrument Panel Glove Box - Installation.
6. Reinstall the glove box into the instrument panel. See: Body and Frame/Interior Moulding / Trim/Glove Compartment/Service and
Repair/Instrument Panel Glove Box - Installation.
7. Work through the rectangular hole in the top of the instrument panel to install and tighten the one screw that secures the center tab of the passenger
airbag instrument panel bracket to the instrument panel structural duct. Tighten the screw to 2.9 Nm (25 in. lbs.).
8. Position the screw guide (3) onto the top of the instrument panel (2) near the windshield (1) and, using hand pressure, press the screw guide
downward until both integral latch features snap into place.
9. Install and tighten the two screws (4) through the screw guide that secure the instrument panel bracket for the passenger airbag to the dash panel.
Tighten the screws to 29.5 Nm (21.5 ft. lbs.).
10. Using hand pressure, press the top of the passenger airbag door forward and downward until each snap feature on the upper edge of the airbag
door is fully engaged into its receptacle in the instrument panel base trim.
11. Using hand pressure, wrap the passenger airbag door downward tightly against the instrument panel, then push forward until each snap feature on
the lower edge of the airbag door is fully engaged into its receptacle in the instrument panel base trim.
12. Visually verify that each of the snap features of the airbag door is fully engaged in the instrument panel. There will be a distinct bulge in the door
over any snap that is not fully engaged.
13. Reinstall the top cover onto the instrument panel. See: Heating and Air Conditioning/Air Register/Service and Repair/Defroster Grille -