
Liberty Sport 4WD L4-2.4L VIN 1 (2002)
Oil Pan: Service and Repair
OIL PAN
REMOVAL
1. Remove air cleaner assembly.
2. Raise vehicle on hoist and drain engine oil.
3. Loosen the engine mount thru bolts.
4. Disconnect exhaust pipe at manifold.
5. Remove structural collar, if equipped.
6. Remove front axle mounting bolts, and lower axle as far possible, if equipped.
7. Position Special Tool 8534 on fender lip and align the slots in the brackets with the fender mounting holes.
8. Secure brackets to the fender using four M6 X 1.0 X 25 mm flanged cap screws.
9. Tighten the thumbscrews to secure the sleeves to the support tube.
10. Secure the support tube in an upright position.
11. Assemble the flat washer, thrust bearing, hook and T-handle.
12. Using the M10 X 1.5 X 40 mm capscrew supplied with the support fixture, secure the chain to the front cover and the hook.
13. Support engine as needed.
14. Remove oil pan attaching bolts.
15. Remove oil pan.
16. Clean oil pan and all gasket surfaces.
INSTALLATION
1. Install the oil pan gasket to the block.
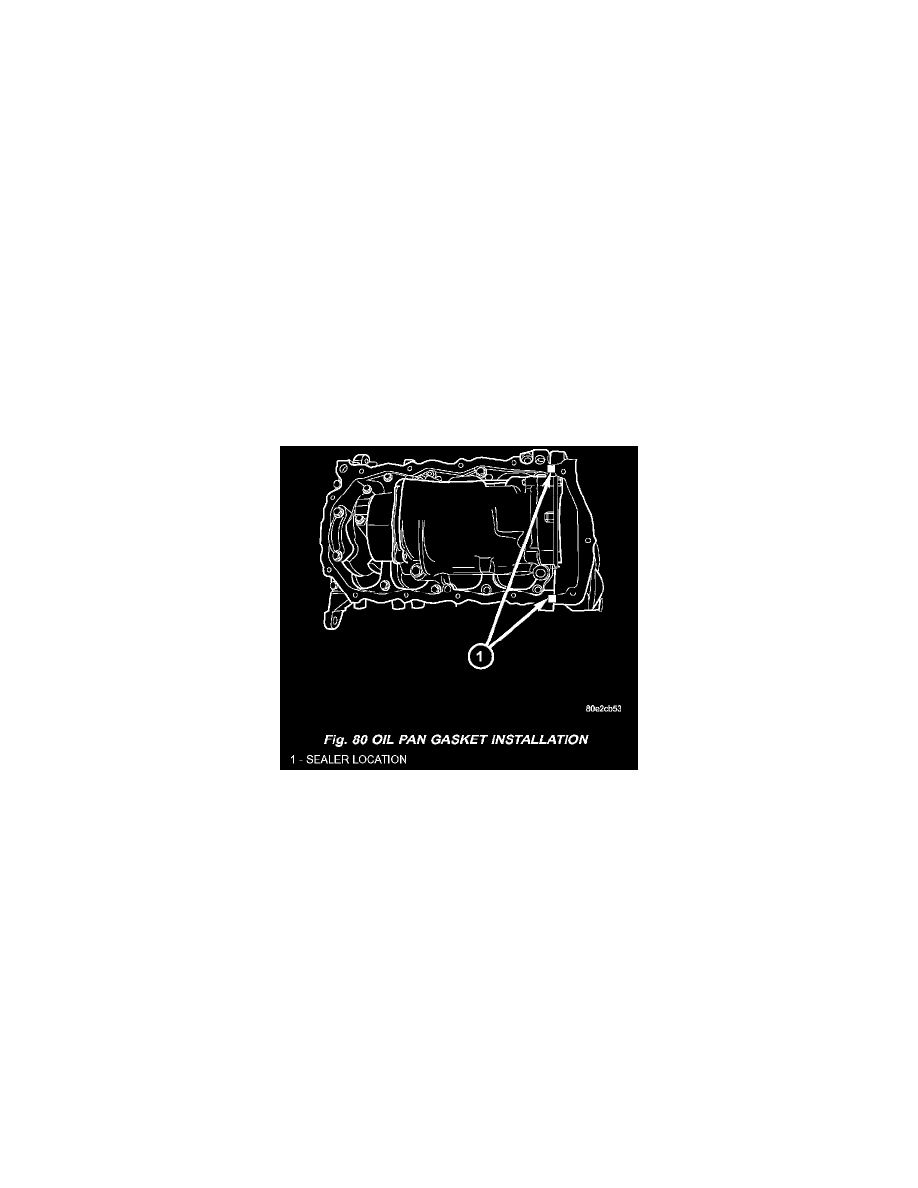
Fig. 80 Oil Pan Gasket Installation
2. Apply a 3 mm (1/8 in.) bead of Mopar Engine RTV at the oil pump to engine block parting line (Fig. 80).
3. Install pan and tighten the screws to 12 Nm (105 in. lbs.).
4. Lower engine, and remove Special Tool 8534.
5. Tighten engine mount thru bolts.
6. Raise the front axle into position, and reinstall front axle mounting bolts. If equipped.
7. Reconnect exhaust pipe to manifold.
8. Install structural collar, if equipped.
9. Lower vehicle.
10. Fill engine crankcase with proper oil to correct level.
11. Reinstall air cleaner assembly.