
Wagoneer L6-258 4.2L VIN C 2-bbl (1982)
Intake Manifold: Service and Repair
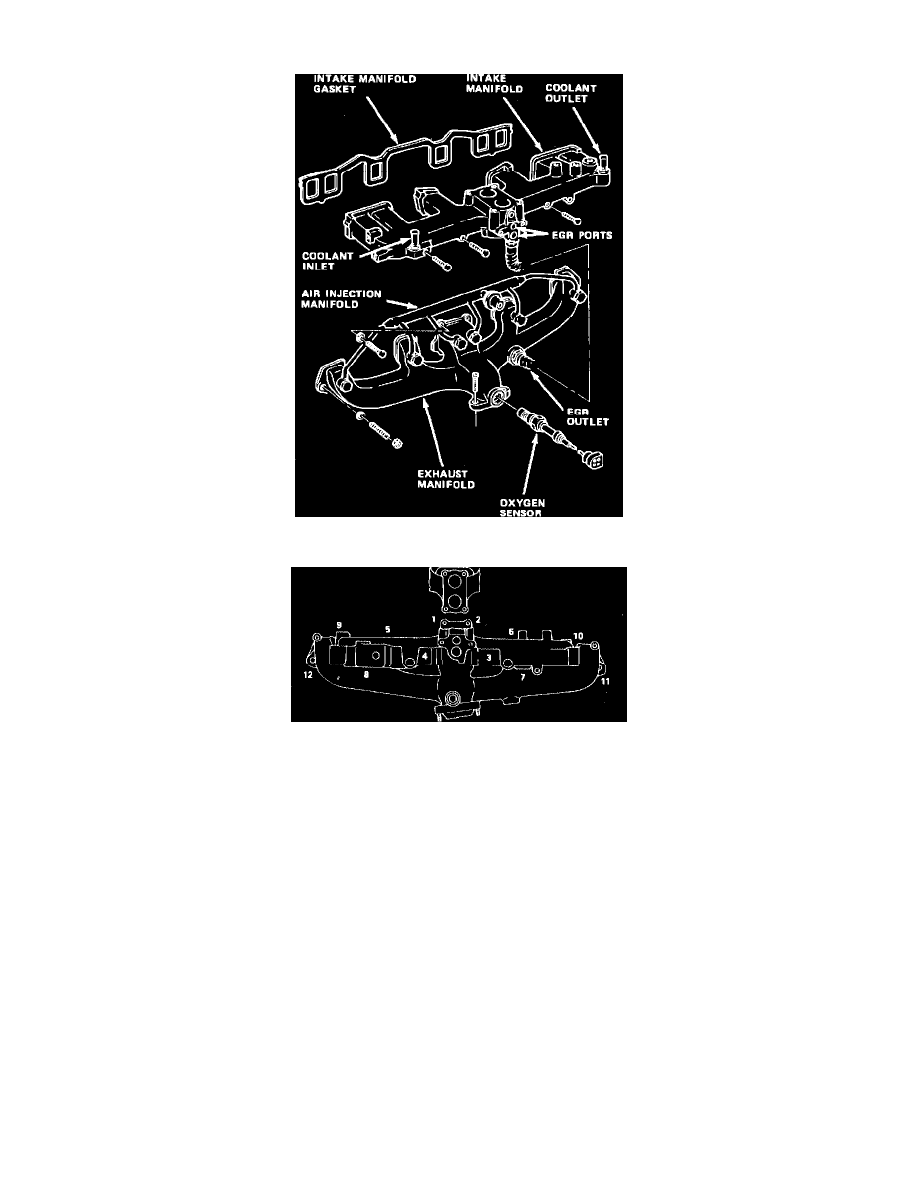
Fig. 4 Manifold installation
Fig. 5 Manifold tightening sequence
1.
Disconnect battery ground cable, drain coolant and remove air cleaner.
2.
Disconnect fuel line, bowl vent and idle speed control hoses, and idle speed control and choke heater electrical connectors, as equipped.
3.
Disconnect coolant and PCV hoses from manifold, and vacuum hoses from spark advance CTO valve.
4.
Disconnect electrical connectors to manifold heater, temperature sensing unit and carburetor, as equipped.
5.
Disconnect throttle cable and throttle valve rod, if equipped.
6.
Disconnect EGR tube from manifolds and vacuum hose from EGR valve.
7.
On models with AIR, disconnect hoses from pump and check valves, then remove diverter valve and hoses as an assembly.
8.
On all models, remove carburetor along with vacuum hoses and base gasket.
9.
Remove AIR/power steering pump lower bracket, if equipped, then the AIR pump.
10.
Remove power steering pump and secure aside, leaving hoses connected.
11.
Remove A/C compressor belt idler pulley and bracket, if equipped.
12.
Remove intake manifold attaching bolts, then remove intake manifold and gasket, Fig. 4.
13.
Position new gasket on cylinder head, install intake manifold and torque bolts to specifications in sequence shown in Fig. 5.
14.
Reverse procedure to complete installation, using new base gasket when installing carburetor. Remove coolant temperature sensor and leave
removed until cooling system is filled to allow air to escape from block. When cooling system is filled, reinstall temperature sensor.