
Wagoneer L6-258 4.2L VIN C 2-bbl (1982)
Timing Chain: Service and Repair
Timing Chain & Sprockets Replacement
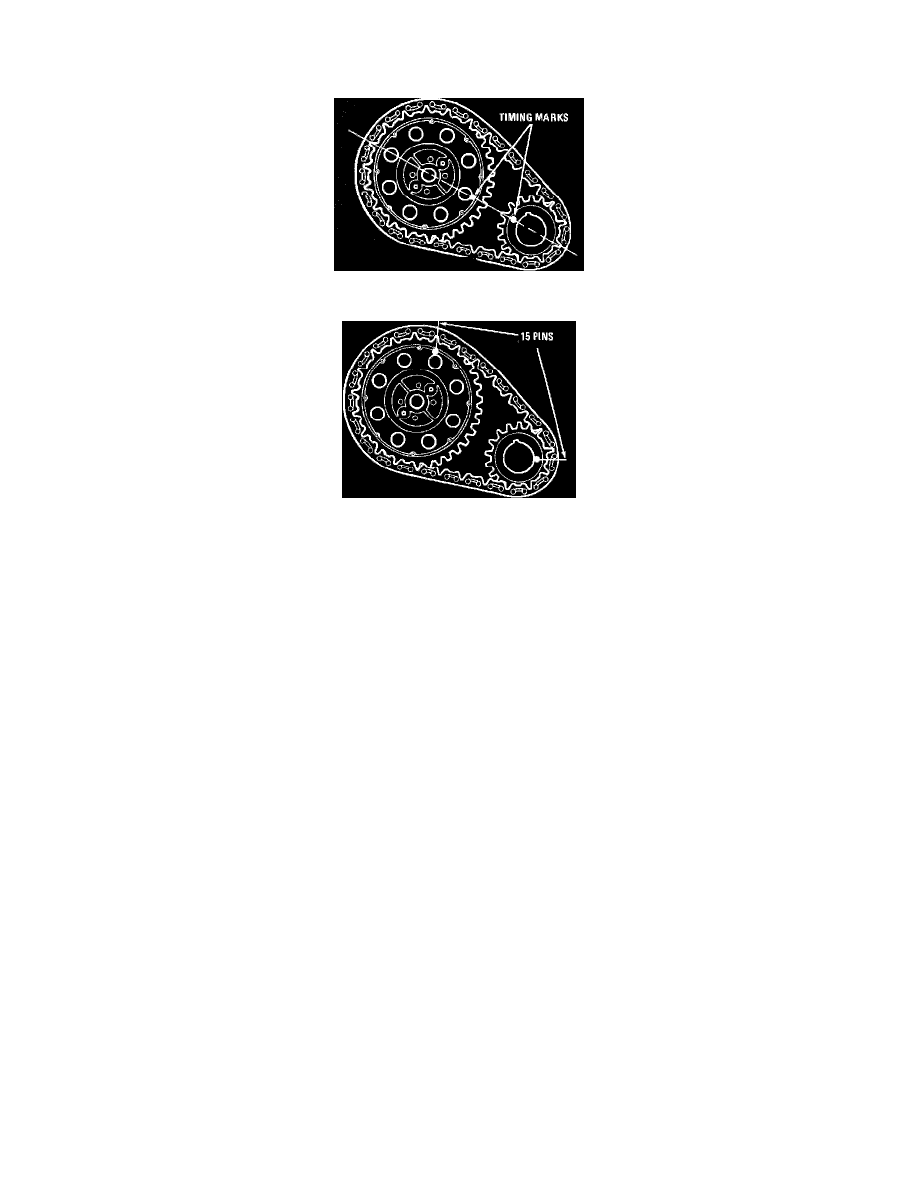
Fig. 11 Valve timing marks
Fig. 12 Timing chain installation check
1.
Disconnect battery ground cable.
2.
Remove engine fan and hub assembly.
3.
Remove vibration damper pulley and vibration damper.
4.
Remove timing case cover.
5.
Remove oil seal from timing case cover.
6.
Remove camshaft sprocket retaining bolt and washer.
7.
Rotate crankshaft until crankshaft sprocket timing marks is closest to and aligned with timing mark on camshaft sprocket, Fig. 11.
8.
Remove timing chain and sprockets as an assembly.
9.
Assemble timing chain, crankshaft and camshaft sprockets with timing marks aligned as shown in Fig. 11.
10.
Install timing chain assembly onto engine.
11.
Install camshaft sprocket retaining bolt and washer. Torque retaining bolt to 50 ft. lbs. To verify correct installation of timing chain, position
timing mark of the camshaft sprocket at approximately the one o'clock position. This positions crankshaft sprocket timing mark at a location where
the adjacent tooth meshes with the timing chain, Fig. 12. Count the number of timing chain pins between timing marks of both crankshaft and
camshaft sprockets. There must be 15 pins.
12.
Install timing case cover and oil seal.
13.
Install vibration damper. Torque damper bolt to 80 ft. lbs.
14.
Install vibration damper pulley. Torque bolts to 20 ft. lbs.
15.
Install engine fan and hub assembly.
16.
Connect battery ground cable.