
Wagoneer L6-258 4.2L VIN C 2-bbl (1982)
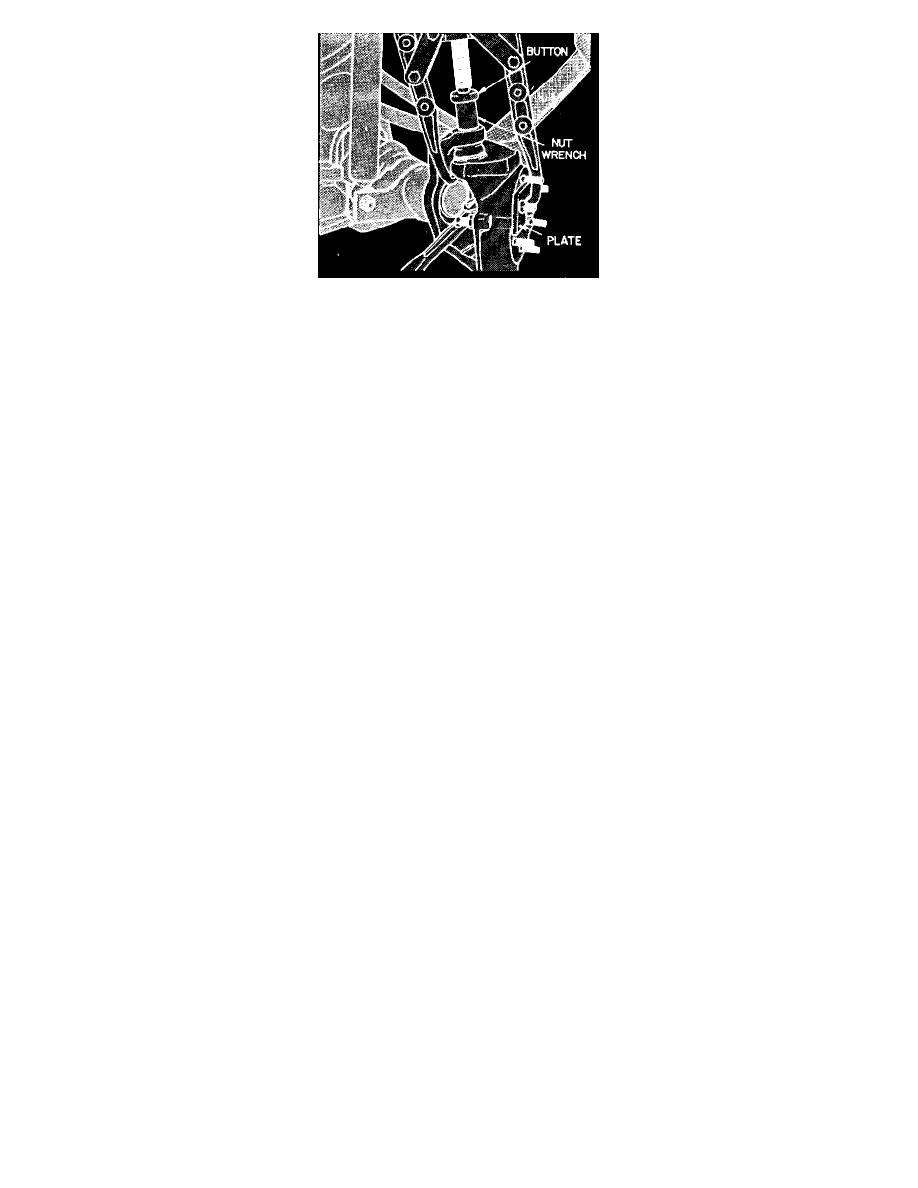
Fig. 2 Steering knuckle installation tools
INSTALLATION
1. On models except Wrangler, install upper ball split ring seat until top of seat is flush with top of yoke.
2. On Wrangler models, install split ring seat to a depth of 0.206 inch in bottom ball joint bore of steering knuckle. Measure depth from notched and
of seat to machined lower surface of steering knuckle joint bore.
3. On all models, install steering knuckle on yoke, then a new lower ball stud jam nut finger tight.
4. On 1980 models position Nut Wrench J-25158, Button J-25211-3, Plate J-25211-3 and Puller J-25215. On 1981-87 models, position Nut Wrench
J-23447, Button J-25211-3, Plate J-25211-1 and Puller J-25212 as shown.
5. Tighten puller screw until lower ball stud is held firmly seated. Torque jamnut to 85 ft. lbs. on CJ and Scrambler models, and 75 ft. lbs. on all
other models. Remove puller and plate.
6. Torque upper ball stud split ring seat to 50 ft. lbs.
7. Install upper ball stud nut and torque to 100 ft. lbs. Install cotter pin.
8. Install tie rod to steering knuckle. Torque tie rod end nuts to 50 ft. lbs.
9. Install axle shaft as described in Front Wheel Drive Section under "Axle Shaft, Replace."