
300Tdi Defender
82
AIR CONDITIONING
4
REPAIR
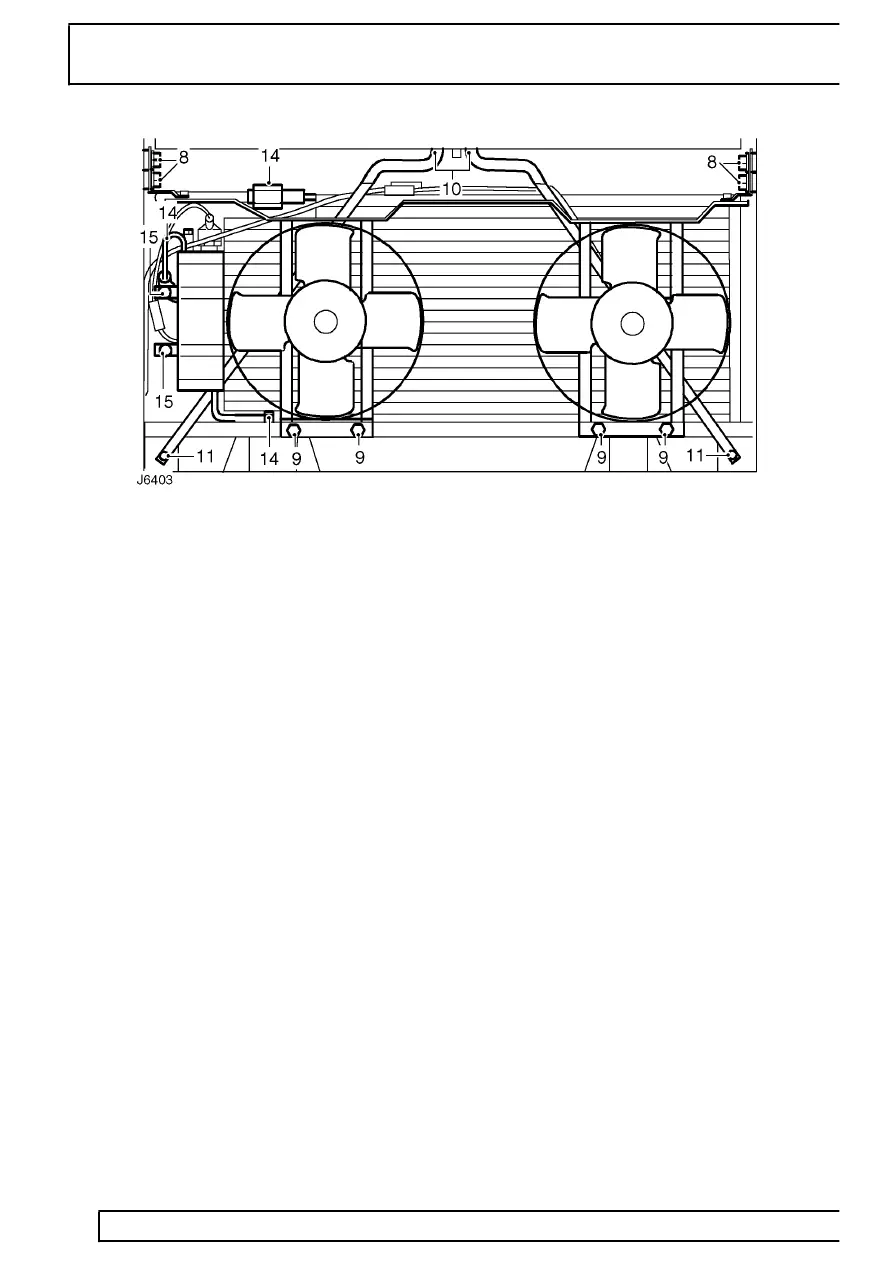
8. Remove 4 bolts and large packing washers
securing fan cowling brackets to wing sides.
9. Remove 4 nuts securing fan cowling to lower
mounting bracket and lift complete assembly
from condenser.
10. Remove 2 bolts securing bonnet striker support
plate and cross braces to grille top panel.
11. Remove 2 bolts securing cross braces to front
wings.
12. Lift condenser, from bottom mounting lugs and
carefully ease forwards to clear top grille panel.
13. Lift condenser, complete with receiver/drier, from
vehicle taking care to clear high and low
pressure hose/pipes at side of radiator.
14. Disconnect condenser and receiver/drier pipes.
15. Remove clamp bolts and release receiver/drier if
a new condenser is to be fitted.
16. Discard all pipe connection ’O’ rings. Cap or plug
all connections to prevent ingress of dirt and
moisture.
Refit
17. Coat unions, threads and new ’O’ rings with
refrigerant oil prior to reassembly.
18. Secure receiver/drier to mounting clamps.
19. Fit condenser and receiver/drier pipes.
20. Lower condenser into position ensuring high and
low pressure pipes are located between radiator
and front wing.
21. Secure cross braces and bonnet striker support
plate to top grille.
22. Secure cross braces to front wings.
23. Secure fan cowl assembly to lower mounting
bracket and front wings.
24. Fit high pressure pipe at evaporator.
25. Fit condenser low pressure pipe at compressor.
26. Connect multi-plug at receiver/drier dual
pressure switch.
27. Connect fan motor lead multi-plug.
28. Evacuate and recharge air conditioning system
See Adjustment, Refrigerant recovery,
recycling, recharging.
29. Reconnect battery.
30. Fit grille panel.