
FRONT BRAKE DISCS
- Make
- Land Rover
- Model
- Defender 300Tdi Defender
- Section
- FRONT BRAKE DISCS
BRAKES
11
REPAIR
REV: 09/97
Assemble outboard pistons
13. Coat new fluid seal with brake fluid. Ease seal
into groove in bore using only fingers, ensuring it
is properly seated. Fluid seal and groove are not
same in section, so when seal is seated it feels
raised to touch at edge furthest away from
mouth of bore.
14. Coat appropriate piston with brake fluid. Insert it
squarely into bore by hand only. Do not tilt piston
during insertion, leave approximately 8mm
projecting from bore.
15. Coat new wiper seal with brake fluid and fit to
new seal retainer. Slide assembly, seal first, over
protruding piston and into bore recess. Use
piston clamp to press home seal retainer and
piston.
Mounting inboard pistons
16. Clamp outboard pistons and carry out same
procedure for removing and fitting outboard
pistons and seals, instructions 8 to 15.
Fit calipers and pads
17. Fit caliper, tighten bolts evenly to
82 Nm (60
lbf/ft).
18. Connect brake flexible hoses to caliper. Tighten
to
15 Nm (11 lbf/ft).
19. Remove hose clamps.
20. Insert pads. Fit pins and springs, secure using
new split pin.
21. Bleed brake system
See Brake System Bleed
.
22. Press brake pedal firmly several times to locate
friction pads.
23. Fit road wheels, remove axle stands. Finally
tighten road wheel nuts to correct torque:
Alloy wheels -
130 Nm (96 lbf/ft)
Steel wheels -
100 Nm (80 lbf/ft)
Heavy duty wheels -
170 Nm (125 lbf/ft)
24. Road test vehicle. Note that new friction pads
require ’bedding-in’, this may take several
hundred miles before brakes are at maximum
efficiency.
FRONT BRAKE DISCS
Service repair no - 70.10.10.
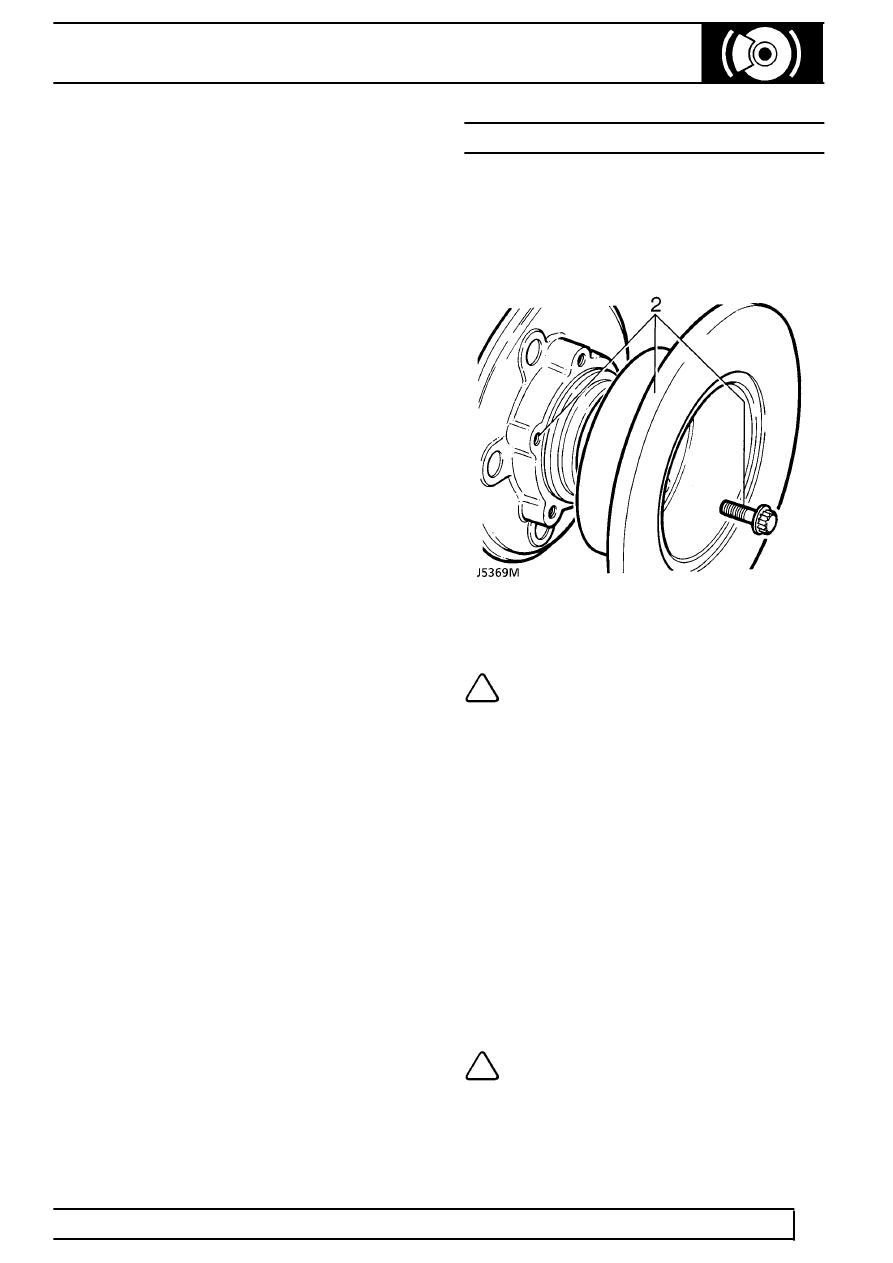
Remove
1. Remove hub assembly
See FRONT AXLE AND
FINAL DRIVE, Repair, Front hub assembly .
2. Remove 5 hub to disc bolts.
3. Tap disc to separate from hub.
NOTE: On 110/130 vehicles ventilated
discs are fitted as standard.
Refit
4. Locate disc to hub.
5. Apply Loctite 270 to disc bolts and tighten to
73
Nm (54 lbf/ft).
6. Check total disc runout with a dial indicator, this
must not exceed 0,15 mm, 0.006 in. If necessary
reposition disc.
7. Fit hub assembly
See FRONT AXLE AND
FINAL DRIVE, Repair, Front hub assembly .
Disc reclamation
8. Check disc thickness. This dimension may be
machined to minimum thickness of 12 mm (0.47
in.) - solid discs, 22 mm (0.90 in) - ventilated
discs. Machine equal amount off each face.
NOTE: The disc MUST BE renewed if the
minimum running thickness stamped on
the disc is recorded.
Parts & tools for this job For Land Rover Defender
- PARTFront brake padsSearch: Land Rover Defender front brake pads
- TOOLCaliper piston rewind toolSearch: brake caliper piston rewind tool
- FLUIDBrake fluidSearch: brake fluid
Links open Amazon search results in a new tab. As an Amazon Associate I earn from qualifying purchases.