300Tdi Defender

BRAKES
13
REPAIR
REAR BRAKE CALIPERS
Service repair no - 70.55.06
Service repair no - 70.55.17
Before starting repair refer to General brake service
practice
See General Brake Service Practice.
Remove caliper
1. Remove rear road wheels.
2. Using a recognised hose clamp, clamp flexible
brake hose above rear axle.
90 Models
110/130 Models
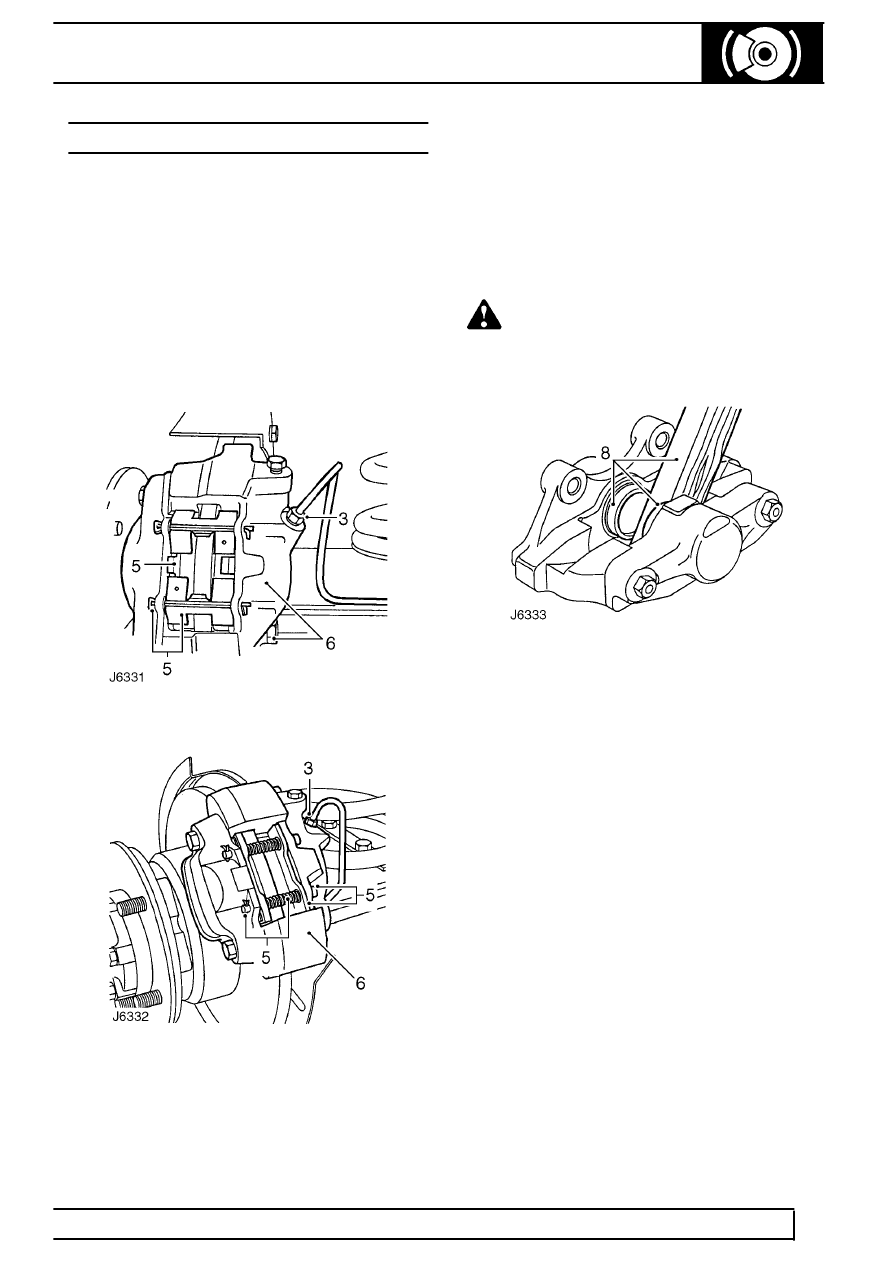
3. Remove brake pipe from rear brake caliper.
4. Seal pipe ends to prevent ingress of dirt.
5. Remove retaining pins and springs and withdraw
pads. If same pads are to be refitted, identify
them for assembly in original positions.
6. Remove 2 bolts and withdraw caliper from rear
axle.
Repair
WARNING: Do not separate caliper halves.
7. Clean outer surfaces of caliper with aerosol
brake cleaner.
8. WITH CAUTION expel pistons from their bores
by applying air pressure to fluid inlet port. It is
unlikely both pistons will expel at same time,
regulate rate with a suitable piece of wood
inserted between two pistons.
9. Finally, remove pistons keeping them identified
with their respective bores.
10. Remove wiper seal retainer by inserting a blunt
screwdriver between retainer and seal and pry
retainer carefully from mouth of bore.
11. Taking care not to damage seal grooves, extract
wiper seal and fluid seal.
12. Clean bores, pistons and particularly seal
grooves using clean brake fluid only. If caliper or
pistons are corroded or their condition is not
perfect new parts must be fitted.
13. Apply brake fluid to new seal. Fit seal into
groove in bore. When seal is seated it feels
raised to touch at edge furthest away from
mouth of bore.
14. Coat piston with brake fluid. Insert it squarely
into bore. Do not tilt piston during insertion and
leave 8mm projecting from bore.
