
300Tdi Defender
CHASSIS AND BODY
35
REPAIR
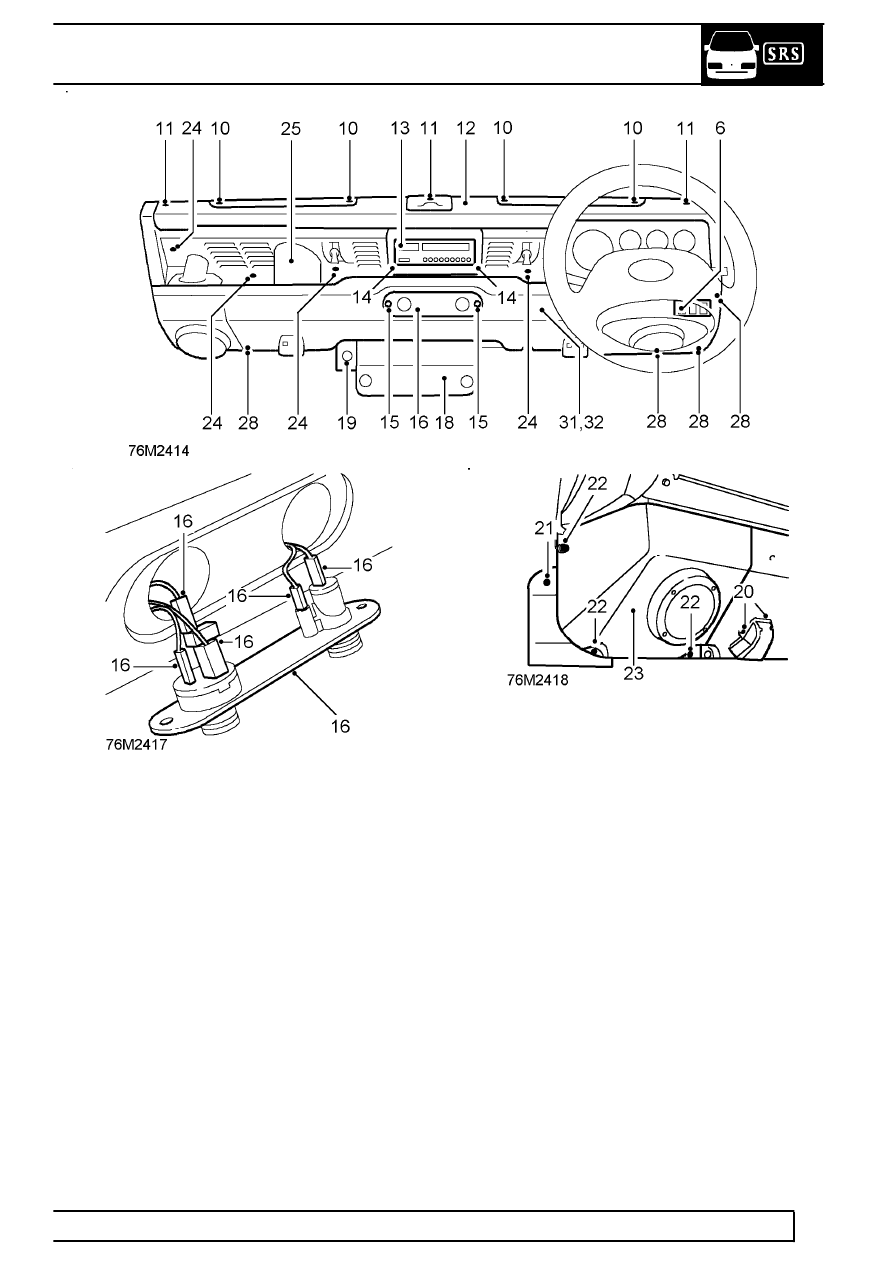
15. If fitted, remove 2 screws, washers and nuts
securing auxiliary switch panel to lower fascia
panel and switch cover.
16. Withdraw switch panel and disconnect switch
leads.
17. Remove 2 screws securing switch cover to
parcel tray.
18. Remove fuse box cover.
19. Models with hand throttle:
Remove fuse box LH retaining screw.
Pivot fuse box down to gain access to lower
inner hand throttle cover fixing screw.
Remove 4 screws and lift up hand throttle cover
from lower fascia panel.
20. Remove 2 screws and remove both footwell
vents from lower fascia panel.
21. Remove single screw and detach door check
strap cover from LH and RH doors.
22. Remove 3 screws securing wiper motor cover to
fascia bulkhead.
23. Release locating pins from fascia panel, lower
wiper motor cover and, if applicable, disconnect
radio speaker leads. Retain wiper motor rack
cover. On LH drive vehicles, disconnect
multi-plugs from rear of switch panel.
24. Prise out 2 large and 5 small cap fasteners
securing trim panel to parcel shelf and fascia
bulkhead.
25. Carefully fold back trim panel to clear fresh air
vent operating levers and remove panel from
parcel shelf.