
300Tdi Defender
ELECTRICAL
3
REPAIR
ELECTRONIC CONTROL UNIT (ECU)
Service repair no - 86.55.85
Remove
1. Remove LH front seat cushion.
2. Release retaining clip and remove battery
access cover.
3. Slacken battery negative lead clamp bolt.
4. Turn starter switch ’on’.
5. Turn starter switch ’off’ and remove key.
6. Disconnect battery negative lead.
NOTE: Operation 6 needs to be carried out
within 15 seconds to avoid activating
battery backed-up alarm sounder, if fitted.
7. Remove steering wheel
See STEERING,
Repair, Steering wheel.
8. Remove 4 screws securing instrument panel to
fascia cowl
See INSTRUMENTS, Repair,
Instrument panel.
9. Pull instrument panel away from fascia cowl and
disconnect speedometer cable, multi-plugs,
alarm LED plug lead, heated rear screen lead,
gearbox oil temperature lead and immobiliser
warning light leads.
10. Remove instrument panel.
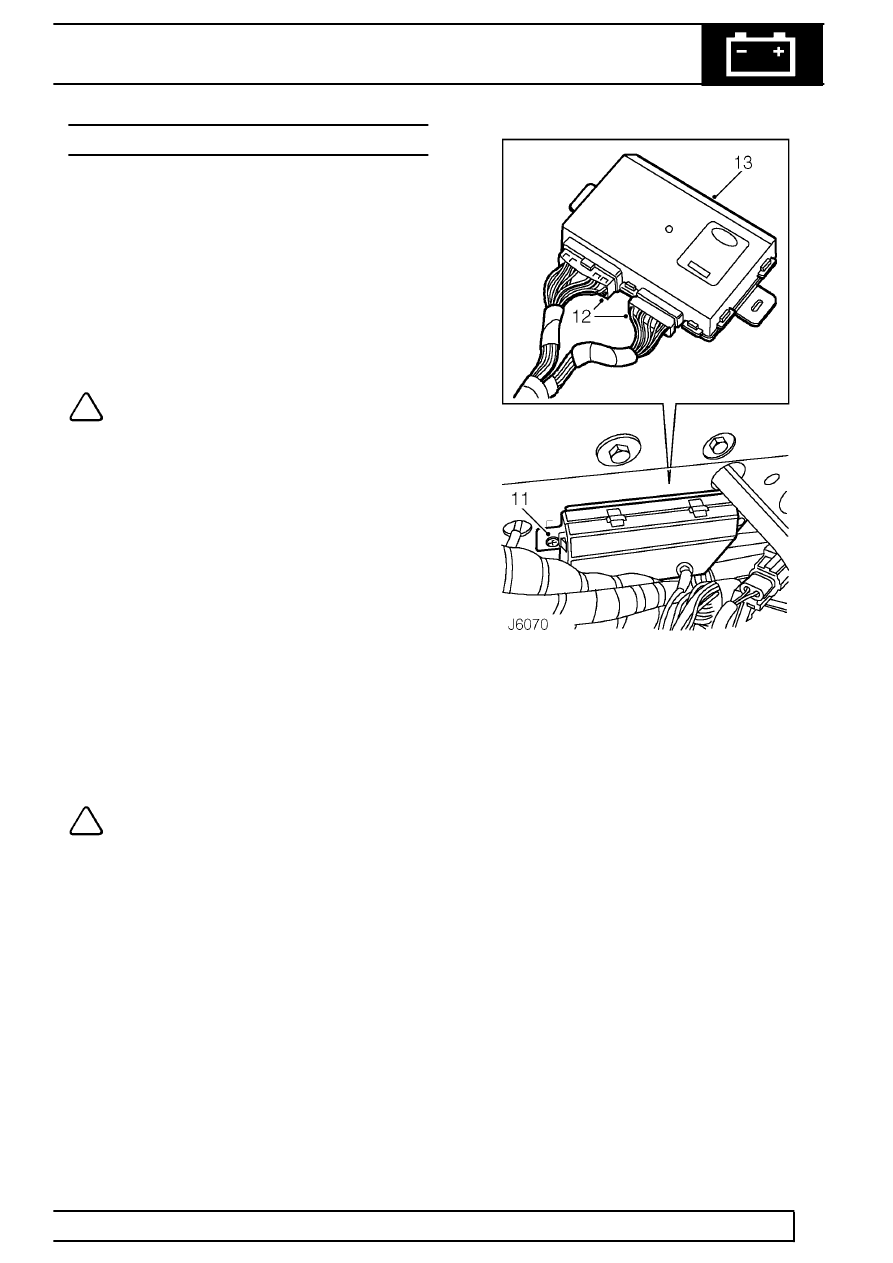
11. Remove 2 screws securing ECU to fascia cowl
(LH drive shown). On RH drive vehicles ECU is
positioned lower down, on vertical face of fascia
panel.
12. Release ECU from fascia cowl and disconnect
both multi-plugs.
13. Remove ECU.
NOTE: A new ECU must be initialised
using TestBook.
Refit
14. Position ECU at fascia cowl and reconnect both
multi-plugs.
15. Locate ECU on mounting face of fascia cowl and
secure with 2 screws.
16. Position instrument panel to fascia cowl and
reconnect immobiliser warning light leads,
gearbox oil temperature lead, heated rear screen
lead, alarm LED plug lead, multi-plugs and
speedometer cable.
17. Secure instrument panel to fascia cowl with 4
screws
See INSTRUMENTS, Repair,
Instrument panel.
18. Fit steering wheel
See STEERING, Repair,
Steering wheel.
19. Reconnect battery negative lead.
20. Fit battery access cover.
21. Fit LH seat cushion.