
300Tdi Defender
REAR SUSPENSION
5
REPAIR
ANTI-ROLL BAR LINKS
Service repair no - 64.35.24.
Remove
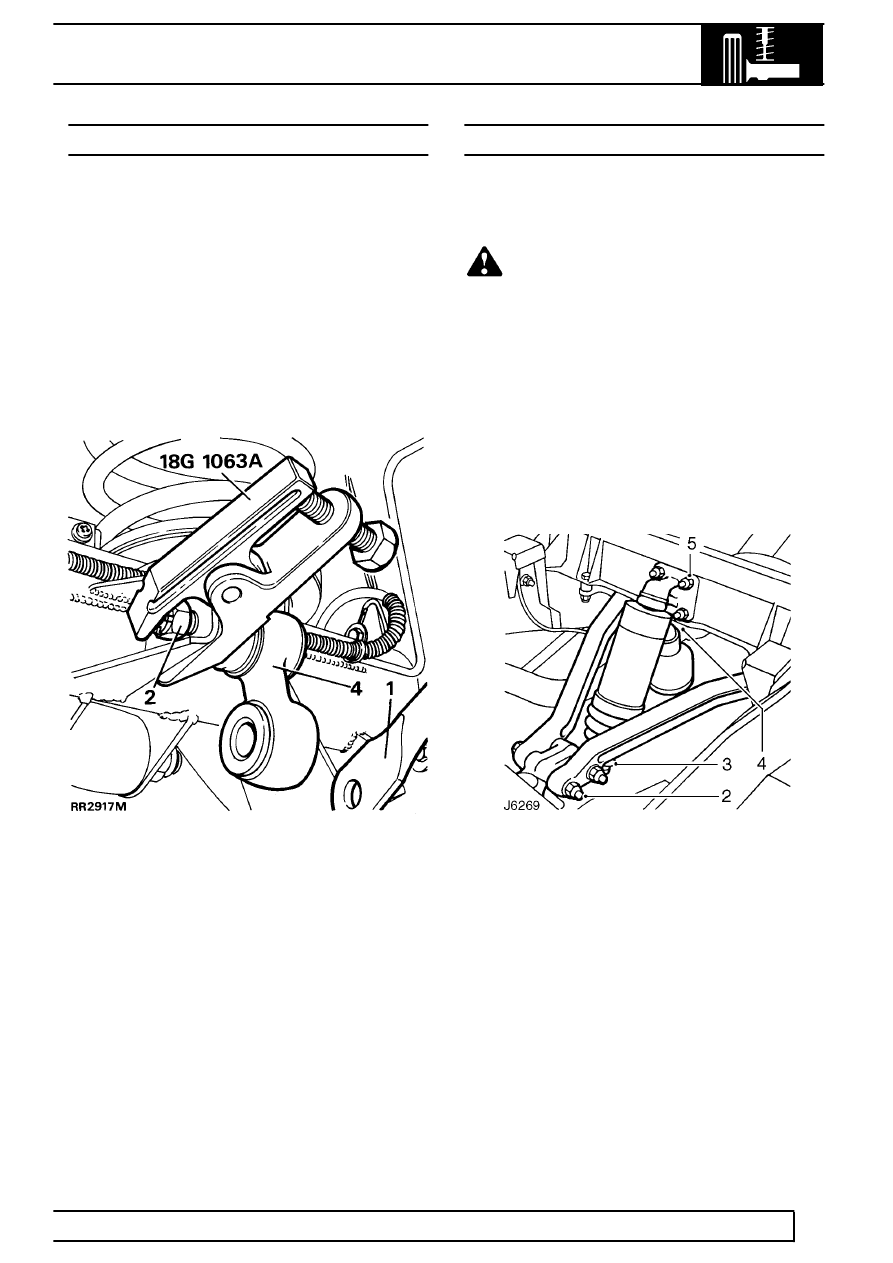
1. Remove 2 nuts, bolts, washers and rubber
bushes from links and lower anti-roll bar to clear
links.
2. Remove cotter pin and loosen castellated nut a
few turns.
3. Release link using special tool 18G 1063A as
shown.
4. Remove castellated nut and remove link.
Refit
5. Fit anti-roll bar link arm and castellated nut. Point
link arm down as shown. Tighten fixing to
40 Nm
(30 lbf/ft) and fit new cotter pin.
6. Align anti-roll bar to links.
7. Fit bolts, washers and rubber bushes using new
self locking nuts and secure anti-roll bar to links.
Tighten to
68Nm (50 lbf/ft).
SELF LEVELLING UNIT
Service repair no - 64.30.09
Remove
WARNING: The levelling unit contains
pressurised gas and MUST NOT be
dismantled. Repair is by replacement of
complete unit only.
1. Raise and support the vehicle under chassis and
use a jack to support weight of the axle.
2. Disconnect upper links at pivot bracket.
3. Ease up levelling unit lower gaiter and unscrew
lower ball joint at push rod using thin jawed
spanners.
4. Release webbing strap from the chassis.
5. Remove 4 nuts securing top bracket to chassis
and withdraw levelling unit complete with
bracket.
Renew levelling unit ball joints
The ball joints for the levelling unit may be dismantled
for cleaning and examination.
6. Unscrew lower ball joint from pivot bracket.
7. Unscrew ball joint from top bracket.
8. Reassemble ball joints, packing with
Dextagrease G.P. or equivalent. Renew joints if
worn.
9. Check condition of gaiters and renew if
necessary.