300Tdi Defender

WIPERS AND WASHERS
9
REPAIR
13. Fit wheelboxes to bulkhead.
14. Fit drive tubes to wheelboxes.
15. Feed drive rack through tubes until fully seated
in both wheelboxes.
16. Secure drive tube nut to wiper motor.
17. Fit wiper motor strap and earth lead.
18. When all components are correctly aligned, fully
tighten wheelboxes nuts to secure drive tubes.
Tighten wheelbox to bulkhead nuts.
19. Fully tighten drive tube nut to wiper motor and
motor strap screws.
20. Connect multiplug to wiper motor and earth lead
to strap tag.
21. Fit spacer, where used, early vehicles only.
22. Fit wiper arm adaptors.
23. Reconnect battery and check operation of wiper
motor and drive assembly and wheelboxes.
24. Disconnect battery.
25. Fit steering column upper and lower supports.
Tighten fixings to correct torque.
26. Fit demister vent top duct.
27. Secure RH demister vent and hose.
28. Fit LH and RH demister vents to ducts.
29. Fit centre and LH fascia top crash rail support
brackets.
30. Fit all other components removed to gain access
to wiper motor and wheelboxes.
31. Reconnect battery, check wiper motor operation
again and adjust wiper arms, if necessary.
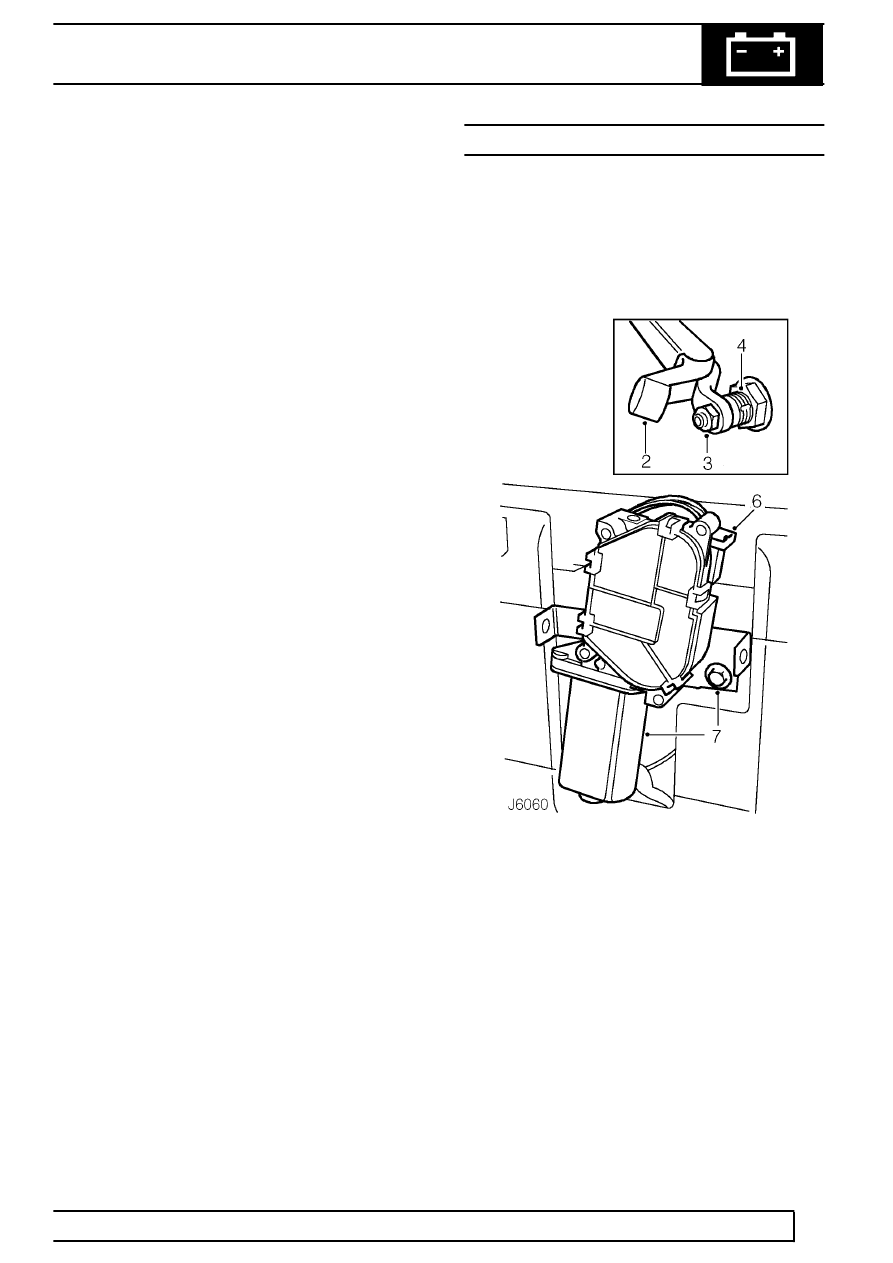
REAR WIPER MOTOR
Service repair no - 84.35.12
Remove
1. With assistance, unscrew 3 retaining nuts and
remove spare wheel from rear door mounting
studs.
2. Lift wiper arm end cap to gain access to securing
nut.
3. Remove nut and withdraw wiper arm from drive
spindle.
4. Remove retaining nut, plain washer and rubber
washer securing wiper motor drive spindle to
door.
5. Remove 2 screws and remove cover from wiper
motor mounting bracket.
6. Disconnect wiper motor harness multi-plug.
7. Remove bolt, with rubber washer, and detach
wiper motor, complete with mounting bracket,
from rear door.
