TD5 Defender

CHASSIS AND BODY
37
REPAIR
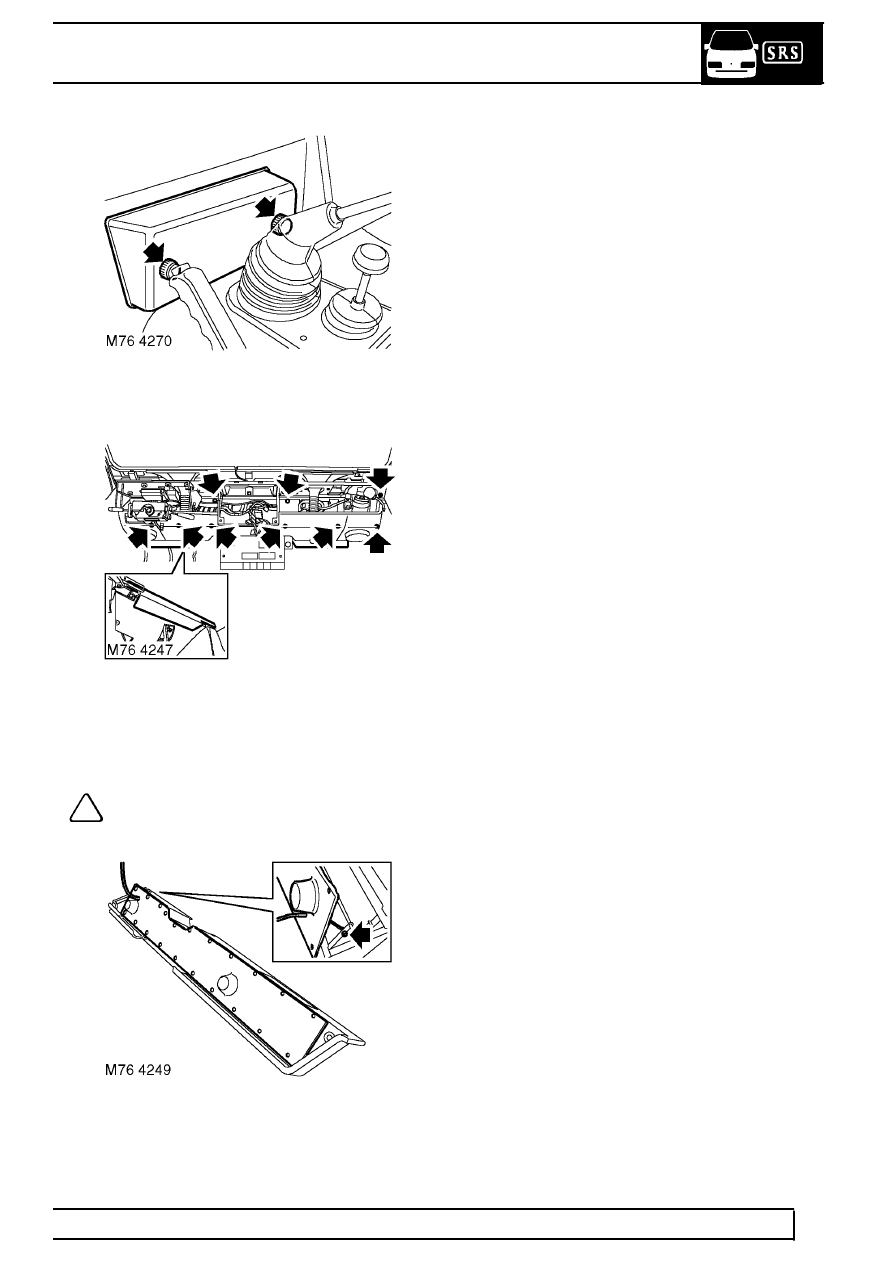
11. Remove 2 screws securing fuse cover and
remove cover.
12. Remove 7 screws securing lower edge of fascia
panel.
13. Remove footwell cover retaining plates.
14. Remove 2 nuts and remove lower fascia panel.
NOTE: Do not carry out further
dismantling if component is removed for
access only.
15. Remove 21 screws and release air duct cover.
16. Loosen trunnion screw, remove air distribution
cable and duct cover.
Refit
17. Fit air distribution cable to duct cover and fit
inner cable to vent flap trunnion.
18. Tighten vent flap trunnion screw to 6 Nm (4
lbf.ft) and bend cable end to secure.
19. Fit duct cover to lower fascia and fit and tighten
screws.
20. Check condition of seal between heater and
lower fascia, if damaged replace.
21. Carefully fit lower fascia panel and ensure
harness route is correct.
22. Secure lower fascia panel with screws and
tighten nuts to 10 Nm (7 lbf.ft).
23. Fit fuse cover and secure with screws.
24. Connect demister tubes to lower fascia panel.
25. Raise air distribution lever to screen demist
position and close footwell vent.
26. Connect air distribution cable to lever, tighten
grub screw and outer cable clamp.
27. Fit end cap to fascia and secure with screws.
28. Fit check strap covers and secure with screws.
29. Fit speakers. See ELECTRICAL, Repair.
30. Fit fascia closing panel.
31. Fit nut plate and fit screws to secure nut plate
and closing panel.
32. Fit knobs to air vent control levers.
33. Fit fascia console. See this Section.
34. Fit steering column nacelle. See STEERING,
Repair.
35. Connect battery negative lead. See
ELECTRICAL, Repair.
