
TD5 Defender
76
CHASSIS AND BODY
22
REPAIR
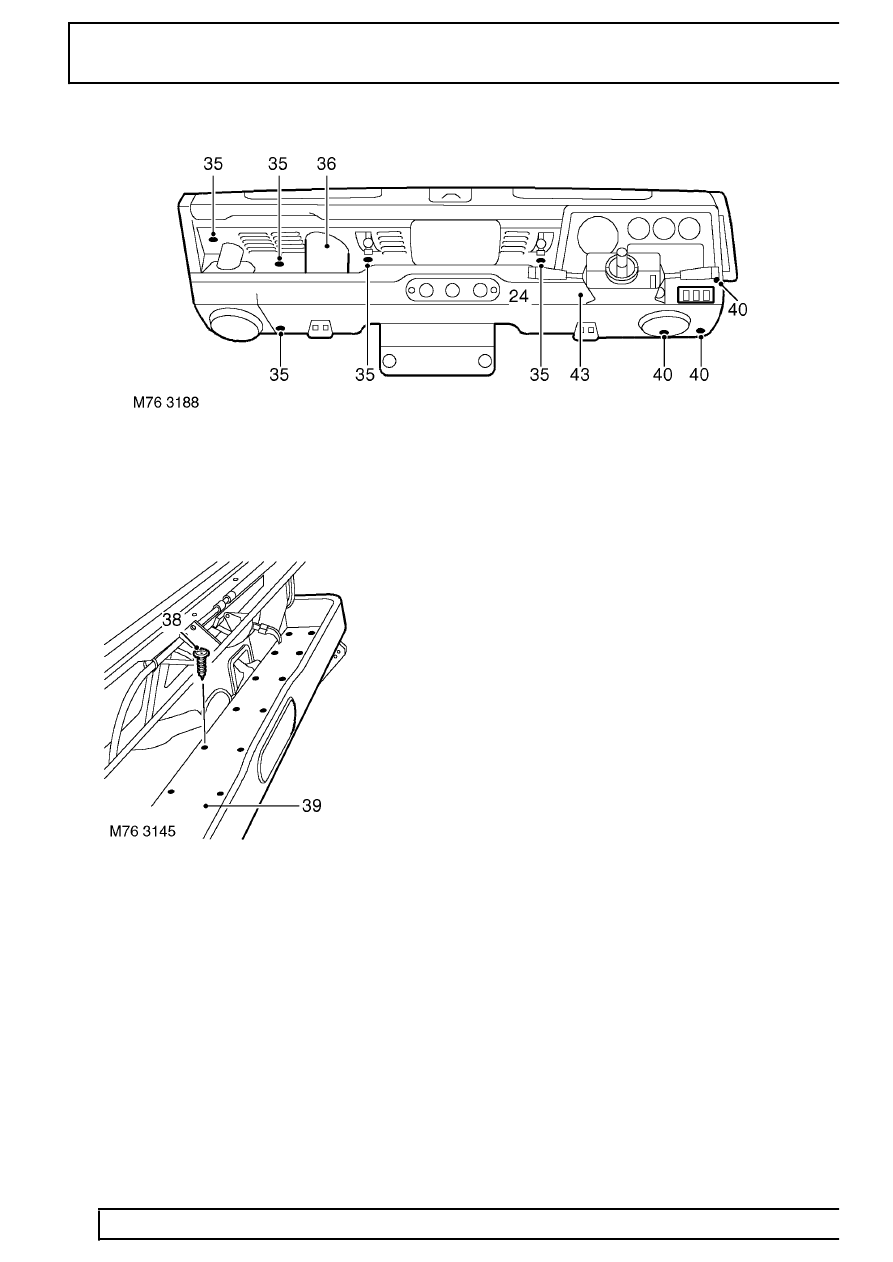
35. Remove 7 trim clips securing trim upper fascia
trim casing to bulkhead.
36. Carefully fold back trim casing over fresh air vent
operating levers and remove.
37. Release demist hose from parcel shelf.
38. Remove 18 screws securing parcel shelf to
lower fascia panel.
39. Remove parcel shelf.
40. Remove 7 screws securing bottom edge of lower
fascia panel to bulkhead.
41. Remove both retaining plates and lower footwell
covers.
42. Remove 2 bolts securing top of lower fascia to
bulkhead.
43. With assistance, remove lower fascia.
Refit
44. With assistance, fit lower fascia.
45. Fit 2 bolts securing top of lower fascia to
bulkhead.
46. Fit both retaining plates and footwell covers to
lower fascia.
47. Fit 7 screws securing bottom edge of lower
fascia to bulkhead.
48. Fit parcel shelf to lower fascia and secure with
screws.
49. Fit demist hose to parcel shelf.
50. Carefully manoeuvre upper fascia trim casing
over fresh air vents and fit to fascia.
51. Fit trim clips securing trim casing to bulkhead.
52. Fit finisher rail to lower fascia and secure with
screws.
53. Fit wiper motor cover and secure with screws.
54. Fit both door check strap covers and secure with
screws.
55. Fit both footwell vents to lower fascia and secure
with screws.
56. Fit interior fuse box cover.
57. Fit auxilliary switch panel cover.
58. Fit auxilliary switch panel. See this Section.