
TD5 Defender
ENGINE
15
OVERHAUL
Valves - Lapping-in
1. Lap each valve to its seat using grinding paste.
2. Apply Prussian Blue to valve seat, insert valve
into guide and press it firmly, without rotating on
to seat.
3. Remove valve and check that a continuous,
even line of Prussian Blue has been transferred
on to valve face.
NOTE: Line does not have to be across
whole width of valve face.
4. Remove all traces of grinding paste on
completion.
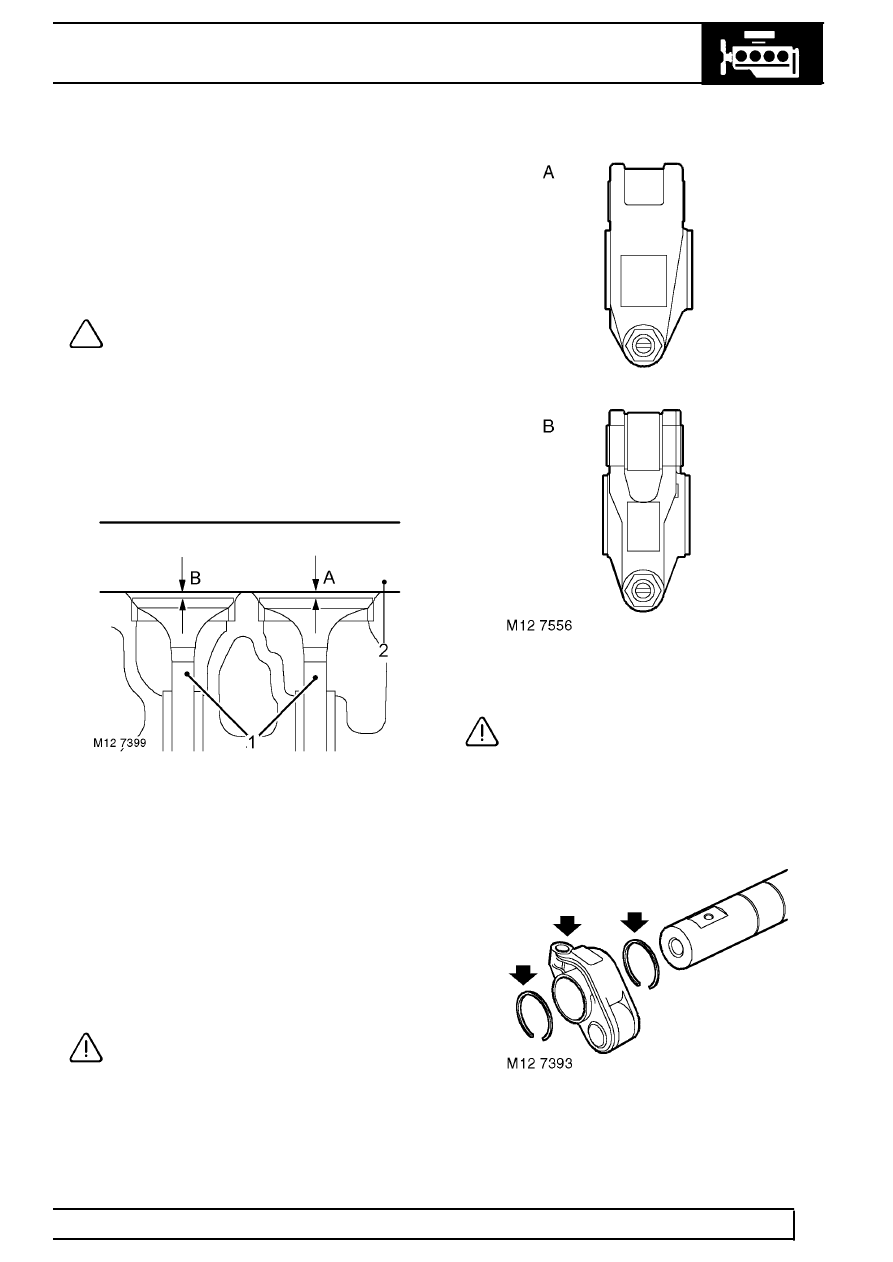
5. Check valve head stand-down. See this
Section.
Valve head stand down
1. Insert each valve into its respective guide.
2. Using a straight edge and feeler gauges, check
and record stand down of each valve head.
3. Compare figures obtained with figures given
below.
Valve head stand down:
Inlet valve A = 0.555 to 0.825 mm (0.022 to
0.032 in)
Exhaust valve B = 0.545 to 1.35 mm (0.021 to
0.053 in)
CAUTION: If any valve has a stand down
greater than specified, repeat check using
a new valve. If, after checking with a new
valve, stand down is still excessive, cylinder head
assembly must be replaced. It is not possible to
replace valve seat inserts.
Rocker shaft - Dismantling
1. Suitably identify each rocker arm to its fitted
position.
CAUTION: Identify type of rocker arm
fitted. Engine Serial No. Prefixes 10P to
14P - Type A rocker arms. Engine Serial
No. Prefixes 15P to 19P - Type B rocker arms.
Type B rocker arms and type B rocker shaft may
be fitted to Engine Serial No. Prefixes 10P to 14P
as an assembly.
2. Remove and discard spring ring retaining rocker
arm on shaft.
3. Remove rocker arm.
4. Remove and discard 2nd spring ring.