
Body interior squeaks and rattles
- Make
- Land Rover
- Model
- Discovery Technical Bulletins
- Section
- Body interior squeaks and rattles › Body interior squeaks and rattles
BODY INTERIOR SQUEAKS AND RATTLES
- Model
- Discovery
- Affected vehicles
- All Derivatives - the ACTION text refers to specific change points where applicable.
- Reference
- 761797
Bulletin text
Discovery
AFFECTED RANGE:
All Derivatives - the ACTION text refers to specific change points where applicable.
PROBLEM:
BODY INTERIOR SQUEAKS AND RATTLES
ACTION:
Where a customer complaint is confirmed and the problem area defined, refer to the following information for the repair method.
Part numbers in the right hand column are to aid identification only and are NOT available individually from Unipart. Use items as required from the Anti - Rattle Kit detailed in PARTS INFORMATION .
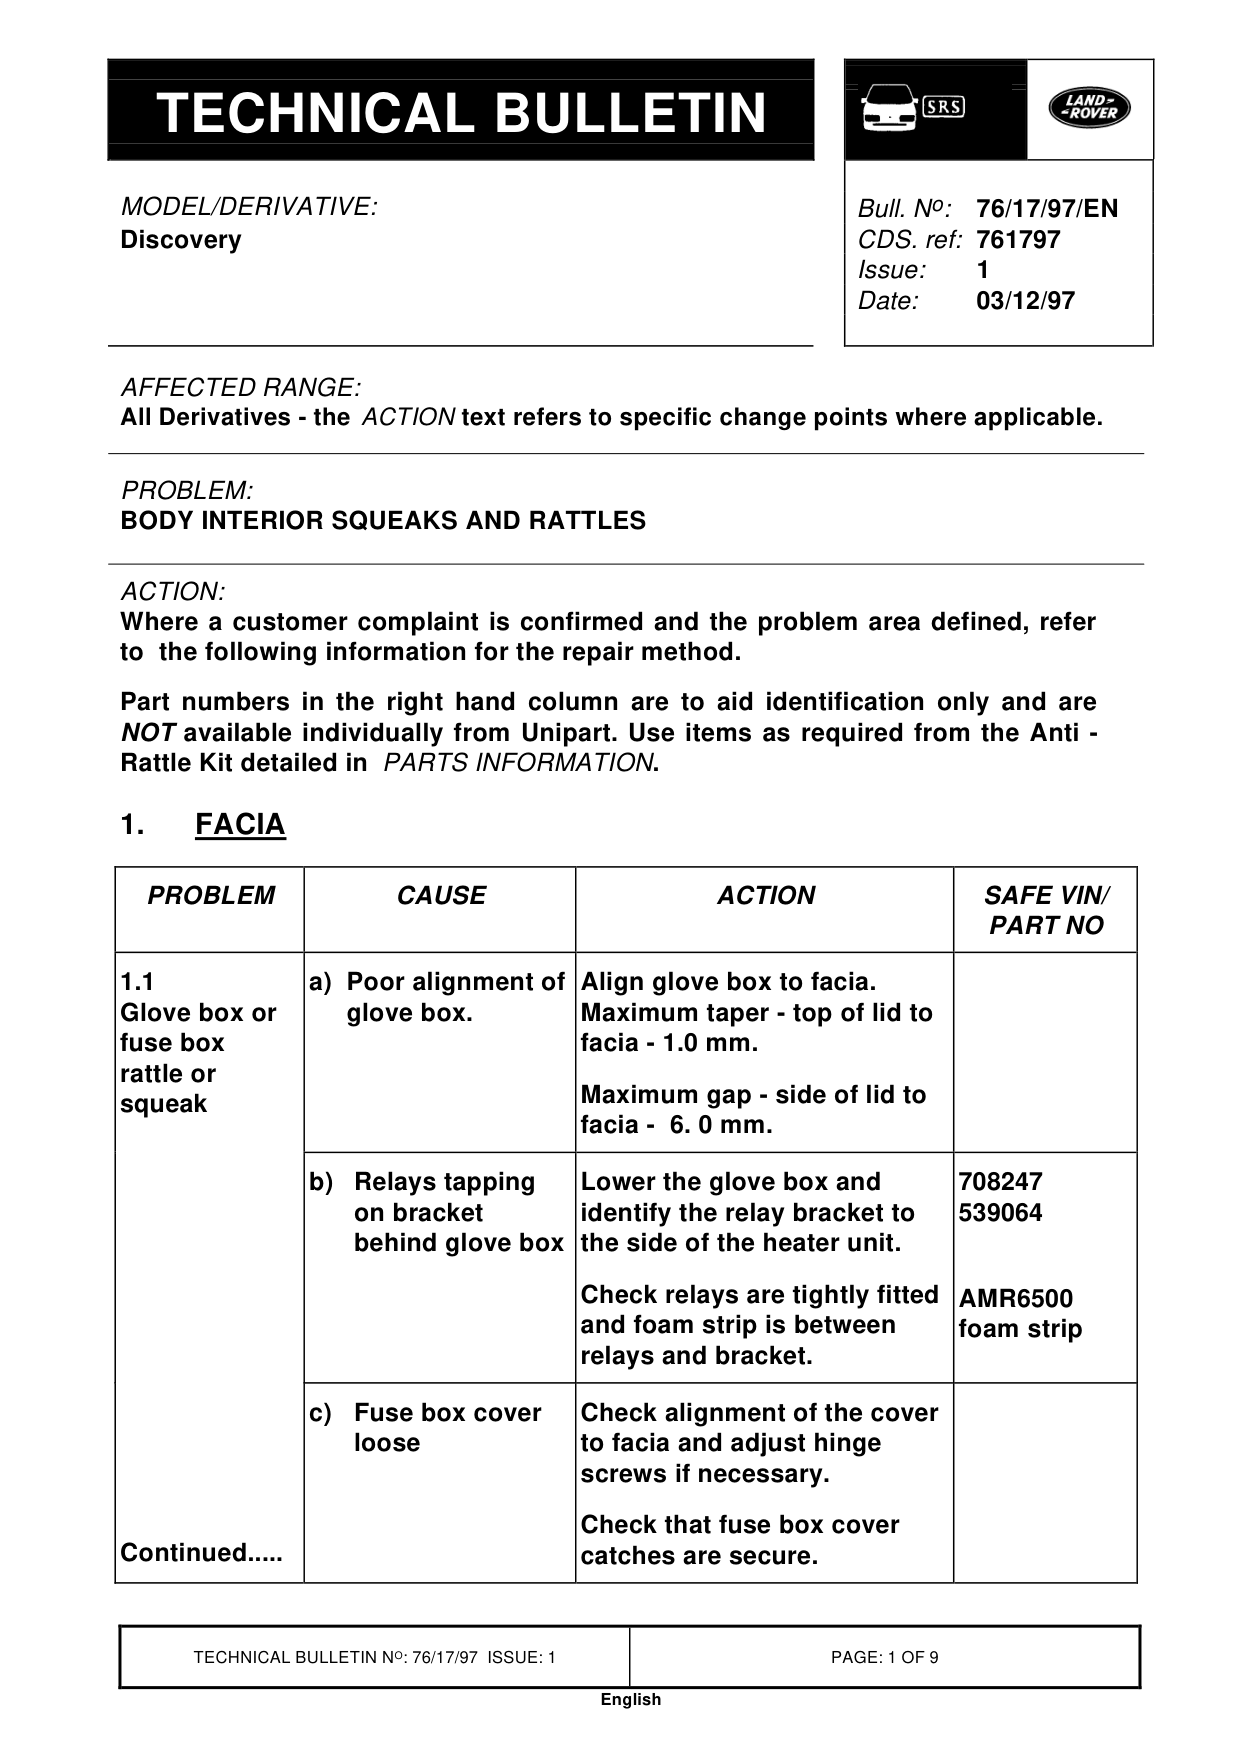
1. FACIA
PROBLEM CAUSE
1.1 a) Poor alignment of Glove box or glove box. fuse box rattle or squeak
b) Relays tapping on bracket behind glove box
c) Fuse box cover loose
Continued.....
Bull. N o : 76/17/97/EN
1 03/12/97
ACTION
SAFE VIN/ PART NO
Align glove box to facia. Maximum taper - top of lid to facia - 1.0 mm.
Maximum gap - side of lid to facia - 6. 0 mm.
Lower the glove box and 708247 identify the relay bracket to 539064 the side of the heater unit.
Check relays are tightly fitted AMR6500 and foam strip is between foam strip relays and bracket.
Check alignment of the cover to facia and adjust hinge screws if necessary.
Check that fuse box cover catches are secure.
1. FACIA continued.....
PROBLEM CAUSE
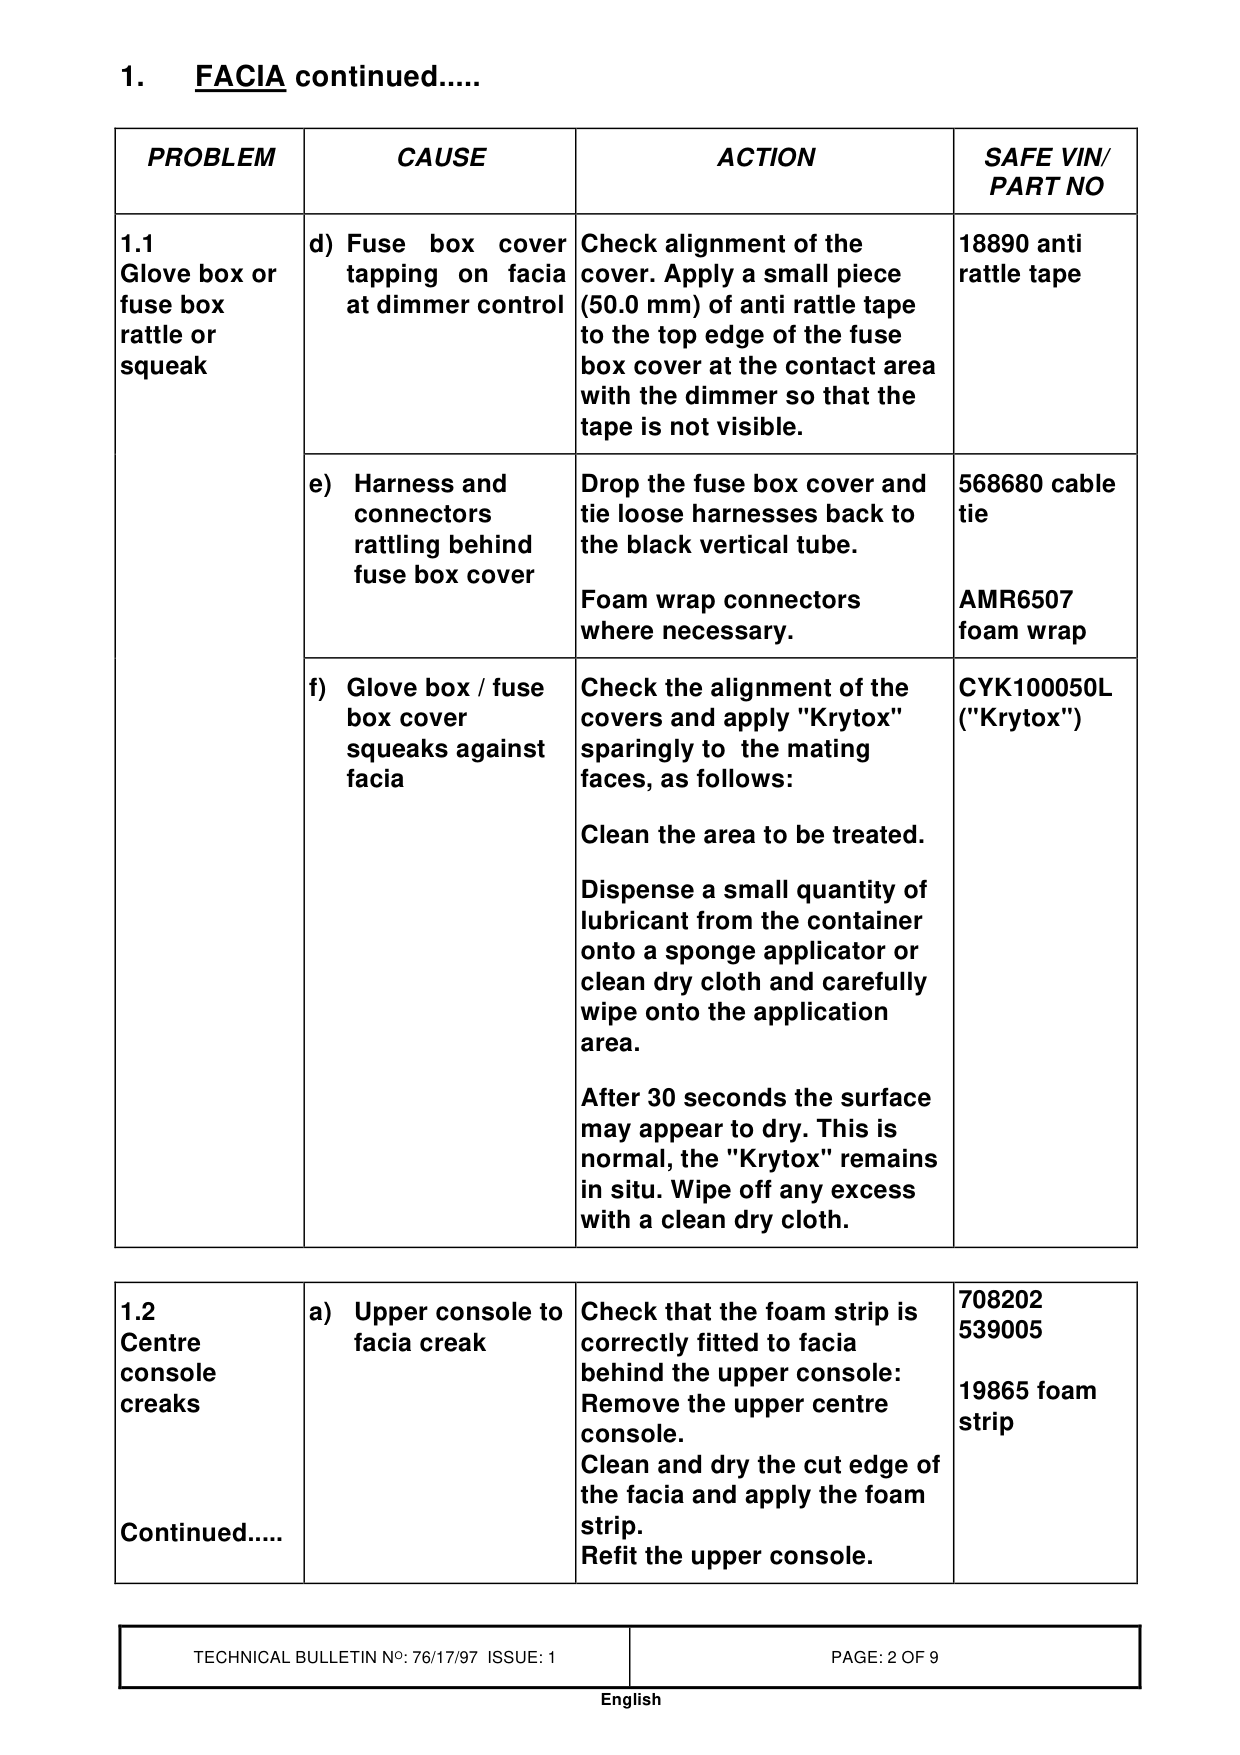
1.1 d) Fuse box cover Glove box or tapping on facia fuse box at dimmer control rattle or squeak
e) Harness and connectors rattling behind fuse box cover
f) Glove box / fuse box cover squeaks against facia
1.2 a) Upper console to Centre facia creak console creaks
Continued.....
ACTION
SAFE VIN/ PART NO
Check alignment of the 18890 anti cover. Apply a small piece rattle tape (50.0 mm) of anti rattle tape to the top edge of the fuse box cover at the contact area with the dimmer so that the tape is not visible.
Drop the fuse box cover and 568680 cable tie loose harnesses back to tie the black vertical tube.
Foam wrap connectors AMR6507 where necessary. foam wrap
Check the alignment of the CYK100050L covers and apply "Krytox" ("Krytox") sparingly to the mating faces, as follows:
Clean the area to be treated.
Dispense a small quantity of lubricant from the container onto a sponge applicator or clean dry cloth and carefully wipe onto the application area.
After 30 seconds the surface may appear to dry. This is normal, the "Krytox" remains in situ. Wipe off any excess with a clean dry cloth.
708202 Check that the foam strip is 539005 correctly fitted to facia behind the upper console: 19865 foam Remove the upper centre strip console. Clean and dry the cut edge of the facia and apply the foam strip. Refit the upper console.
1. FACIA continued.....
PROBLEM CAUSE
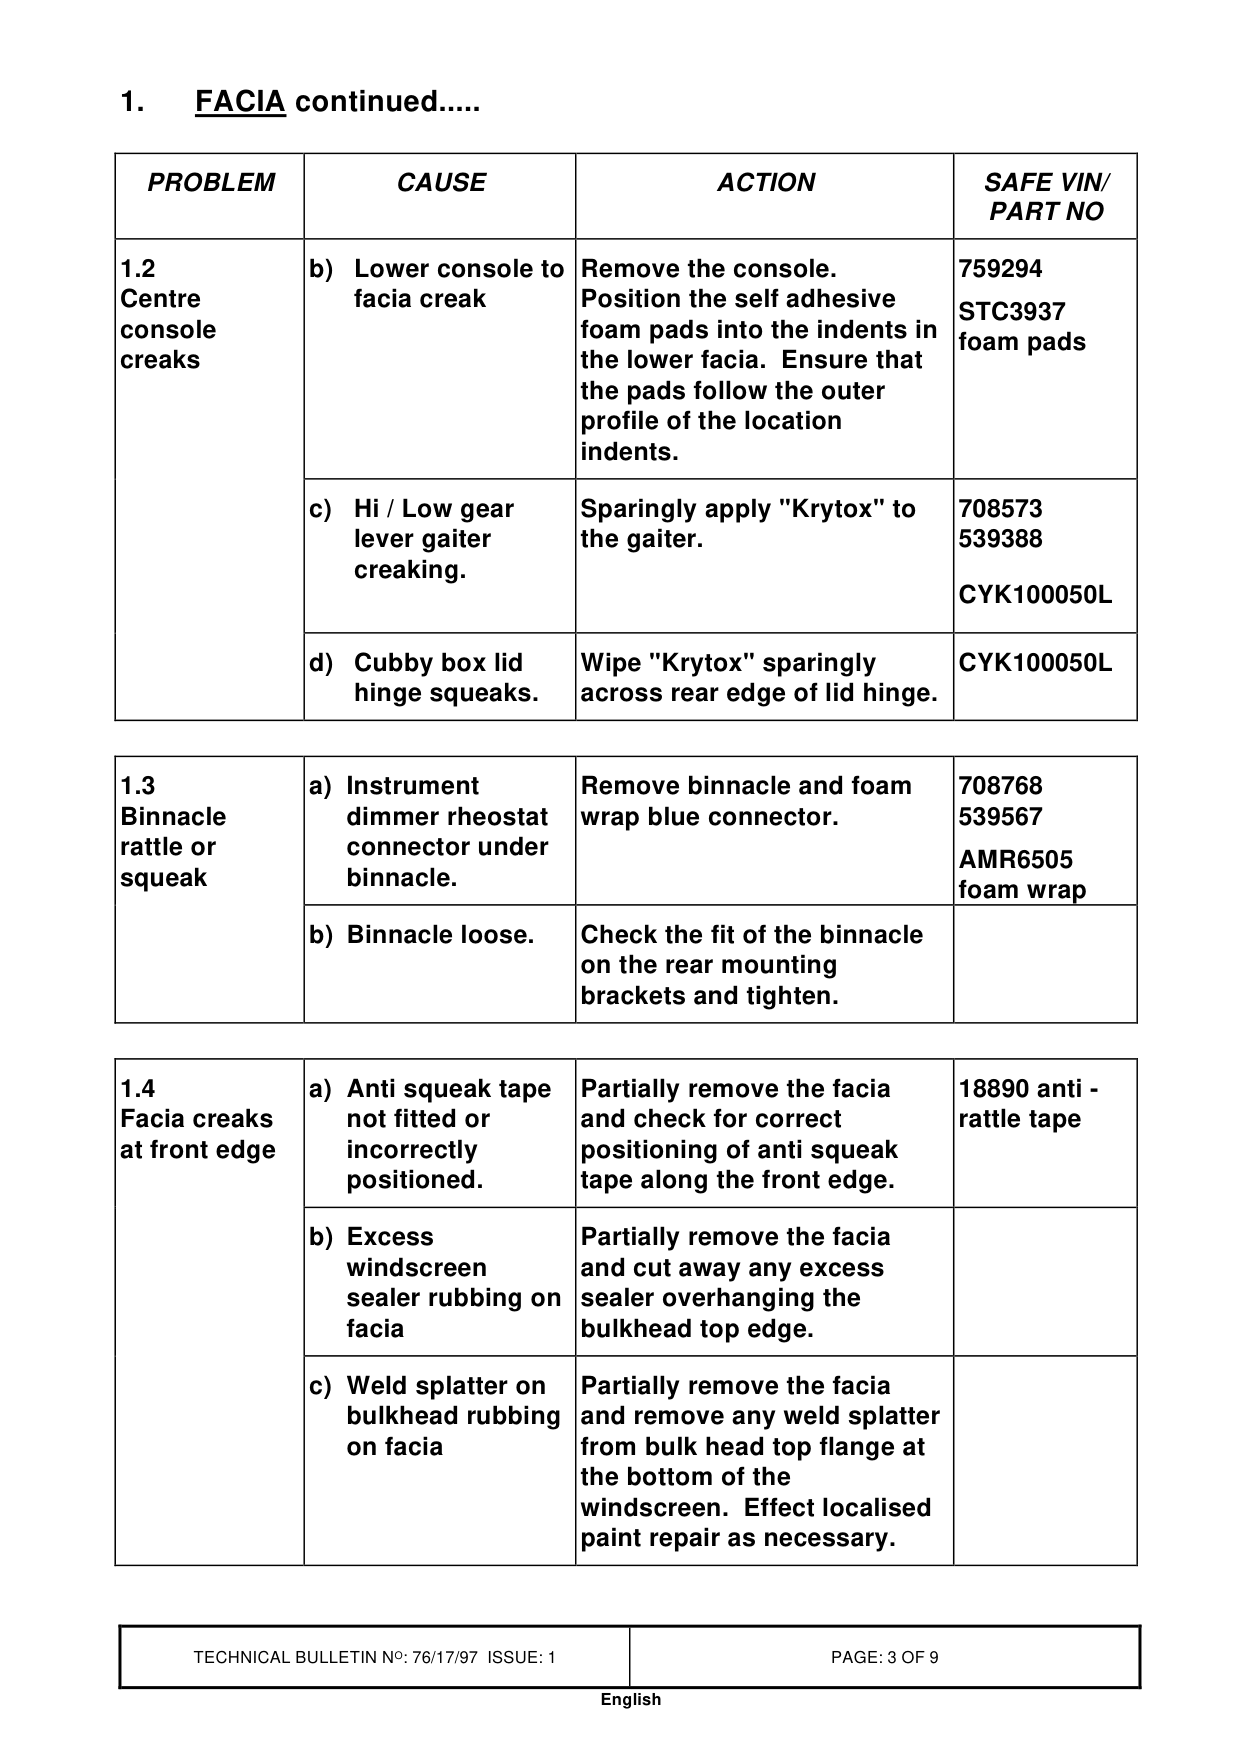
1.2 b) Lower console to Centre facia creak console creaks
c) Hi / Low gear lever gaiter creaking.
d) Cubby box lid hinge squeaks.
1.3 a) Instrument Binnacle dimmer rheostat rattle or connector under squeak binnacle.
b) Binnacle loose.
1.4 a) Anti squeak tape Facia creaks not fitted or at front edge incorrectly positioned.
b) Excess windscreen sealer rubbing on facia
c) Weld splatter on bulkhead rubbing on facia
ACTION
SAFE VIN/ PART NO
Remove the console. 759294 Position the self adhesive STC3937 foam pads into the indents in foam pads the lower facia. Ensure that the pads follow the outer profile of the location indents.
Sparingly apply "Krytox" to 708573 the gaiter. 539388
CYK100050L
Wipe "Krytox" sparingly CYK100050L across rear edge of lid hinge.
Remove binnacle and foam 708768 wrap blue connector. 539567 AMR6505 foam wrap
Check the fit of the binnacle on the rear mounting brackets and tighten.
Partially remove the facia 18890 anti - and check for correct rattle tape positioning of anti squeak tape along the front edge.
Partially remove the facia and cut away any excess sealer overhanging the bulkhead top edge.
Partially remove the facia and remove any weld splatter from bulk head top flange at the bottom of the windscreen. Effect localised paint repair as necessary.
1. FACIA continued.....
PROBLEM CAUSE
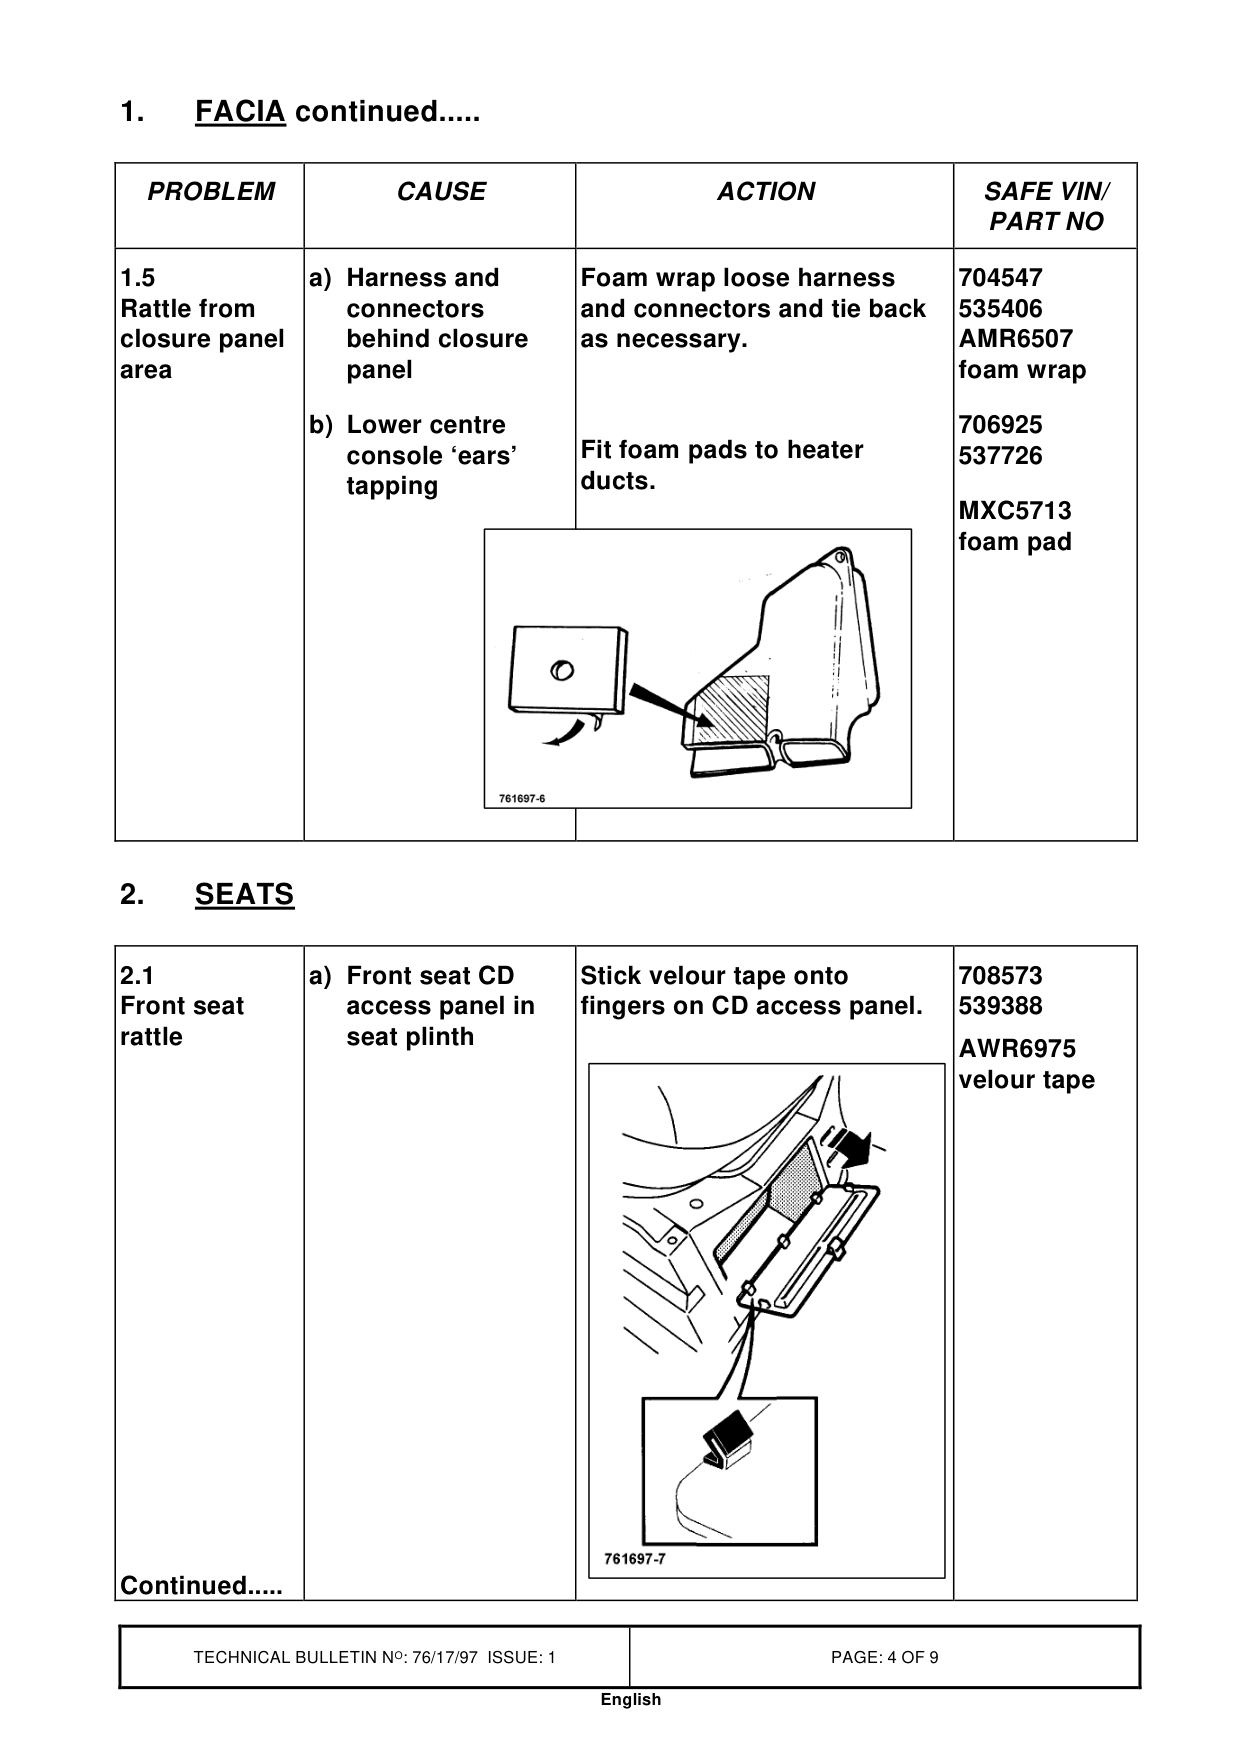
1.5 a) Harness and Rattle from connectors closure panel behind closure area panel
b) Lower centre console ‘ears’ tapping
2. SEATS
2.1 a) Front seat CD Front seat access panel in rattle seat plinth
Continued.....
ACTION
SAFE VIN/ PART NO
Foam wrap loose harness 704547 and connectors and tie back 535406 as necessary. AMR6507 foam wrap
706925 Fit foam pads to heater 537726 ducts. MXC5713 foam pad
Stick velour tape onto 708573 fingers on CD access panel. 539388 AWR6975 velour tape
2. SEATS continued.....
PROBLEM CAUSE
2.1 b) Front seat belt Front seat under floor rattle eyebolt.
c) Lumbar adjuster squeaks.
2.2 a) Rear seat striker Rear seats catch incorrectly rattle adjusted.
b) Rear seat hinge bracket loose.
c) Tools under rear seat.
d) Rear seat belt under floor eyebolt.
e) Rear seat leather squeak.
ACTION
SAFE VIN/ PART NO
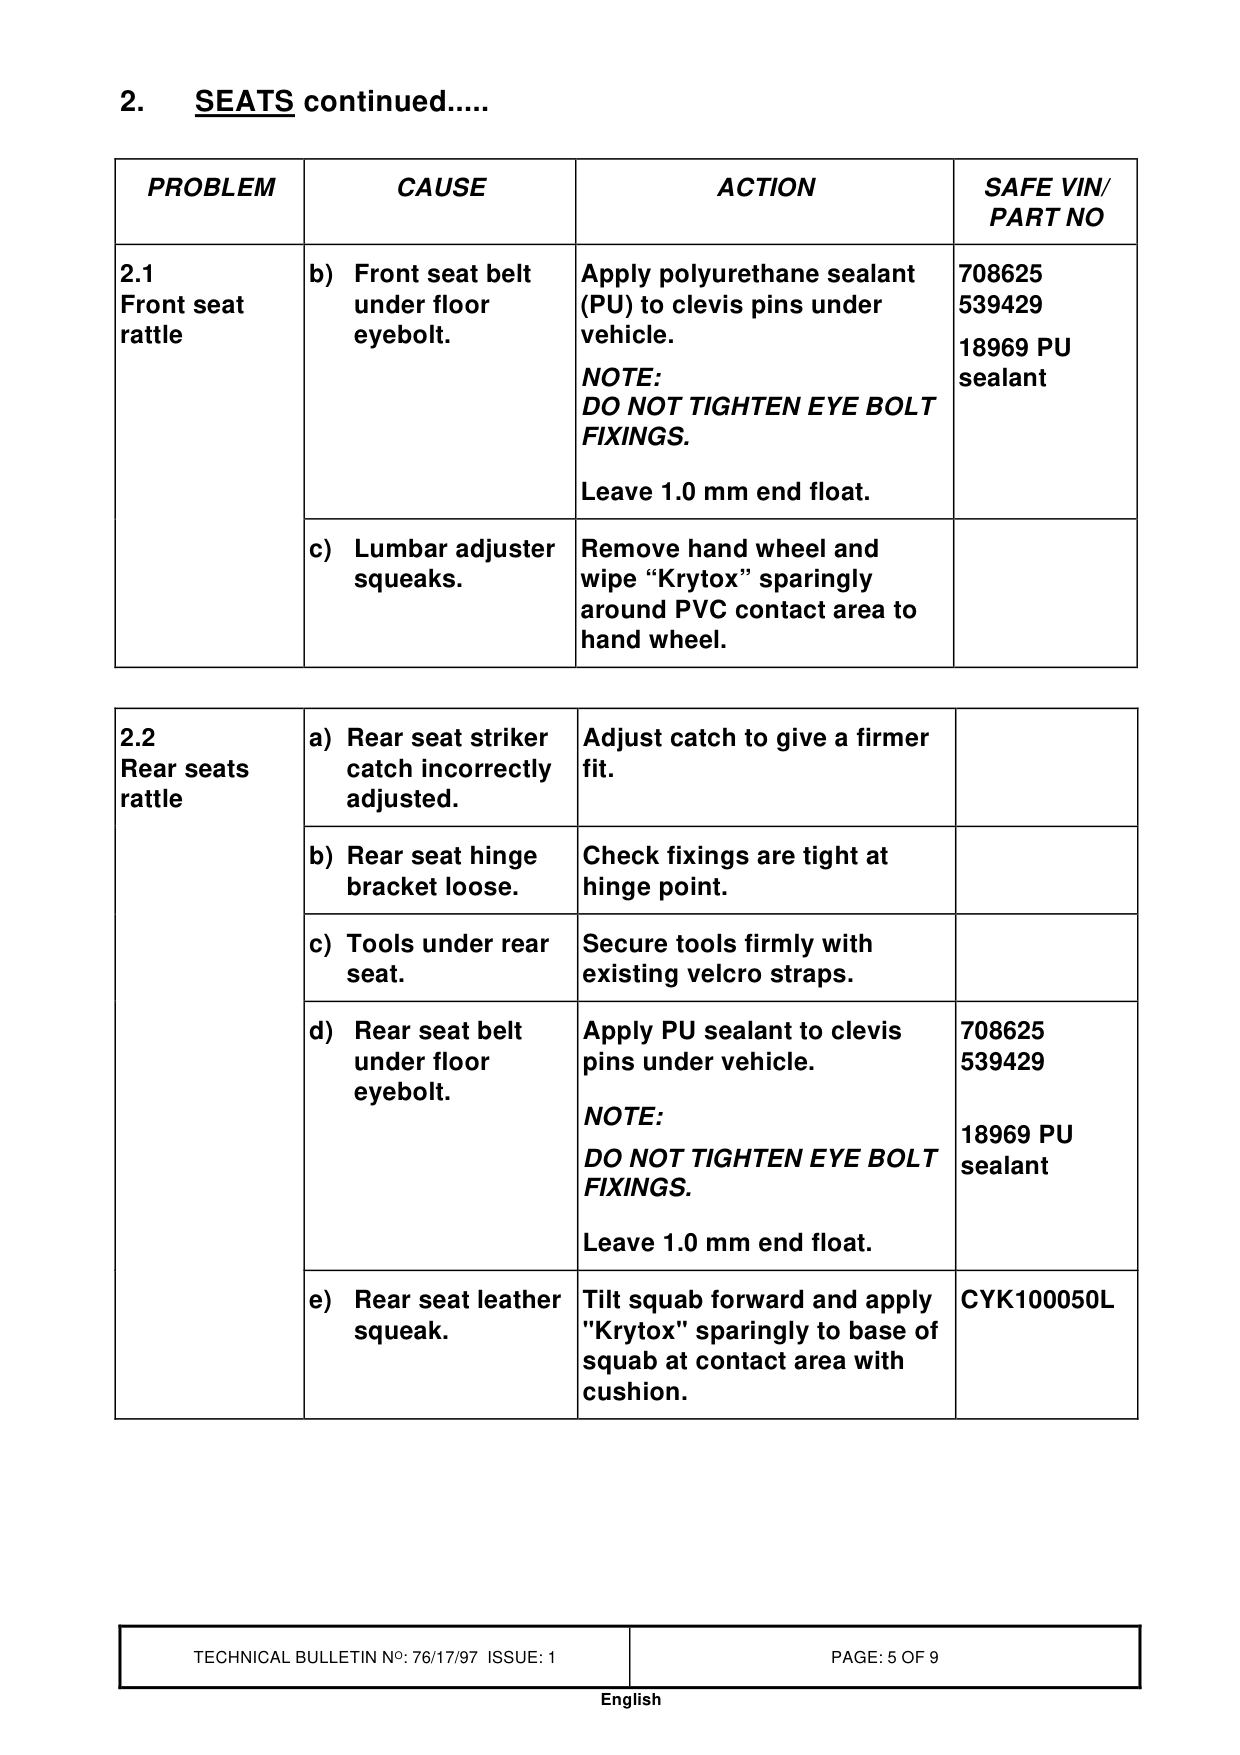
Apply polyurethane sealant 708625 (PU) to clevis pins under 539429 vehicle. 18969 PU
NOTE:
sealant DO NOT TIGHTEN EYE BOLT FIXINGS.
Leave 1.0 mm end float.
Remove hand wheel and wipe “Krytox” sparingly around PVC contact area to hand wheel.
Adjust catch to give a firmer fit.
Check fixings are tight at hinge point.
Secure tools firmly with existing velcro straps.
708625 Apply PU sealant to clevis 539429 pins under vehicle.
NOTE:
18969 PU DO NOT TIGHTEN EYE BOLT sealant FIXINGS.
Leave 1.0 mm end float.
Tilt squab forward and apply CYK100050L "Krytox" sparingly to base of squab at contact area with cushion.
3. HEAD LINING
PROBLEM CAUSE
3.1 a) Tweeter 'A' post rattle connector behind ‘A’ post trim
3.2 a) Interior light Rattle in harness centre of connector headlining at interior light
b) Redundant air conditioning harness rattle.
3.3 a) Ultra sonic Rattle top of receiver 'B' post LH connector.
3.4 a) Harness / washer Rattle in tubes not lower edge of secured head lining / cant rail area
4. SIDE DOORS
4.1 a) Stiffener plate Side door touching door rattle skin
b) Door harness.
ACTION
SAFE VIN/ PART NO
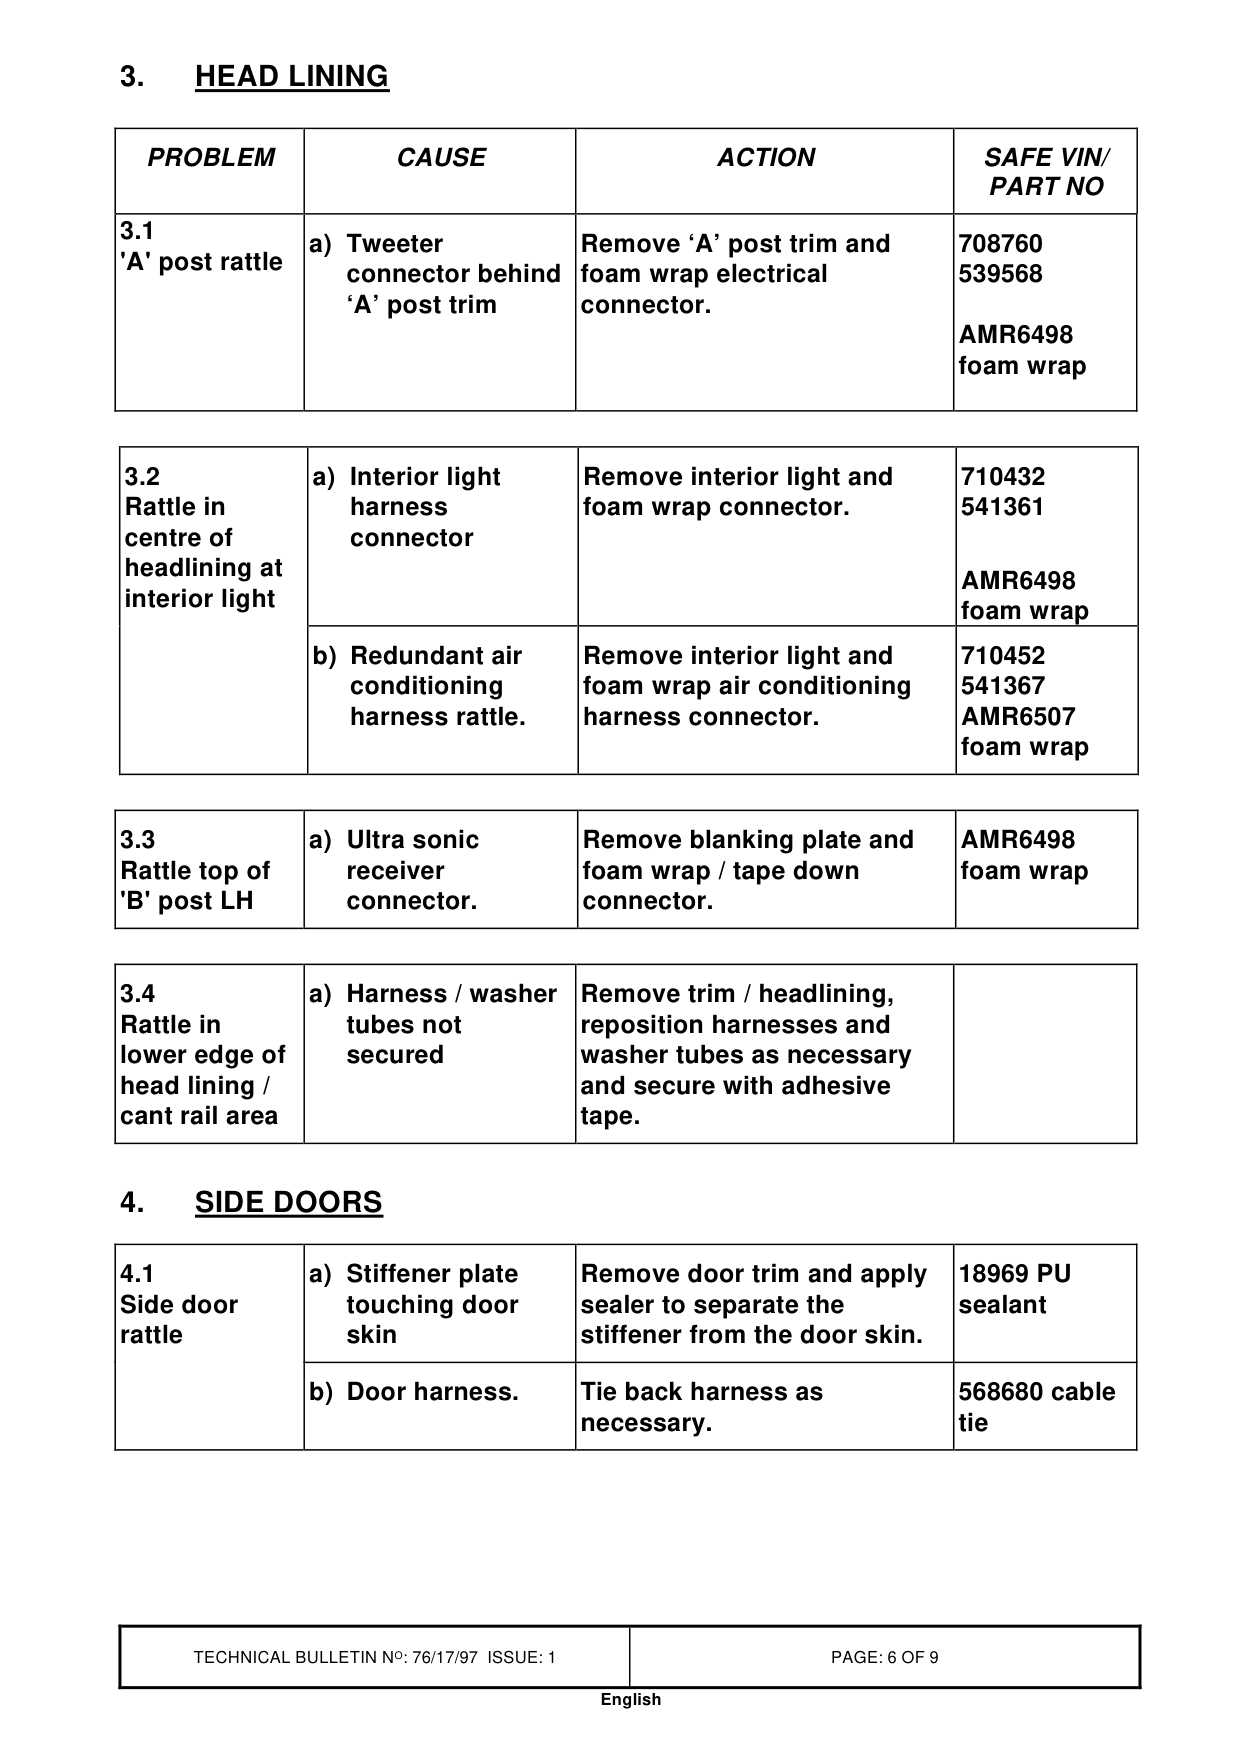
Remove ‘A’ post trim and 708760 foam wrap electrical 539568 connector. AMR6498 foam wrap
Remove interior light and 710432 foam wrap connector. 541361
AMR6498 foam wrap
Remove interior light and 710452 foam wrap air conditioning 541367 harness connector. AMR6507 foam wrap
Remove blanking plate and AMR6498 foam wrap / tape down foam wrap connector.
Remove trim / headlining, reposition harnesses and washer tubes as necessary and secure with adhesive tape.
Remove door trim and apply 18969 PU sealer to separate the sealant stiffener from the door skin.
Tie back harness as 568680 cable necessary. tie
5. REAR END DOOR
PROBLEM CAUSE
5.1 a) Rear end door Rear end door dovetail setting dovetail bounce.
5.2 a) Harnesses and Rear end door connectors internal fittings rattling
b) Interior release link rod
Continued.....
ACTION
SAFE VIN/ PART NO
Set dovetail and striker to give full engagement of wedge on the lower face of the dovetail.
709333 Remove door trim and foam 540114 wrap harness connectors. Tape loose harnesses back to AMR6498 inner door panel. foam wrap DO NOT DAMAGE PAINT!
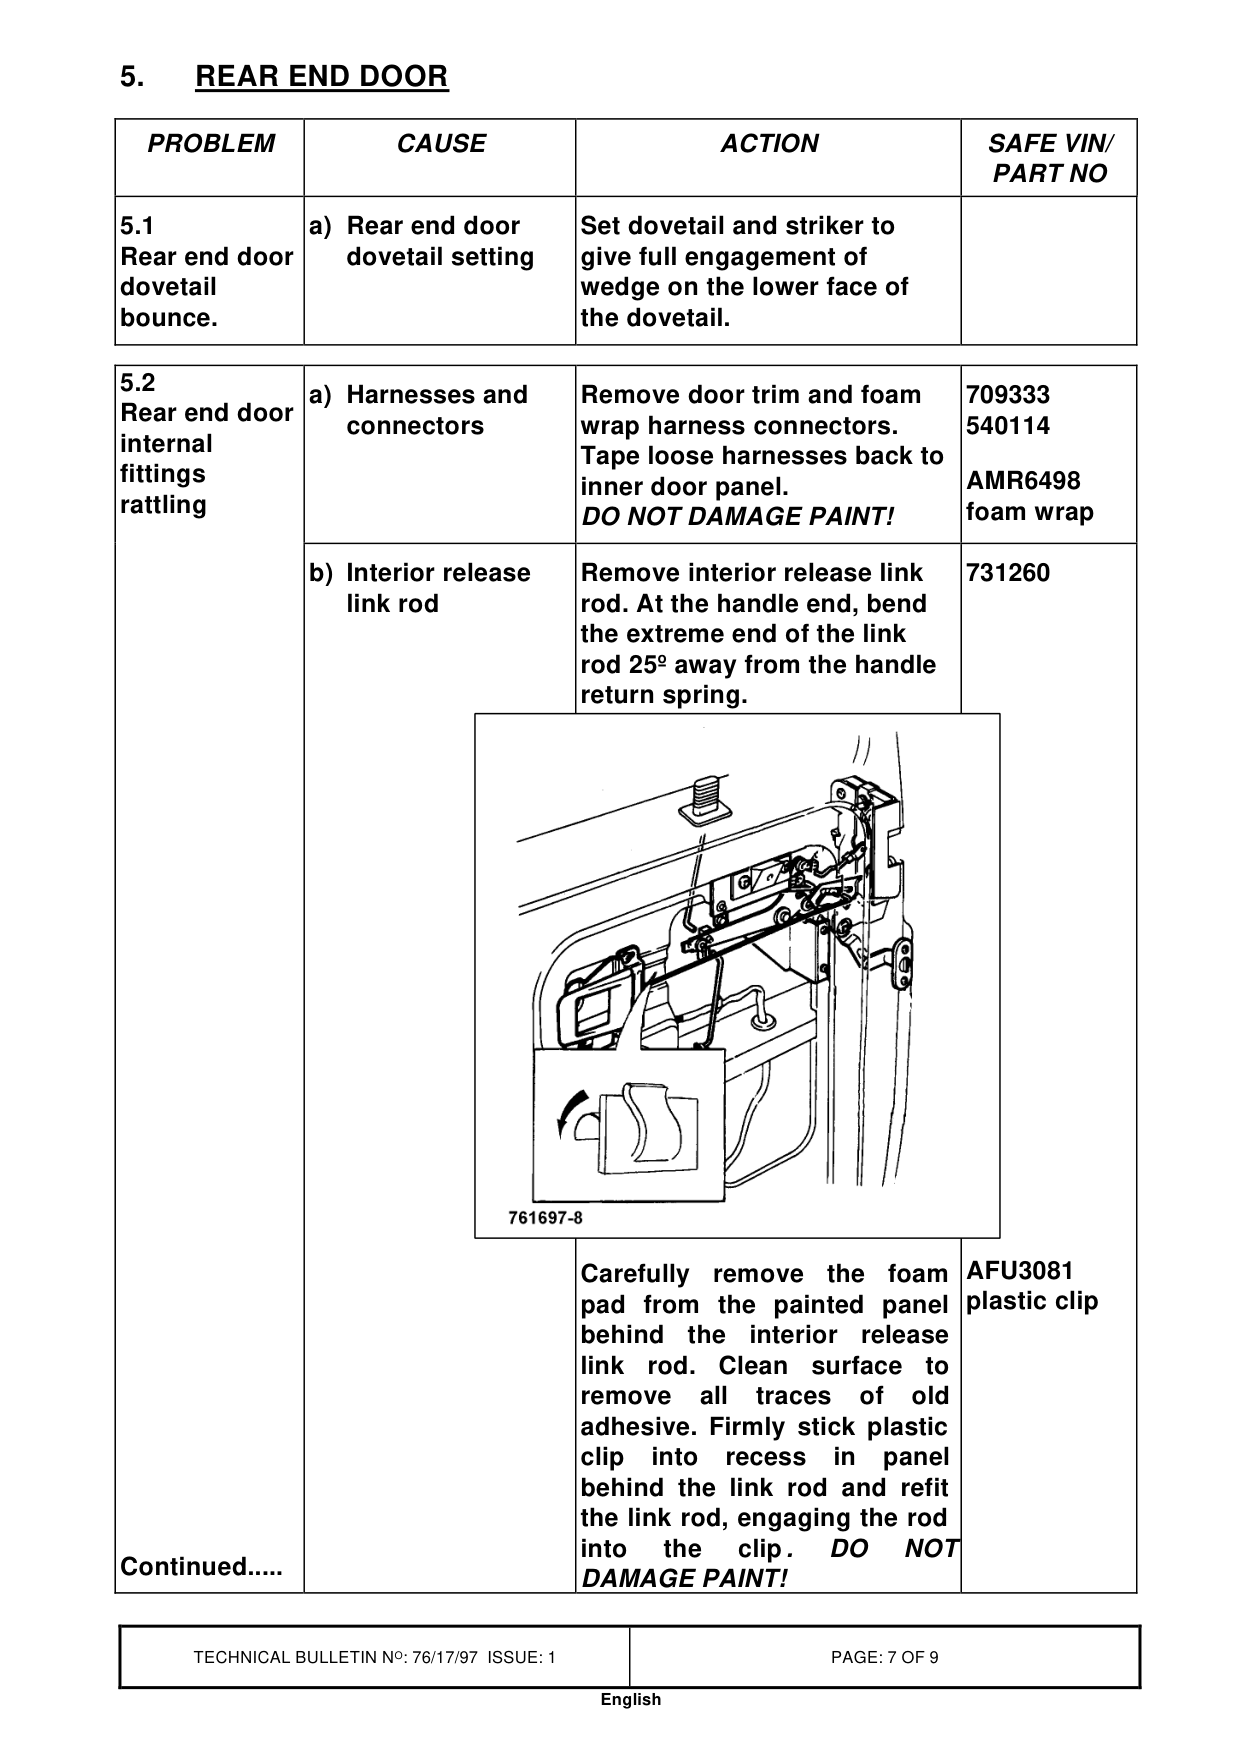
Remove interior release link 731260 rod. At the handle end, bend the extreme end of the link rod 25º away from the handle return spring.
AFU3081 Carefully remove the foam plastic clip pad from the painted panel behind the interior release link rod. Clean surface to remove all traces of old adhesive. Firmly stick plastic clip into recess in panel behind the link rod and refit the link rod, engaging the rod into the clip . DO NOT DAMAGE PAINT!
5. REAR END DOOR continued.....
PROBLEM CAUSE
5.2 c) Cage nuts loose Rear end door in retainers. internal fittings rattling
d) Rear seat belt eye bolts.
5.3 a) Air conditioning Rattle at connectors and bottom of left harness. hand door post
5.4 a) Bumper end caps Rattle at tapping on body. bottom of either door post.
6. RESTRAINTS
6.1 a) Clearance at seat Seat belt belt anchorage lower fixings bolt. rattle.
b) Rear seat belt eye bolts.
ACTION
SAFE VIN/ PART NO
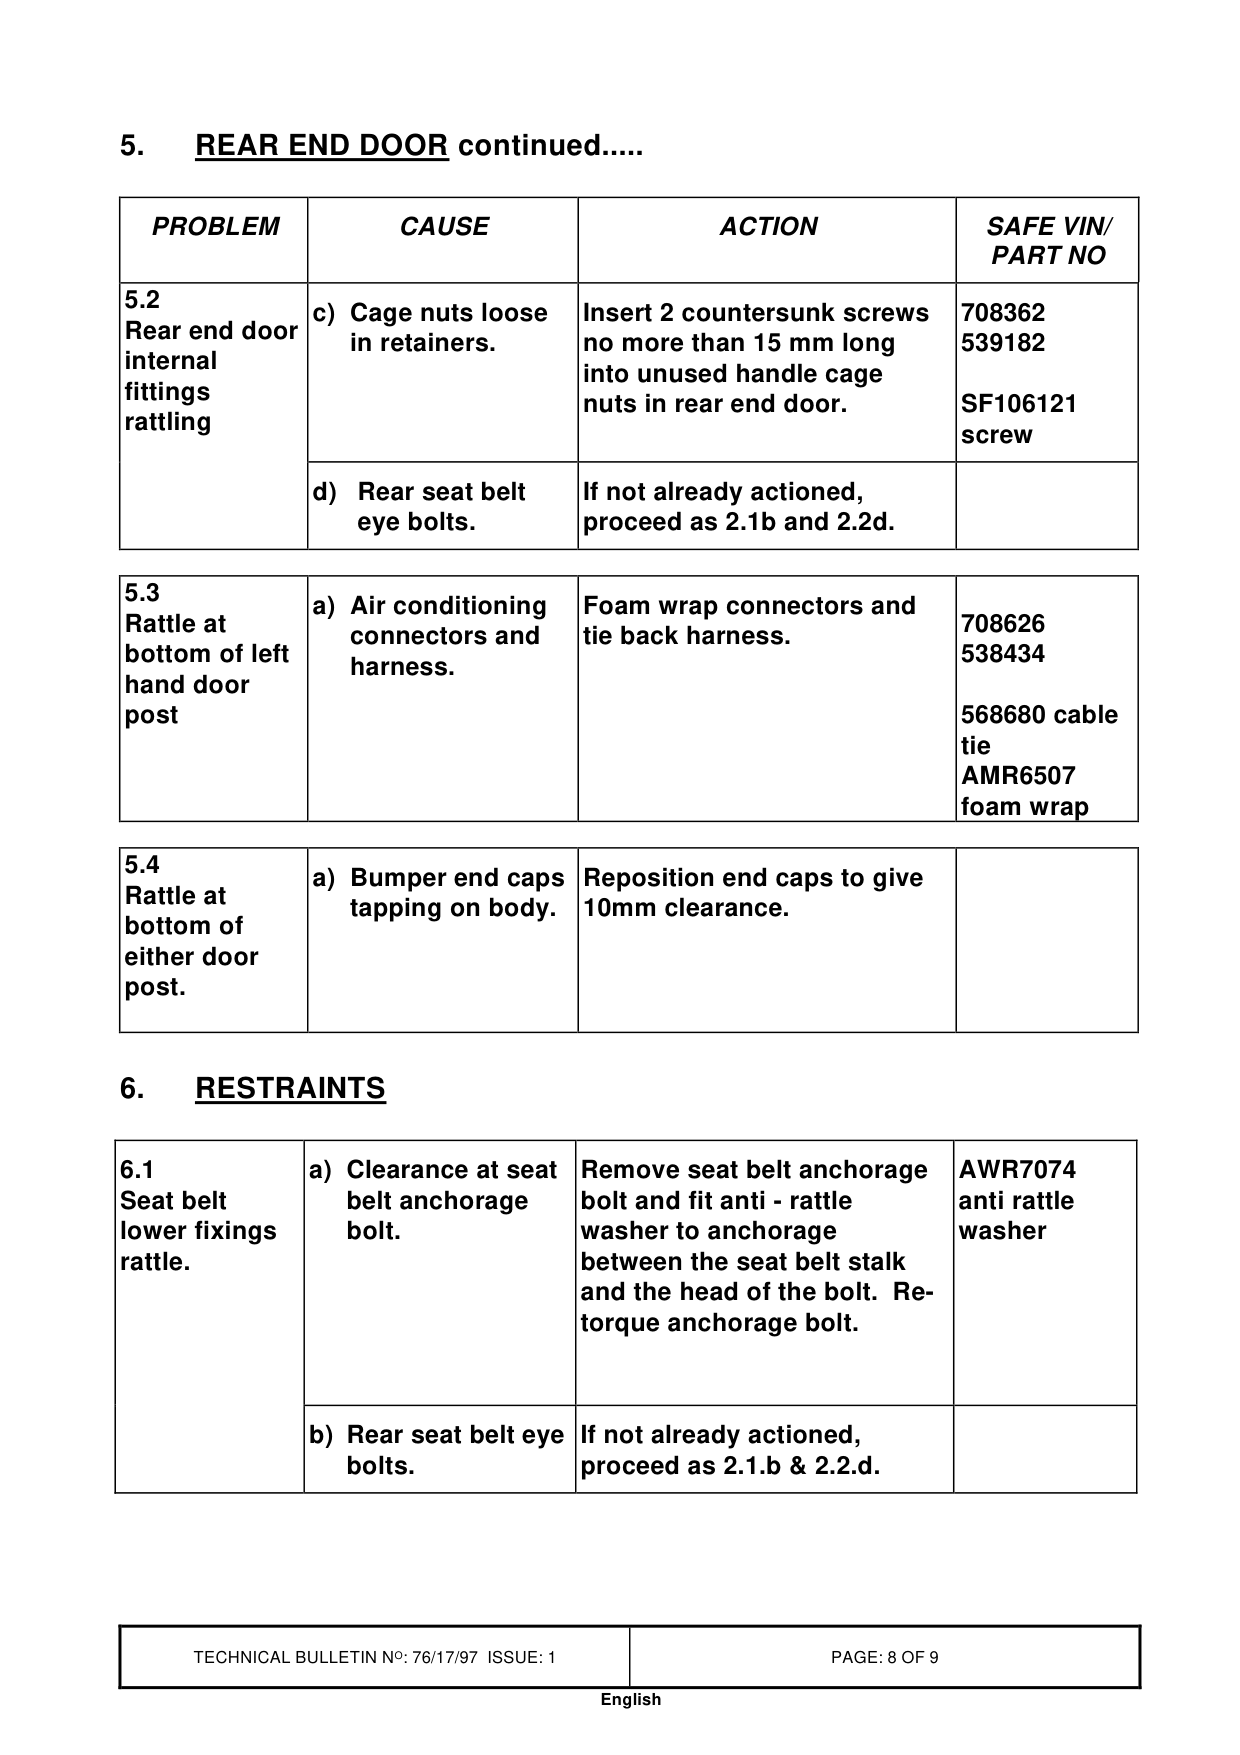
Insert 2 countersunk screws 708362 no more than 15 mm long 539182 into unused handle cage nuts in rear end door. SF106121 screw
If not already actioned, proceed as 2.1b and 2.2d.
Foam wrap connectors and 708626 tie back harness. 538434
568680 cable tie AMR6507 foam wrap
Reposition end caps to give 10mm clearance.
Remove seat belt anchorage AWR7074 bolt and fit anti - rattle anti rattle washer to anchorage washer between the seat belt stalk and the head of the bolt. Retorque anchorage bolt.
If not already actioned, proceed as 2.1.b & 2.2.d.
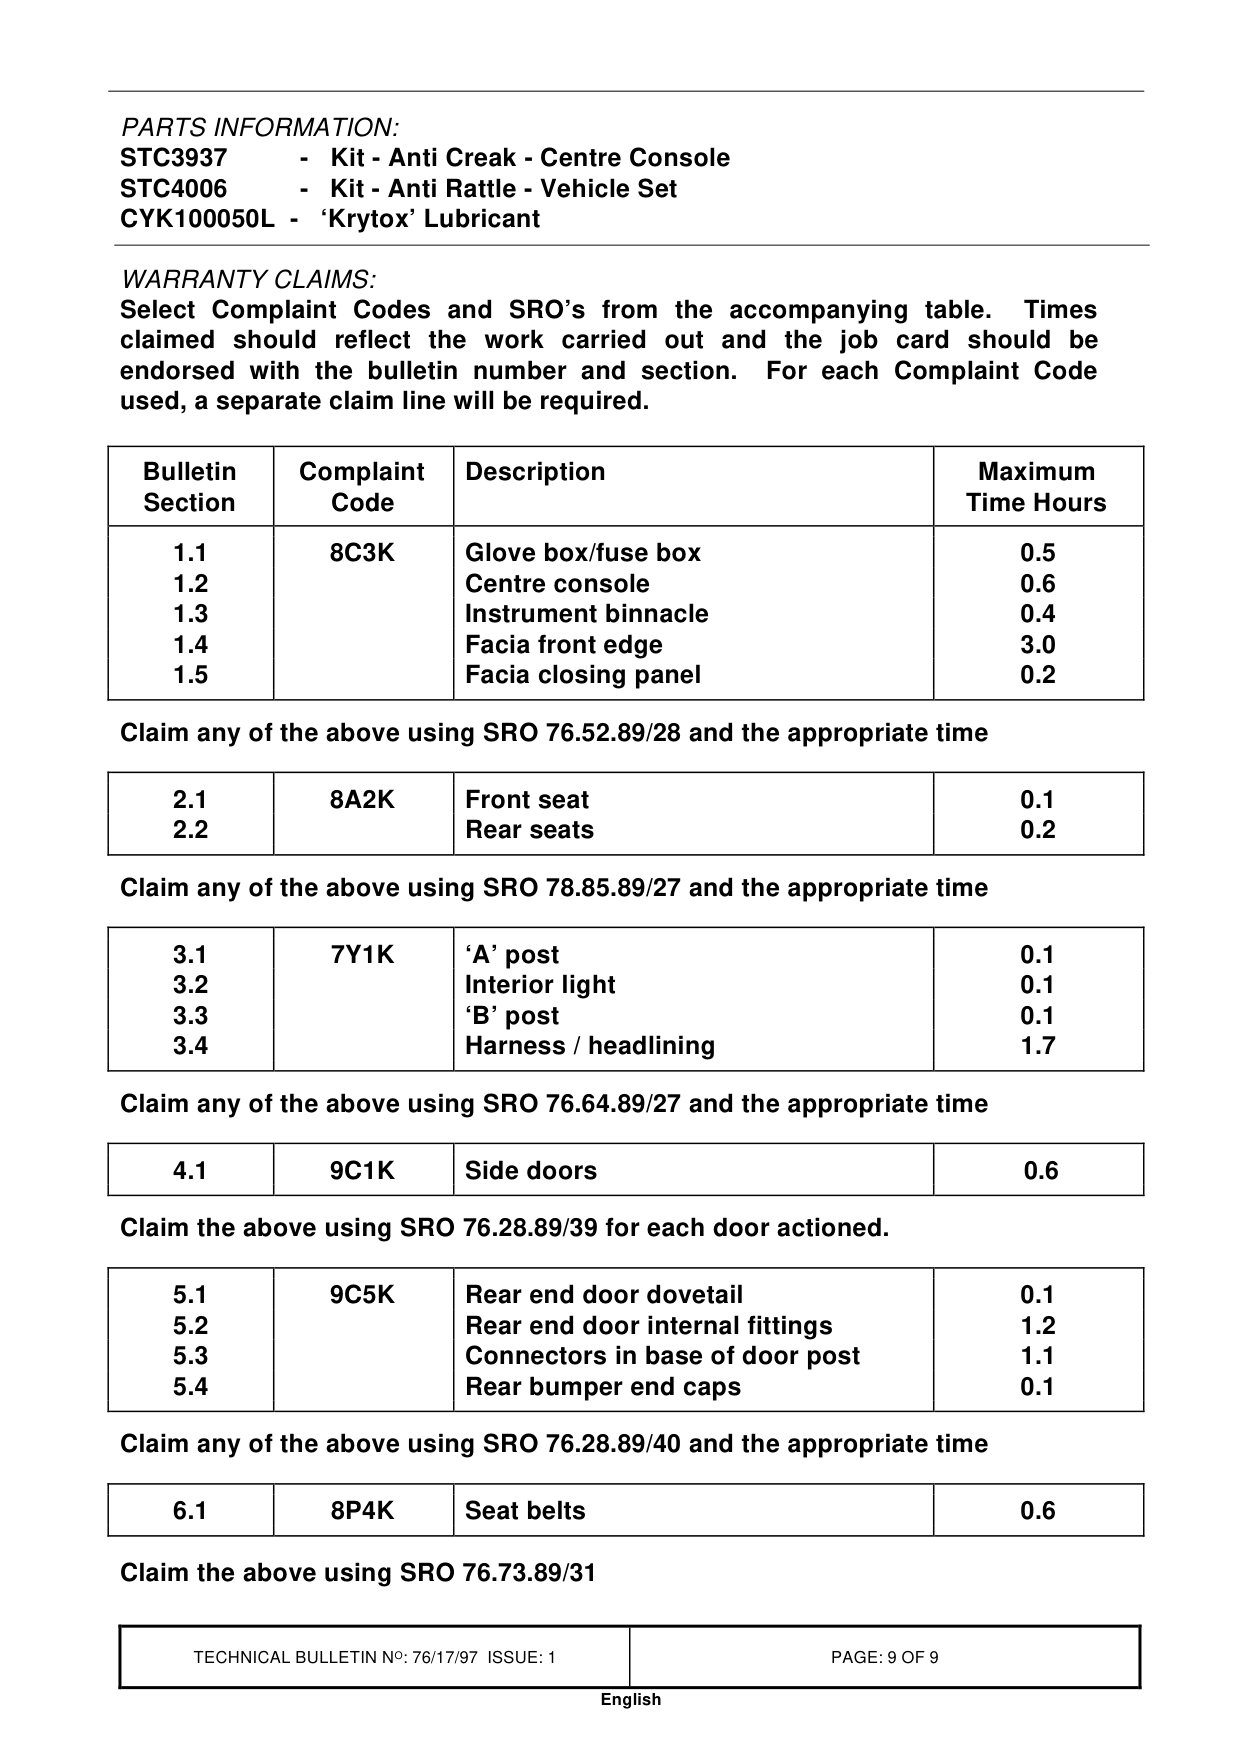
PARTS INFORMATION:
STC3937 - Kit - Anti Creak - Centre Console STC4006 - Kit - Anti Rattle - Vehicle Set CYK100050L - ‘Krytox’ Lubricant
WARRANTY CLAIMS: Select Complaint Codes and SRO’s from the accompanying table. Times claimed should reflect the work carried out and the job card should be endorsed with the bulletin number and section. For each Complaint Code used, a separate claim line will be required.
Bulletin Complaint Description Section Code
1.1 8C3K Glove box/fuse box 1.2 Centre console 1.3 Instrument binnacle 1.4 Facia front edge 1.5 Facia closing panel
Claim any of the above using SRO 76.52.89/28 and the appropriate time
2.1 8A2K Front seat 2.2 Rear seats
Claim any of the above using SRO 78.85.89/27 and the appropriate time
3.1 7Y1K ‘A’ post 3.2 Interior light 3.3 ‘B’ post 3.4 Harness / headlining
Claim any of the above using SRO 76.64.89/27 and the appropriate time
4.1 9C1K Side doors
Claim the above using SRO 76.28.89/39 for each door actioned.
5.1 9C5K Rear end door dovetail 5.2 Rear end door internal fittings 5.3 Connectors in base of door post 5.4 Rear bumper end caps
Claim any of the above using SRO 76.28.89/40 and the appropriate time
6.1 8P4K Seat belts
Claim the above using SRO 76.73.89/31
Maximum Time Hours
0.5 0.6 0.4 3.0 0.2
0.1 0.2
0.1 0.1 0.1 1.7
0.6
0.1 1.2 1.1 0.1
0.6
Parts & tools for this job For Land Rover Discovery
- TOOLTrim removal tool kitSearch: trim removal tool kit
- PARTTouch-up paintSearch: Land Rover touch up paint
- PARTPanel clip assortmentSearch: Land Rover panel clips assortment
Links open Amazon search results in a new tab. As an Amazon Associate I earn from qualifying purchases.