
Sunroof jamming/fails to operate
- Make
- Land Rover
- Model
- Discovery Technical Bulletins
- Section
- Sunroof jamming/fails to operate › Sunroof jamming/fails to operate
SUNROOF JAMMING/FAILS TO OPERATE
- Model
- Discovery with factory fitted Sunroof Discovery with factory fitted Sunroof
- Affected vehicles
- upto 197950 upto 528721
- Date
- 1997-04-30
- Reference
- 30/04/97
Bulletin text
Sunroof - Jamming or Fails To Operate
MODEL
Discovery with factory fitted Sunroof Discovery with factory fitted Sunroof
DETAIL
In the event of a sunroof jamming or not operating on an electric sunroof check that the operating switch, ECU, and motor are operating correctly. On a manual sunroof check that the handle and gearbox are operating correctly (see procedure for gearbox operation). If no faults are found with the above components it will be necessary to replace the complete sunroof assembly.
Note: Do not remove the two yellow timing lock pegs until the new sunroof is fully fitted .
Refer to previous bulletins 76/13/96 and 76/06/96 for additional information
ACTION REQUIRED
Upon customer complaint of a sunroof jamming or not operating follow the process detailed below.
PARTS INFORMATION
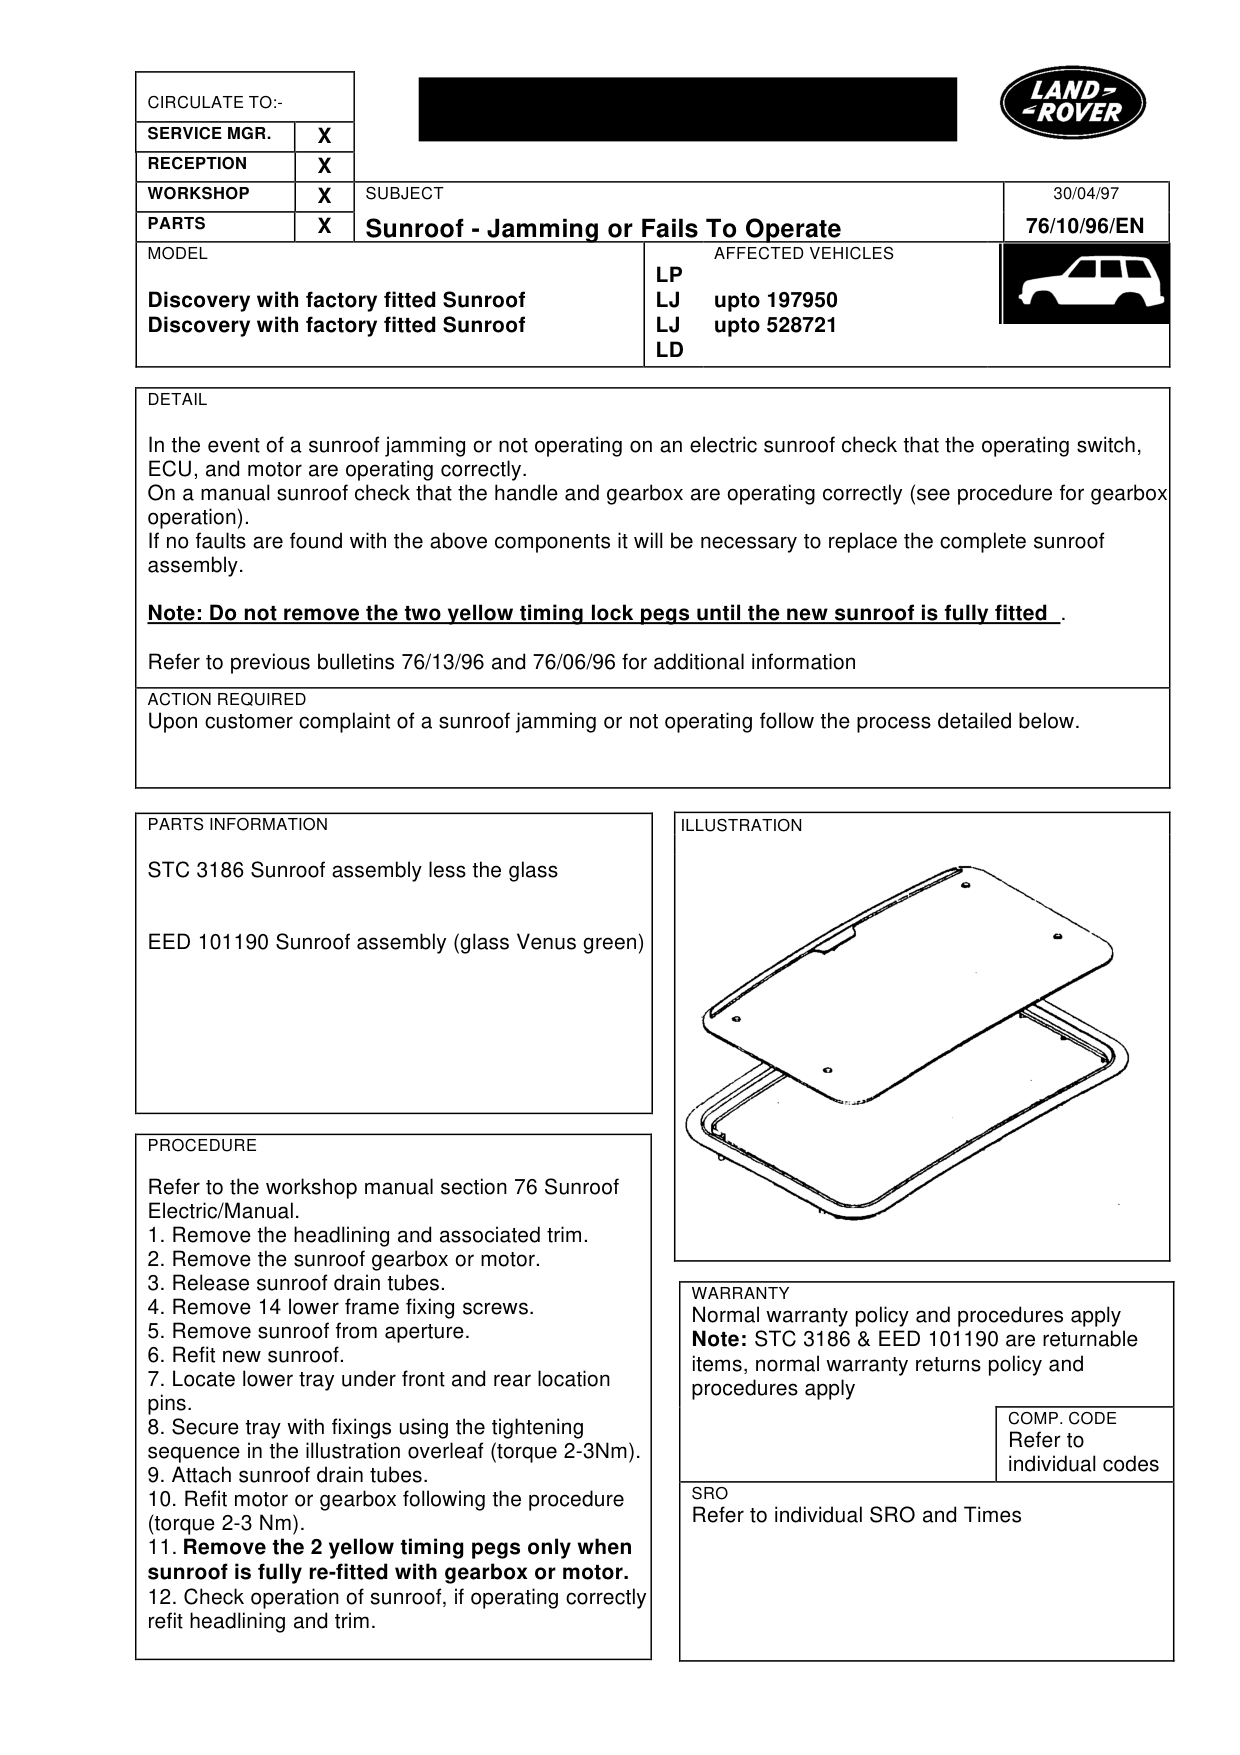
STC 3186 Sunroof assembly less the glass
EED 101190 Sunroof assembly (glass Venus green)
PROCEDURE
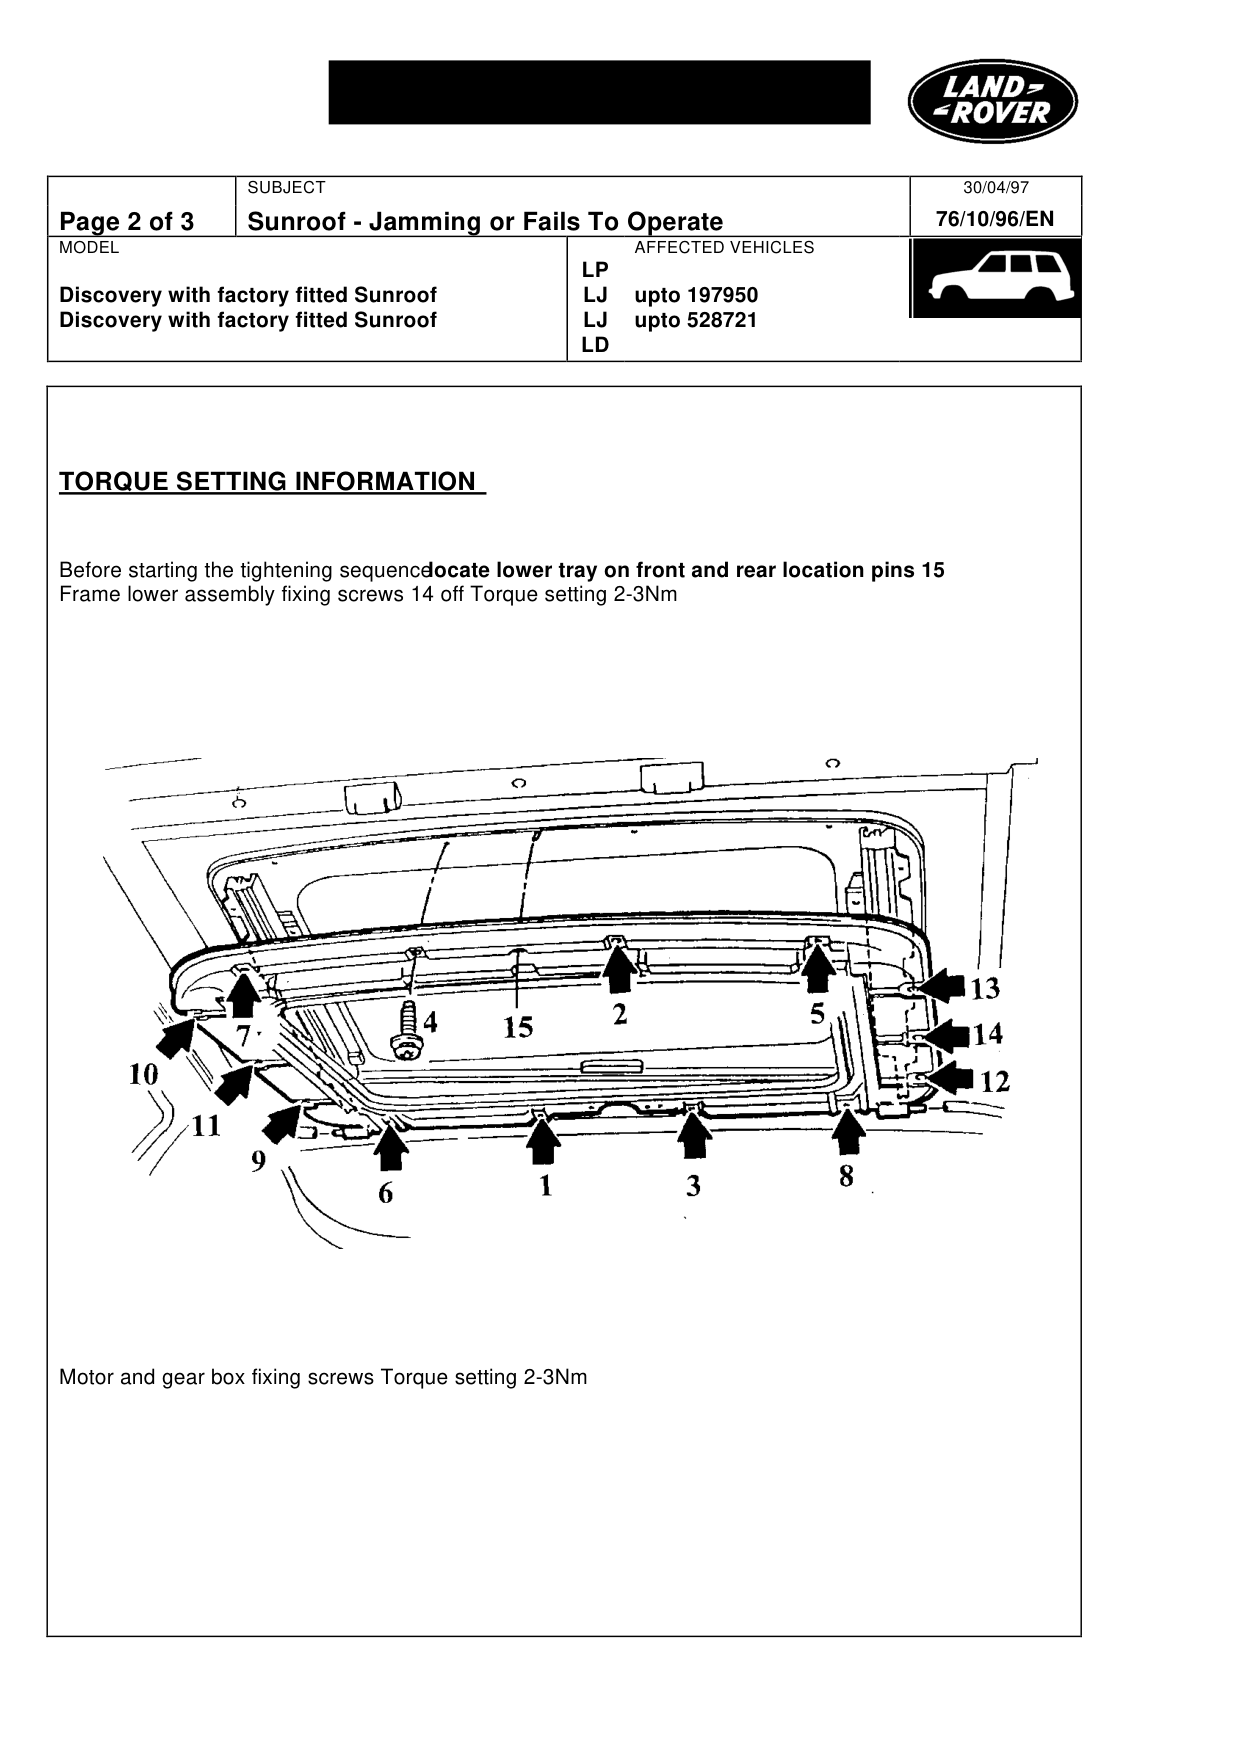
Refer to the workshop manual section 76 Sunroof Electric/Manual. 1. Remove the headlining and associated trim. 2. Remove the sunroof gearbox or motor. 3. Release sunroof drain tubes. 4. Remove 14 lower frame fixing screws. 5. Remove sunroof from aperture. 6. Refit new sunroof. 7. Locate lower tray under front and rear location pins. 8. Secure tray with fixings using the tightening sequence in the illustration overleaf (torque 2-3Nm). 9. Attach sunroof drain tubes. 10. Refit motor or gearbox following the procedure (torque 2-3 Nm). 11. Remove the 2 yellow timing pegs only when sunroof is fully re-fitted with gearbox or motor. 12. Check operation of sunroof, if operating correctly refit headlining and trim.
30/04/97
76/10/96/EN
AFFECTED VEHICLES
LP LJ upto 197950 LJ upto 528721 LD
WARRANTY
Normal warranty policy and procedures apply Note: STC 3186 & EED 101190 are returnable items, normal warranty returns policy and procedures apply
COMP. CODE
Refer to individual codes
SRO
Refer to individual SRO and Times
Sunroof - Jamming or Fails To Operate
MODEL
Discovery with factory fitted Sunroof Discovery with factory fitted Sunroof
TORQUE SETTING INFORMATION
Before starting the tightening sequence locate lower tray on front and rear location pins 15 Frame lower assembly fixing screws 14 off Torque setting 2-3Nm
Motor and gear box fixing screws Torque setting 2-3Nm
30/04/97 76/10/96/EN
AFFECTED VEHICLES
LP LJ upto 197950 LJ upto 528721 LD
Sunroof Repair / Diagnostic Bulletin
MODEL
Discovery with factory fitted Sunroof Discovery with factory fitted Sunroof
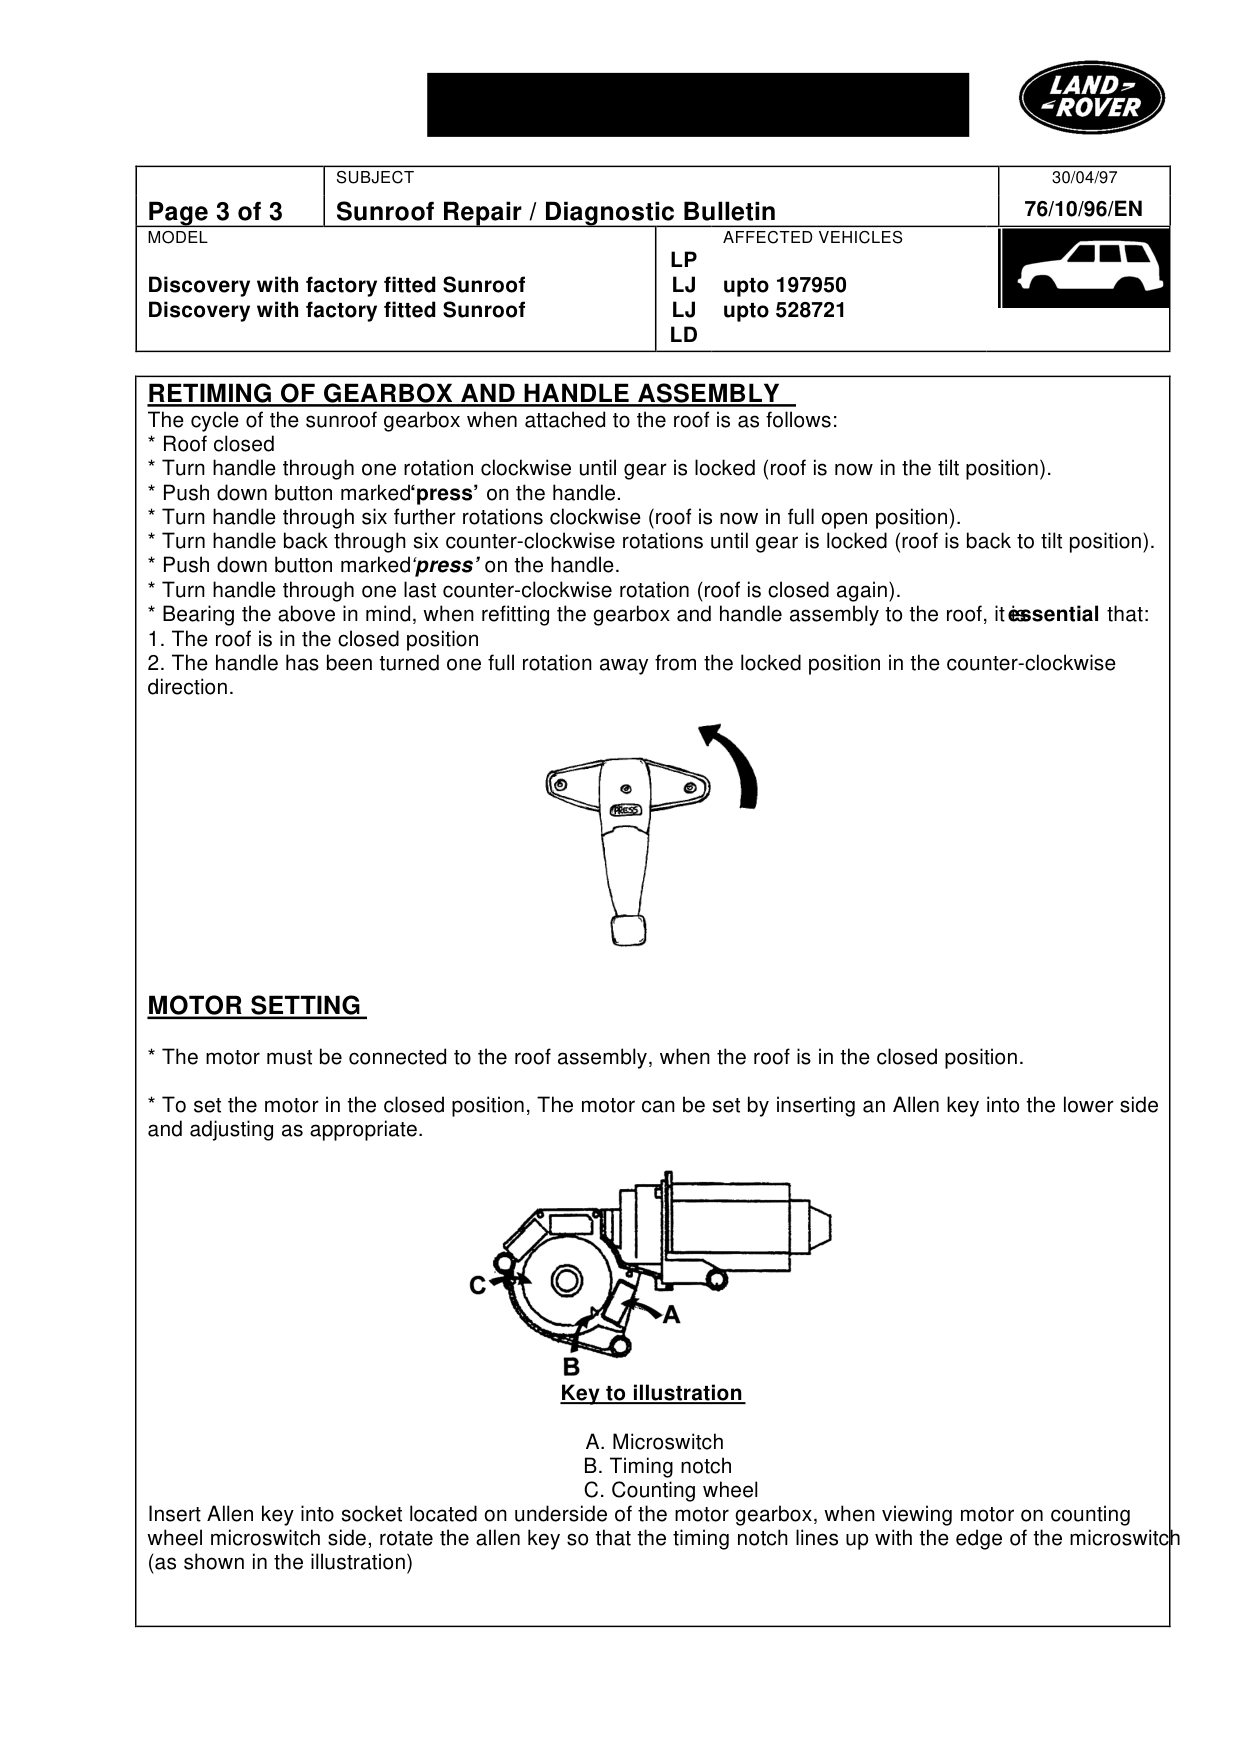
RETIMING OF GEARBOX AND HANDLE ASSEMBLY The cycle of the sunroof gearbox when attached to the roof is as follows: * Roof closed * Turn handle through one rotation clockwise until gear is locked (roof is now in the tilt position). * Push down button marked ‘press’ on the handle. * Turn handle through six further rotations clockwise (roof is now in full open position). * Turn handle back through six counter-clockwise rotations until gear is locked (roof is back to tilt position). * Push down button marked ‘ press’ on the handle. * Turn handle through one last counter-clockwise rotation (roof is closed again). * Bearing the above in mind, when refitting the gearbox and handle assembly to the roof, it is 1. The roof is in the closed position 2. The handle has been turned one full rotation away from the locked position in the counter-clockwise direction.
MOTOR SETTING
* The motor must be connected to the roof assembly, when the roof is in the closed position.
* To set the motor in the closed position, The motor can be set by inserting an Allen key into the lower side and adjusting as appropriate.
Key to illustration
A. Microswitch B. Timing notch C. Counting wheel Insert Allen key into socket located on underside of the motor gearbox, when viewing motor on counting wheel microswitch side, rotate the allen key so that the timing notch lines up with the edge of the microswitch (as shown in the illustration)
30/04/97 76/10/96/EN
AFFECTED VEHICLES
LP LJ upto 197950 LJ upto 528721 LD
essential that:
Parts & tools for this job For Land Rover Discovery
- TOOLDigital multimeterSearch: automotive digital multimeter
- PARTAssorted fuse kitSearch: car fuse assortment kit
- TOOLWire crimper and connector kitSearch: wire crimper connector kit
Links open Amazon search results in a new tab. As an Amazon Associate I earn from qualifying purchases.