
Kickdown cable re-setting procedure
- Make
- Land Rover
- Model
- Discovery Technical Bulletins
- Section
- Kickdown cable re-setting procedure › Kickdown cable re-setting procedure
KICKDOWN CABLE RE-SETTING PROCEDURE
- Model
- Discovery Automatic Diesel with EDC
- Affected vehicles
- All
- Date
- 1996-04-03
- Reference
- 03/04/96
Bulletin text
Kickdown Cable Re-Setting Procedure
MODEL
Discovery Automatic Diesel with EDC
DETAIL
It would appear from reports received that clarification is required regarding the process for achieving the correct kickdown cable setting when replacing or re-setting a cable. The workshop manual does not clearly define this processand this bulletin should be used incojunction with the manual when undertaking any service repairs in the area..
ACTION REQUIRED
Vehicles that require the kickdown cable to be replaced or re-set, refer to the process detailed below. This information should be used inconjunction with the workshop manual procedure.
PARTS INFORMATION
Not applicable
PROCEDURE
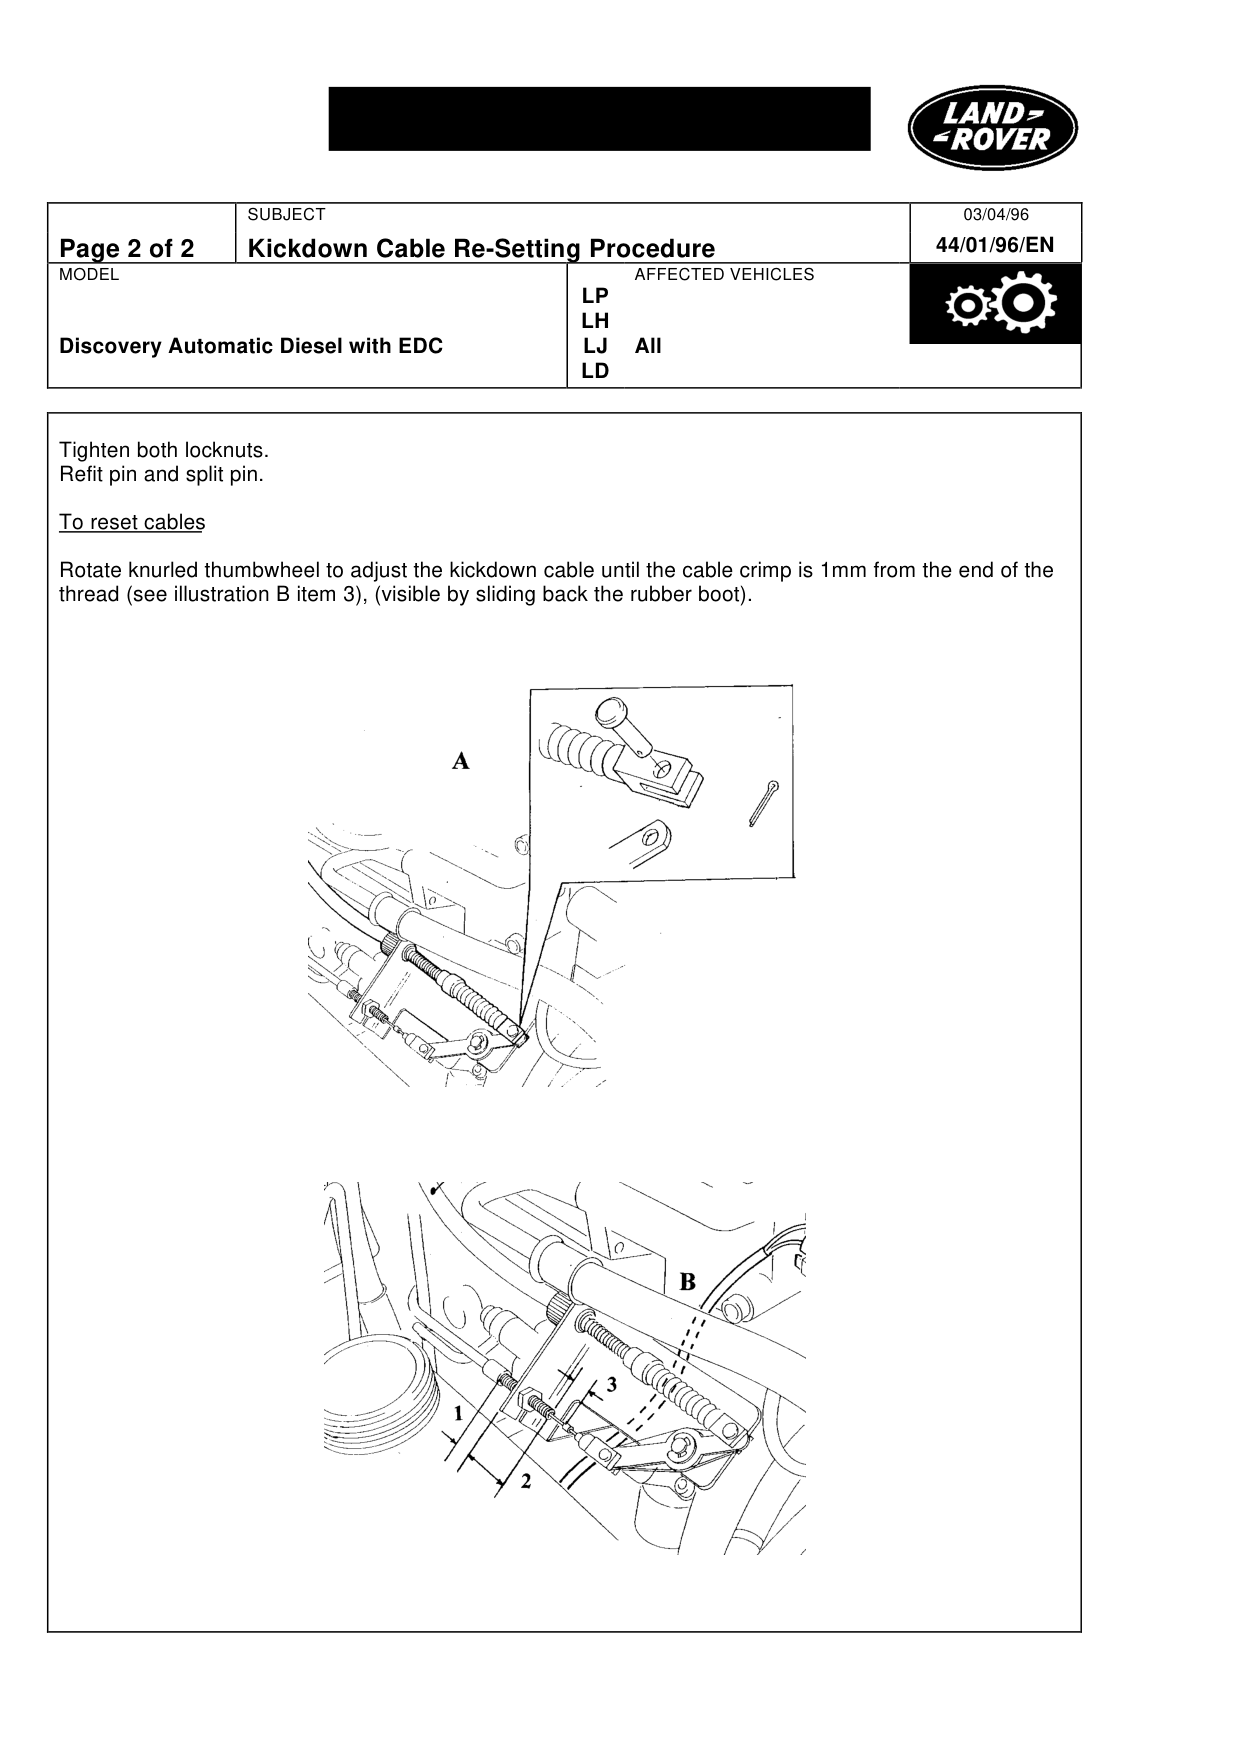
Process for remove and re-fitting kickdown cable. See illustration ‘A’ Remove split pin from pin. Remove pin from clevis. Undo locknut from thread. Remove cable from bracket.
To refit kickdown cable Ensure one locknut is at the base of the thread; and the other is removed to allow the cable clevis end to pass through the smaller hole in the kickdown bracket. Push cable through hole until it abuts against the 1st locknut; screw on the 2nd locknut. Adjust the thread position until either; 6 threads are visible behind the 1st locknut (see illustration ‘B’ item 1) or a dimension of 28mm is achieved between the rear face of the bracket and the end of the threads (see illustration ‘B’ item 2). Continued.........................
03/04/96
44/01/96/EN
AFFECTED VEHICLES
LP LH LJ All LD
WARRANTY
Normal warranty policy and procedures apply
COMP. CODE
4F5A
SRO
44.30.01 Remove and refit cable and /or adjust 00.10 hour
Kickdown Cable Re-Setting Procedure
MODEL
Discovery Automatic Diesel with EDC
Tighten both locknuts. Refit pin and split pin.
To reset cables
Rotate knurled thumbwheel to adjust the kickdown cable until the cable crimp is 1mm from the end of the thread (see illustration B item 3), (visible by sliding back the rubber boot).
03/04/96 44/01/96/EN
AFFECTED VEHICLES
LP LH LJ All LD
Parts & tools for this job For Land Rover Discovery
- TOOLTorque wrenchSearch: 3/8 inch torque wrench
- TOOLSocket setSearch: socket set metric
- BOOKHaynes manualSearch: Haynes manual Land Rover Discovery
Links open Amazon search results in a new tab. As an Amazon Associate I earn from qualifying purchases.