
Transmission noise in cab area
- Make
- Land Rover
- Model
- Discovery Technical Bulletins
- Section
- Transmission noise in cab area › Transmission noise in cab area
TRANSMISSION NOISE IN CAB AREA
- Model
- Discovery Automatic Derivatives Discovery Automatic Derivatives
- Affected vehicles
- 501920 onwards 163104 onwards
- Date
- 1997-06-03
- Reference
- 03/06/97
Bulletin text
Transmission Noise - In Cab Area
MODEL
Discovery Automatic Derivatives Discovery Automatic Derivatives
DETAIL
It has been found on extensive road tests that transmission noise is transmitted into the cab area of some vehicles at around 30 mph (49Km) and above. Engineers have found that a sealing gasket underneath the automatic gear lever housing has been damaged when fitted, or when service repairs have been carried out.
To overcome this concern during vehicle manufacture additional care points have been introduced to eliminate in cab noise from this area. Any vehicle exhibiting in cab transmission noise from the above Vin numbers should be inspected to ensure that the gasket is correctly fitted.
ACTION REQUIRED
Upon customer complaint of transmission noise evident in the cab area, the gasket identified should be checked for displacement and if found to be damaged, the process detailed below should be followed.
PARTS INFORMATION
BTR 9815 - Sound deadening pad - if necessary
Sikaflex 221 - Black (Refer to bulletin 131/93 for supplier information) - locally sourced
PROCEDURE
Refer to the workshop manual section 44 Visual Check
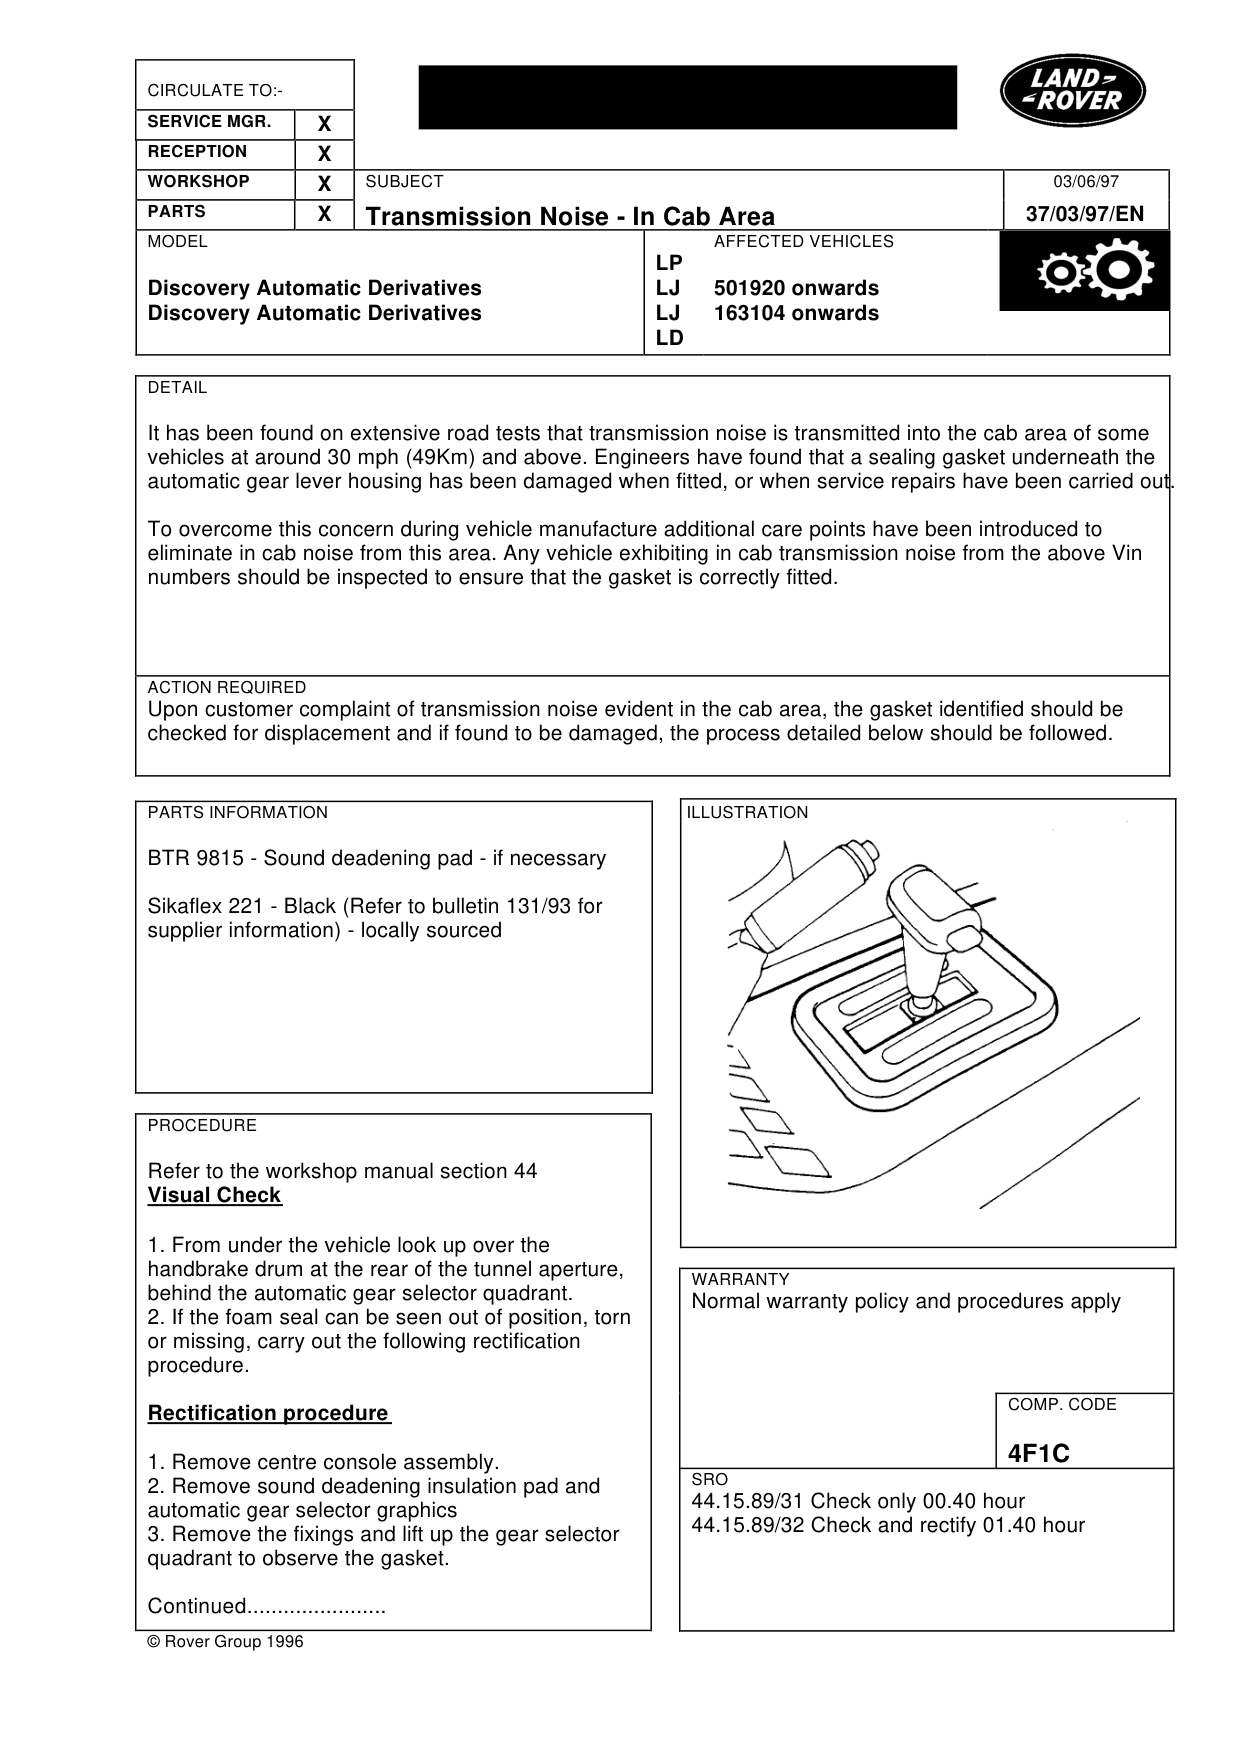
1. From under the vehicle look up over the handbrake drum at the rear of the tunnel aperture, behind the automatic gear selector quadrant. 2. If the foam seal can be seen out of position, torn or missing, carry out the following rectification procedure.
Rectification procedure
1. Remove centre console assembly. 2. Remove sound deadening insulation pad and automatic gear selector graphics 3. Remove the fixings and lift up the gear selector quadrant to observe the gasket.
Continued.......................
© Rover Group 1996
03/06/97
37/03/97/EN
AFFECTED VEHICLES
LP LJ 501920 onwards LJ 163104 onwards LD
WARRANTY
Normal warranty policy and procedures apply
COMP. CODE
4F1C
SRO
44.15.89/31 Check only 00.40 hour 44.15.89/32 Check and rectify 01.40 hour
Transmission Noise - In Cab Area
MODEL
Discovery Automatic Derivatives Discovery Automatic Derivatives
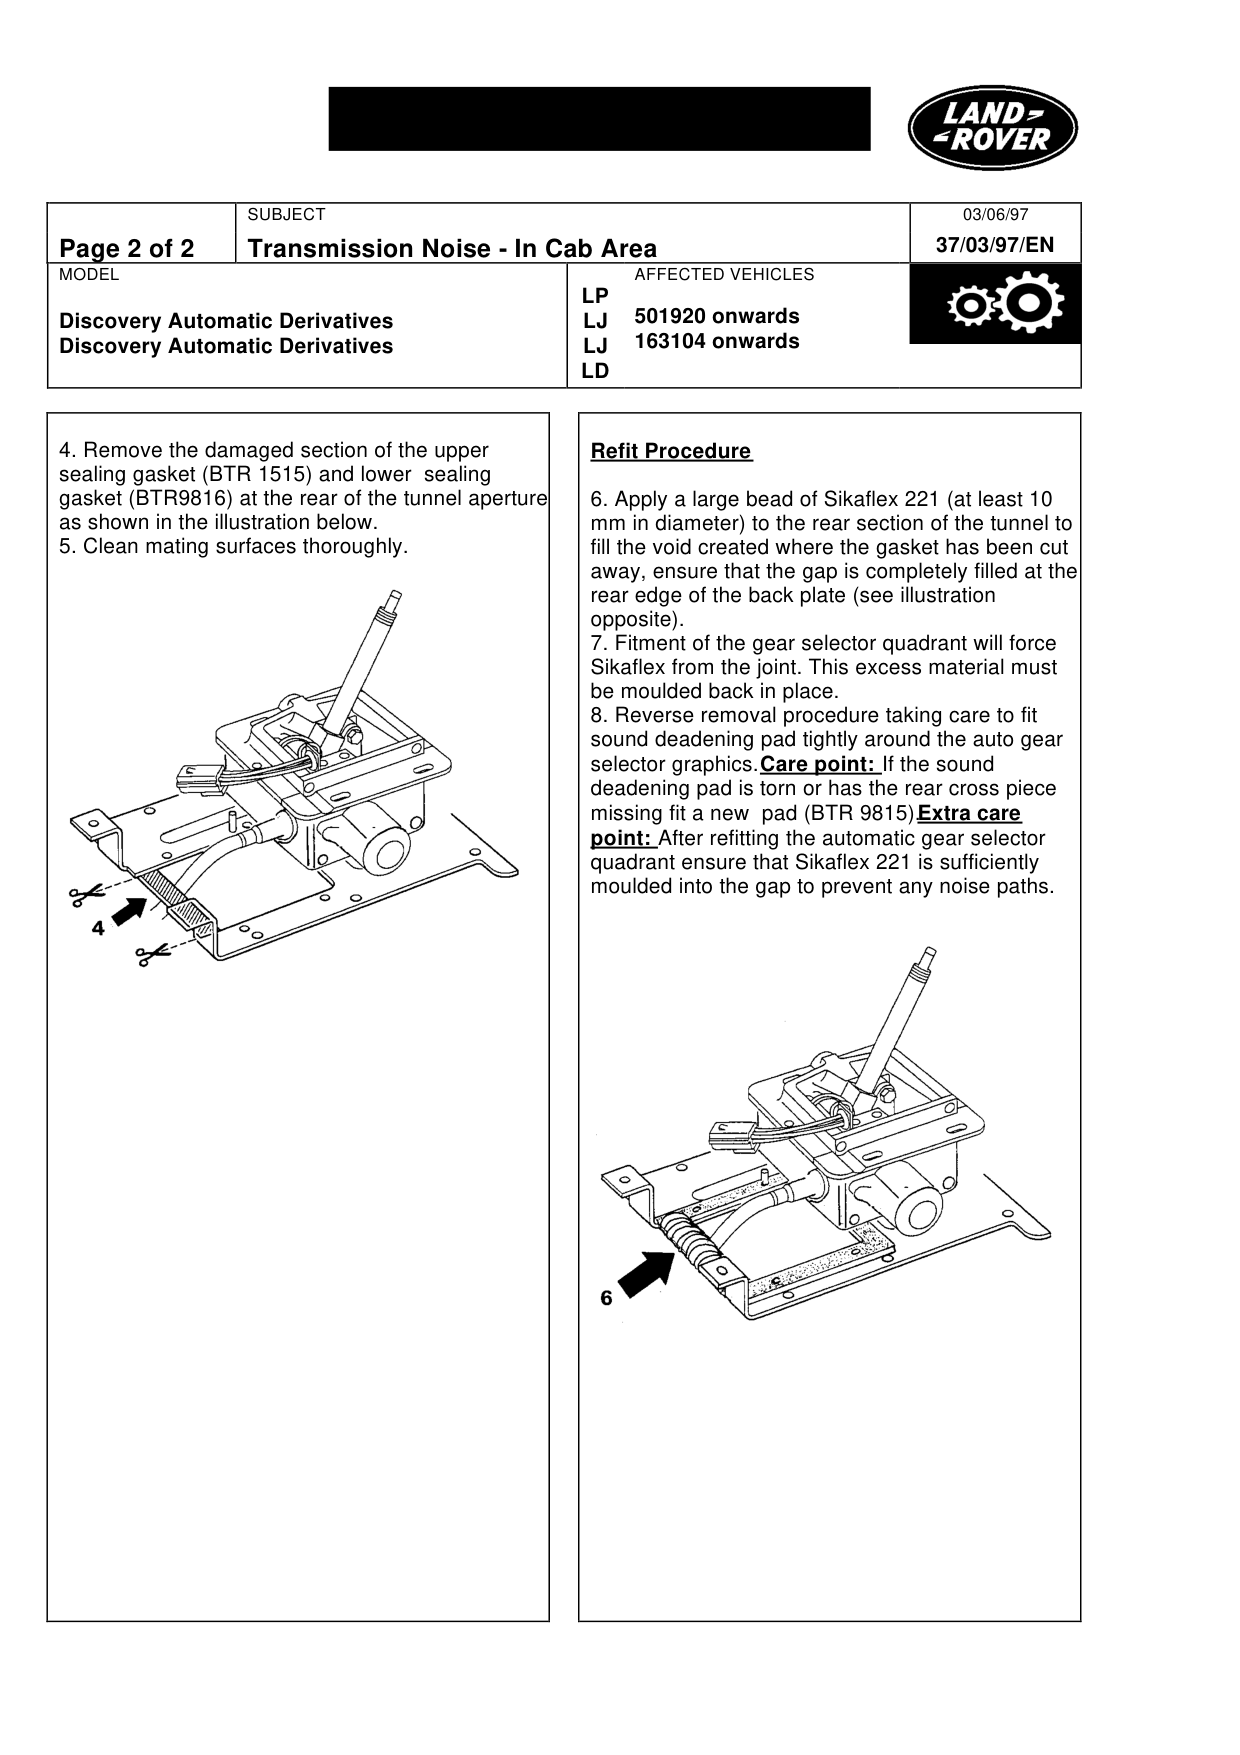
4. Remove the damaged section of the upper sealing gasket (BTR 1515) and lower sealing gasket (BTR9816) at the rear of the tunnel aperture as shown in the illustration below. 5. Clean mating surfaces thoroughly.
03/06/97 37/03/97/EN
AFFECTED VEHICLES
LP 501920 onwards LJ 163104 onwards LJ LD
Refit Procedure
6. Apply a large bead of Sikaflex 221 (at least 10 mm in diameter) to the rear section of the tunnel to fill the void created where the gasket has been cut away, ensure that the gap is completely filled at the rear edge of the back plate (see illustration opposite). 7. Fitment of the gear selector quadrant will force Sikaflex from the joint. This excess material must be moulded back in place. 8. Reverse removal procedure taking care to fit sound deadening pad tightly around the auto gear selector graphics. Care point: If the sound deadening pad is torn or has the rear cross piece missing fit a new pad (BTR 9815). Extra care point: After refitting the automatic gear selector quadrant ensure that Sikaflex 221 is sufficiently moulded into the gap to prevent any noise paths.
Parts & tools for this job For Land Rover Discovery
- TOOLTorque wrenchSearch: 3/8 inch torque wrench
- TOOLSocket setSearch: socket set metric
- BOOKHaynes manualSearch: Haynes manual Land Rover Discovery
Links open Amazon search results in a new tab. As an Amazon Associate I earn from qualifying purchases.