
300Tdi Discovery
37
MANUAL GEARBOX
2
REPAIR
25. Remove nuts and bolts securing transmission
cross-member to chassis.
26. Remove nuts and bolts securing cross-member
mountings to transmission.
27. Remove cross-member.
28. Manufacture an adapter plate to dimensions
given in service tool section and attach it to a
transmission hoist. To achieve balance of the
transmission unit when mounted to hoist, it is
essential that point A, is situated over lifting hoist
ram. Drill holes B to suit hoist table. Secure the
transmission unit cradle at point C using the
lower bolts retaining transfer gearbox rear cover.
Raise hoist just enough to take weight of
transmission.
29. Lower hoist sufficiently to allow transfer gearbox
selector lever to clear transmission tunnel
aperture.
30. Disconnect differential lock switch connectors.
31. Disconnect reverse lamp switch connectors.
32. Remove clips securing gearbox breather pipes
to harness.
33. Support engine under sump with a jack.
CAUTION: Use a wooden block to protect
sump.
34. Remove bell housing nuts.
35. Withdraw transmission whilst ensuring all
connections to engine and chassis are released.
36. Remove transmission assembly from hoist
cradle and position safely on a bench.
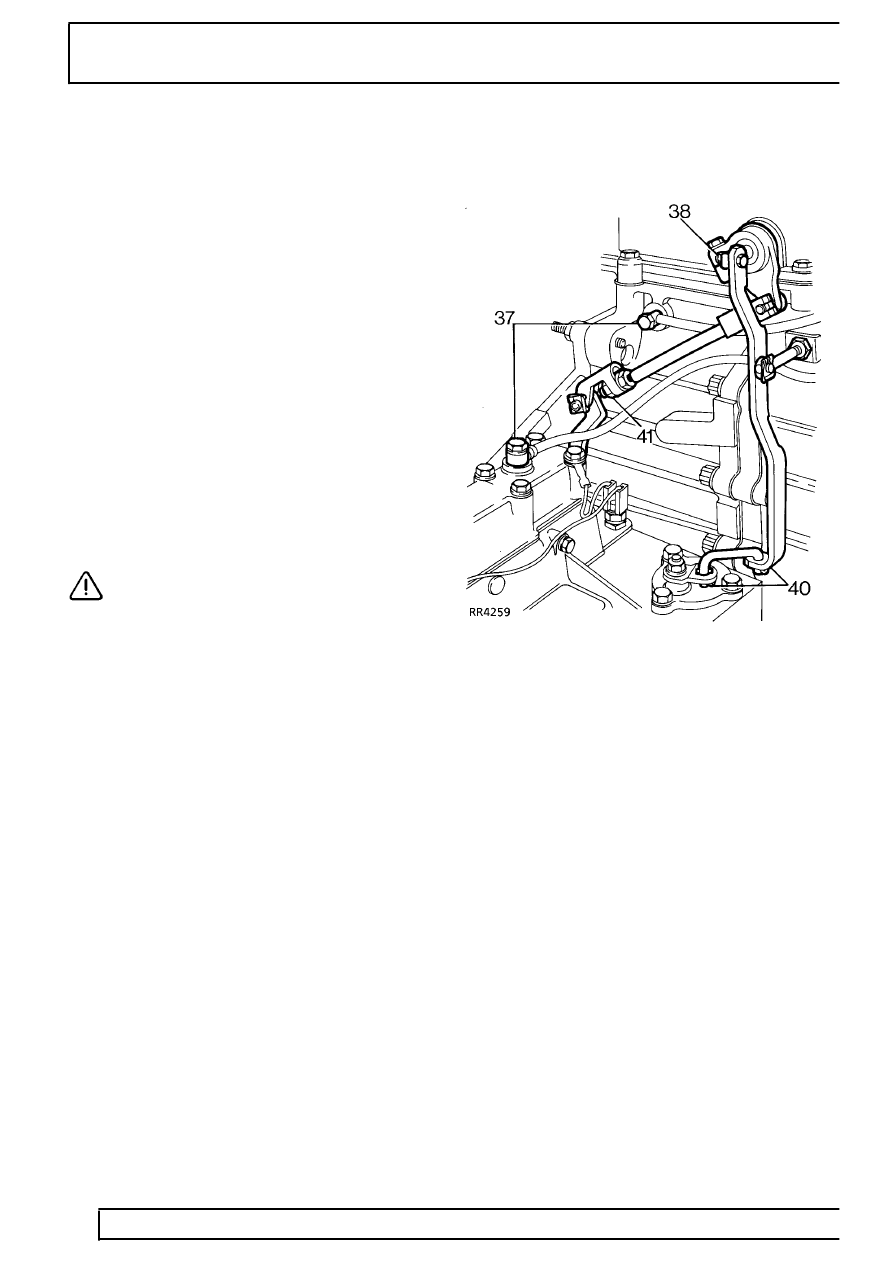
37. Remove breather pipes. Discard pipe union
sealing washers.
38. Remove ’Nyloc’ nut, and remove bolt, securing
lever to high/low shaft.
39. Collect spacer washer.
40. Remove 2 clips and remove differential lock
lever link.
41. Remove lower locknut from high/low operating
rod.
42. Place a sling round transfer box and attach to
hoist.
43. Remove nut and 5 bolts securing transfer
gearbox to extension housing.
44. Withdraw transfer gearbox.