300Tdi Discovery

44
AUTOMATIC GEARBOX
2
REPAIR
1. Site vehicle on a four post ramp [hoist].
2. Disconnect battery negative lead.
3. Remove fan cowl securing screws and release
cowl from radiator.
4. Loosen securing clip and disconnect air flow
hose from plenum chamber.
5. Disconnect stepper motor hose from top of
plenum chamber.
6. Disconnect kickdown cable from throttle linkage
and release from clipping.
7. Release two gearbox breather pipes from clip
located on lifting eye at rear of right hand
cylinder head.
8. Remove dipstick from main gearbox oil filler
tube.
9. Working inside vehicle detach transfer gear lever
gaiter from console, unscrew knob and withdraw
gaiter and knob.
10. Raise vehicle on ramp [hoist].
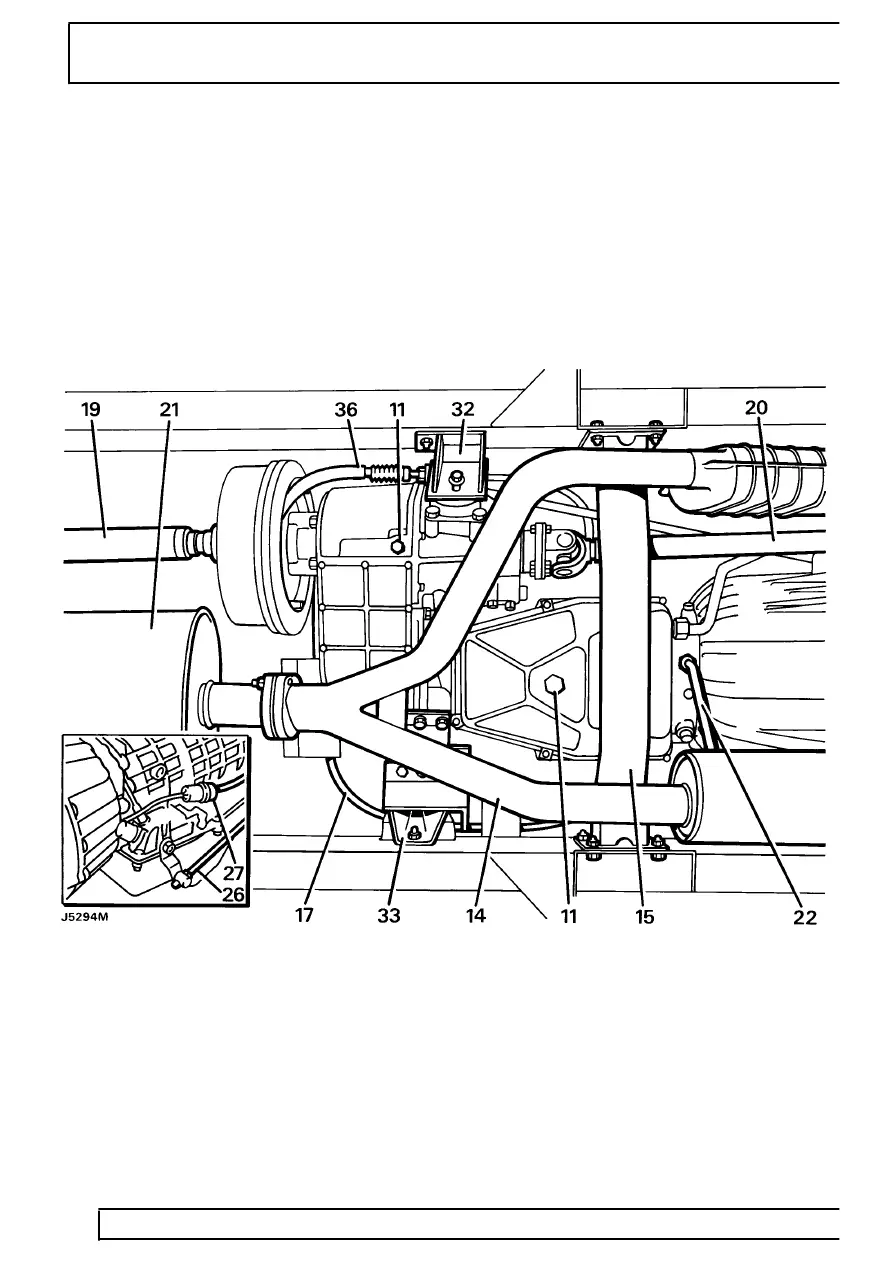
11. Remove drain plugs and drain oil from transfer
gearbox and main gearbox. Refit plugs.
12. Detach heat shield at front exhaust pipe to
manifold.
13. Disconnect electrics to Lambda sensors.
14. Remove catalytic converter assembly.
15. Remove chassis cross-member from under
gearbox.
16. Remove heat shield from speedometer cable at
transfer gearbox.
17. Remove clamp and disconnect speedometer
cable from transfer gearbox. Tie cable to one
side.
18. Mark for reassembly propeller shaft to transfer
gearbox mating flanges.
