
300Tdi Discovery
REAR AXLE AND FINAL DRIVE
3
OVERHAUL
23. Check gear for freedom of rotation and backlash.
Nominal backlash should be present. Excess
backlash necessitates replacement of gears or
differential housing.
24. Check serial number marked on pinion end face
matches that on crown wheel.
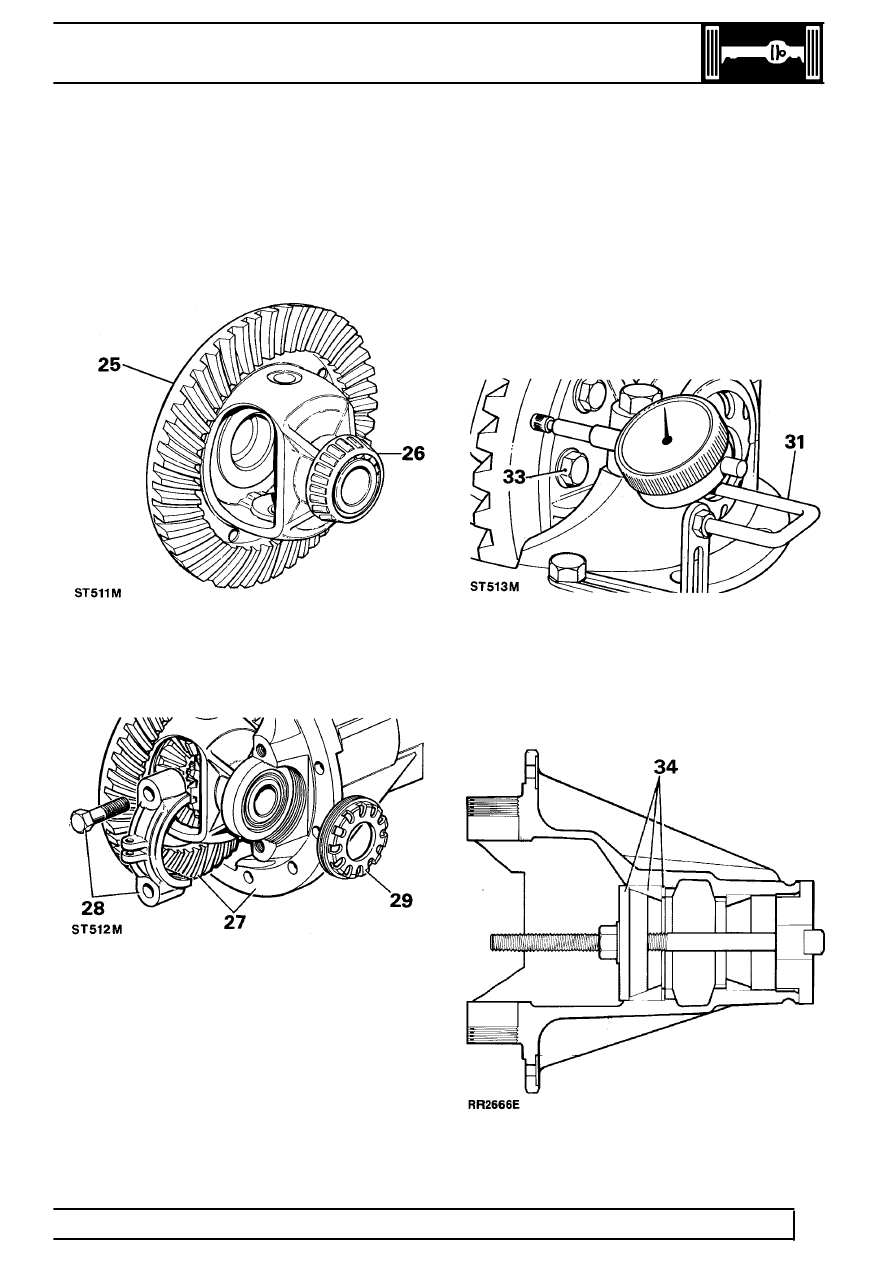
25. Clean and fit crown wheel.
26. Fit carrier bearings and assemble tracks to
bearings.
27. Place differential housing with crown wheel and
bearings in pinion housing.
28. Fit bearing caps and bolts. Do not tighten bolts.
29. Fit bearing adjusting nuts and adjust to obtain
zero end float.
30. Tighten bearing cap bolts to
90 Nm.
31. Check crown wheel for run-out. This should not
exceed 0,10 mm. If exceeded examine crown
wheel and mounting flange for burrs, grit, etc.
Refit and recheck. A buckled or damaged
differential housing flange is corrected by
replacing differential gear housing.
32. After checking run out remove differential
housing from pinion housing.
33. Remove crown wheel bolts and refit using
Loctite ’Studlock’. Tighten to
58 Nm.
34. Fit pinion head bearing track and original shim to
pinion housing. Use service tools LRT-54-505
and LRT-54-506. If fitting a new shim use
minimum 1.27 mm thickness.