
300Tdi Discovery
CHASSIS AND BODY
61
REPAIR
REAR DOOR UPPER TRIM PANEL - WITH REAR
AIR CONDITIONING FITTED
Service repair no - 76.13.72/20
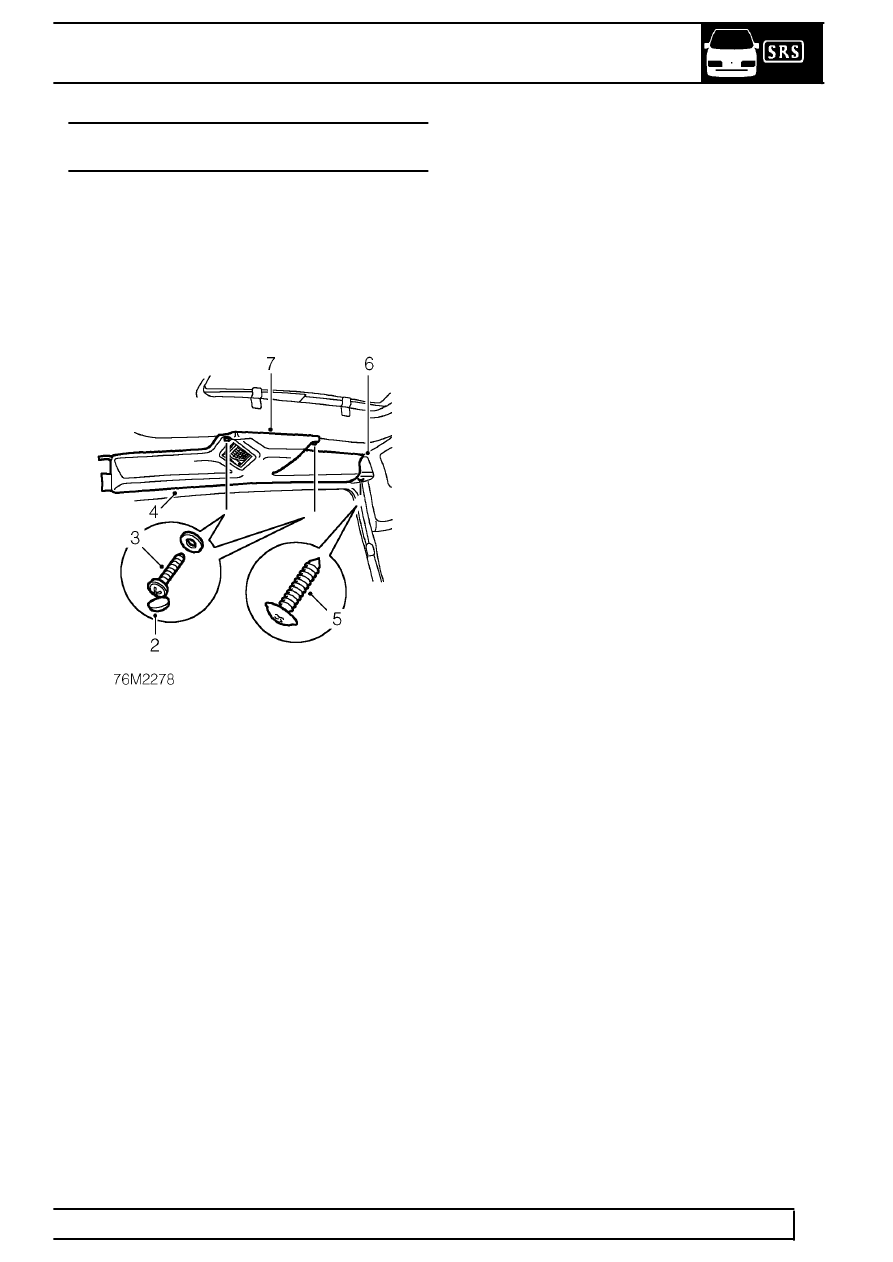
Remove
1. Remove alpine light trim casing.
See alpine
light trim casing - lh - with rear air
conditioning fitted.
2. Release 2 trim panel retaining screw covers.
3. Remove 2 trim panel retaining screws.
4. Release rear edge of trim panel from body.
5. Remove screw securing rear header duct to
alpine light duct.
6. Release rear header duct from alpine light duct.
7. Remove trim panel assembly.
Dismantle
8. Remove 2 vents from trim panel.
9. Remove screw securing rear header duct to trim
panel.
10. Remove rear header duct.
Rebuild
11. Fit rear header duct to new trim panel and
secure with screw.
12. Fit vents to trim panel.
Refit
13. Position trim panel and connect rear header duct
to alpine light duct.
14. Fit and tighten screw securing rear header duct
to alpine light duct.
15. Secure rear edge of trim panel to body.
16. Fit and tighten screws securing trim panel.
17. Secure trim panel retaining screw covers.
18. Fit alpine light trim casing.
See alpine light
trim casing - lh - with rear air conditioning
fitted.