
300Tdi Discovery
AIR CONDITIONING
9
REPAIR
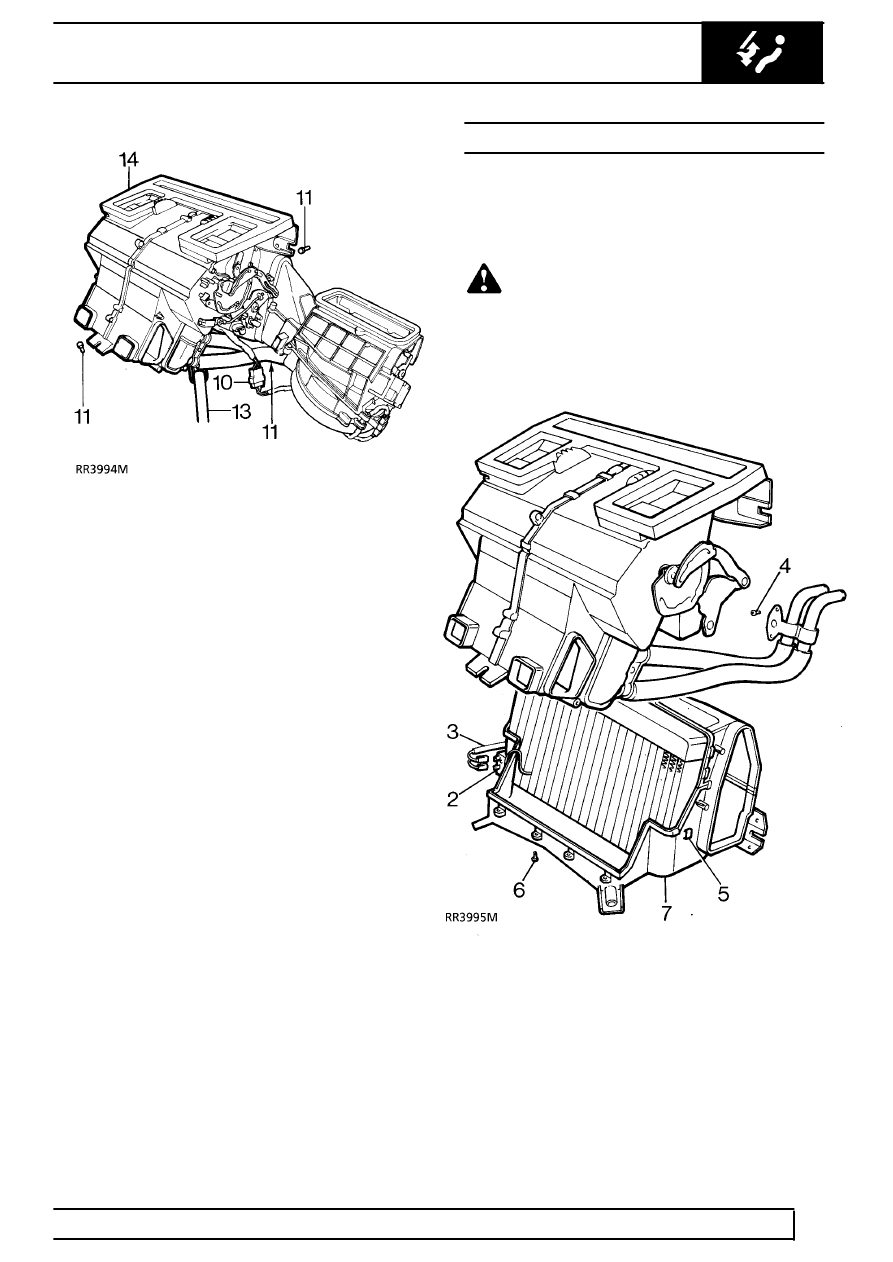
10. Disconnect multiplug connecting heater to
blower unit, remove 3 screws and remove
blower unit.
11. Remove 5 screws securing casing to bulkhead
and tunnel.
12. Remove 2 securing bolts and remove centre
console front mounting bracket.
13. Disconnect 2 drain tubes..
14. Ease heater and cooler unit from its location and
remove from vehicle.
Refit
15. Ease heater and cooler unit into position.
16. Fit retaining bolts finger tight. Tighten in
sequence, centre and top bolts and then the
bottom bolt.
17. Reverse removal procedure.
18. Use new ’O’ rings and lubricate with refrigerant
oil.
19. Evacuate and recharge system.
See
Adjustment, Refrigerant Recovery Recycling
Recharging
20. Leak test any disturbed joints.
See Adjustment,
Leak Test System
21. Perform a functional check.
EVAPORATOR AND EXPANSION VALVE
Service repair no - 86.25.20 - Evaporator
Service repair no - 86.25.01 - Expansion valve
Remove
WARNING: Wear eye and hand protection
when disconnecting components
containing refrigerant. Plug all exposed
connections immediately.
1. Remove heater and cooler unit.
See Heater
and Cooler Unit