
300Tdi Discovery
86
ELECTRICAL
2
OVERHAUL
LUBRICATION
Apply clean engine oil:
a.
A spot into rotor spindle before fitting rotor
arm.
Apply Omnilube 2 (or equivalent) grease.
b.
Auto advance mechanism.
c.
Pick-up plate centre bearing.
d.
Pre tilt spring and its rubbing area (pick-up
and base plate assembly).
e.
Vacuum unit connecting peg (pick-up and
base plate assembly).
f.
Connecting peg hole in vacuum unit
connecting rod.
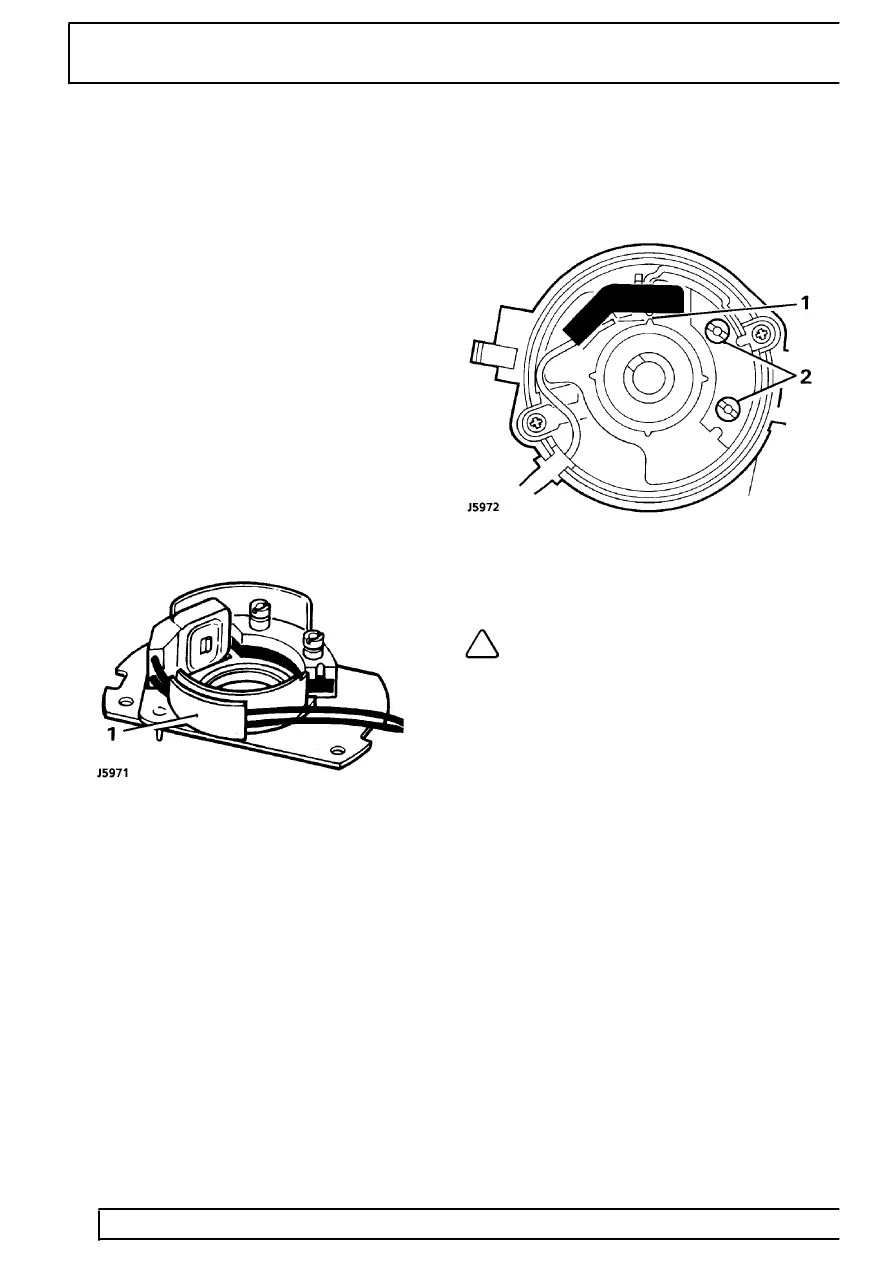
Fitting pick-up and base plate assembly
1. Pick-up leads must be prevented from fouling
rotating reluctor. Both leads should be located in
plastic guide as illustrated. Check during
re-assembly.
Fitting reluctor
2. Slide reluctor as far as it will go on rotor shaft,
rotate reluctor until it engages with coupling ring
beneath pick-up base plate. Distributor shaft,
coupling ring and reluctor are ’keyed’ and rotate
together. Fit ’O’ ring, flat washer and retaining
circlip.
Pick-up air gap adjustment
1. Air gap between pick-up limb and reluctor teeth
must be set within specified limits, using a
non-ferrous feeler gauge.
2. If adjustment is necessary, loosen two barrel
nuts to set the air gap.
See ENGINE TUNING
DATA, Information, Engine 3.9 V8i
NOTE: When original pick-up and base
plate assembly has been refitted, air gap
should be checked, and adjusted if
necessary.
When fitting a new assembly air gap will require
adjusting to within specified limits.
Amplifier module
1. Before fitting module, apply MS4 Silicone grease
or equivalent heat-conducting compound to
amplifier module backplate, seating face on
distributor body and both faces of heatsink
casting.