
Cruise control not suspending under light brake pedal application
- Make
- Land Rover
- Model
- Freelander Technical Bulletins
- Section
- Cruise control not suspending under light brake pedal application › Cruise control not suspending under light brake pedal application
CRUISE CONTROL NOT SUSPENDING UNDER LIGHT BRAKE PEDAL APPLICATION
- Model
- Freelander
- Affected vehicles
- All KV6 derivatives in VIN range: 1A 577926 to 1A 598681 RE - ISSUE INFORMATION: Bulletin No amended. Please destroy your existing copy and replace with this Issue 2.
- Date
- 2001-11-21
- Reference
- Bulletin 0040, CDS ref L8646bu
Bulletin text
Freelander
AFFECTED RANGE:
All KV6 derivatives in VIN range: 1A 577926 to 1A 598681
RE - ISSUE INFORMATION: Bulletin N o amended. Please destroy your existing copy and replace with this Issue 2.
PROBLEM:
CRUISE CONTROL NOT SUSPENDING UNDER LIGHT BRAKE PEDAL APPLICATION The customer may complain that on very light brake pedal application, the vehicle decelerates giving the impression that the cruise control has suspended, but on releasing the brake pedal, cruise control resumes operation.
CAUSE:
Lack of synchronization between the mechanical brake switch and the Hall brake switch.
ACTION:
On customer complaint of the above, follow repair procedure below, to install an additional link wire which will restore switch synchronisation.
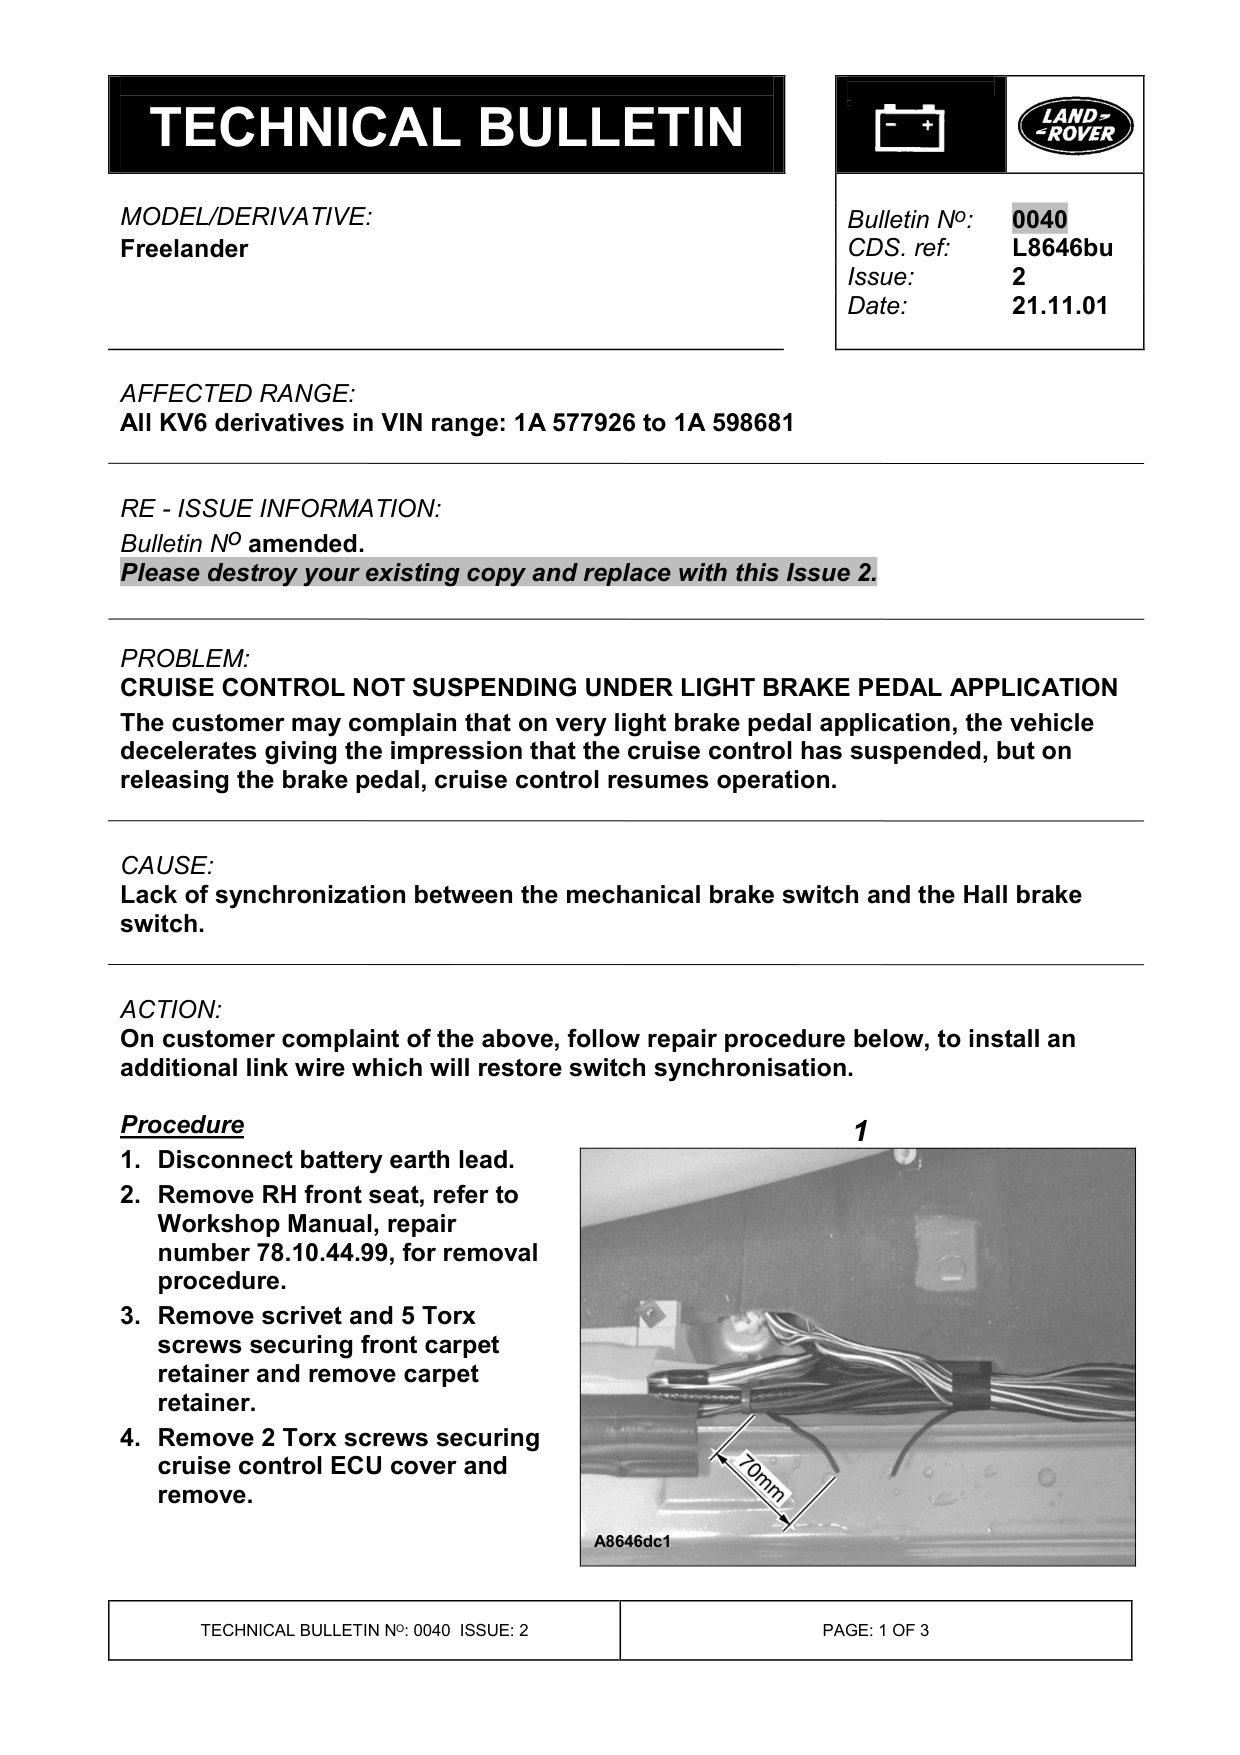
Procedure 1. Disconnect battery earth lead. 2. Remove RH front seat, refer to Workshop Manual, repair number 78.10.44.99, for removal procedure. 3. Remove scrivet and 5 Torx screws securing front carpet retainer and remove carpet retainer. 4. Remove 2 Torx screws securing cruise control ECU cover and remove.
Bulletin N o : 0040
1
A8646dc1
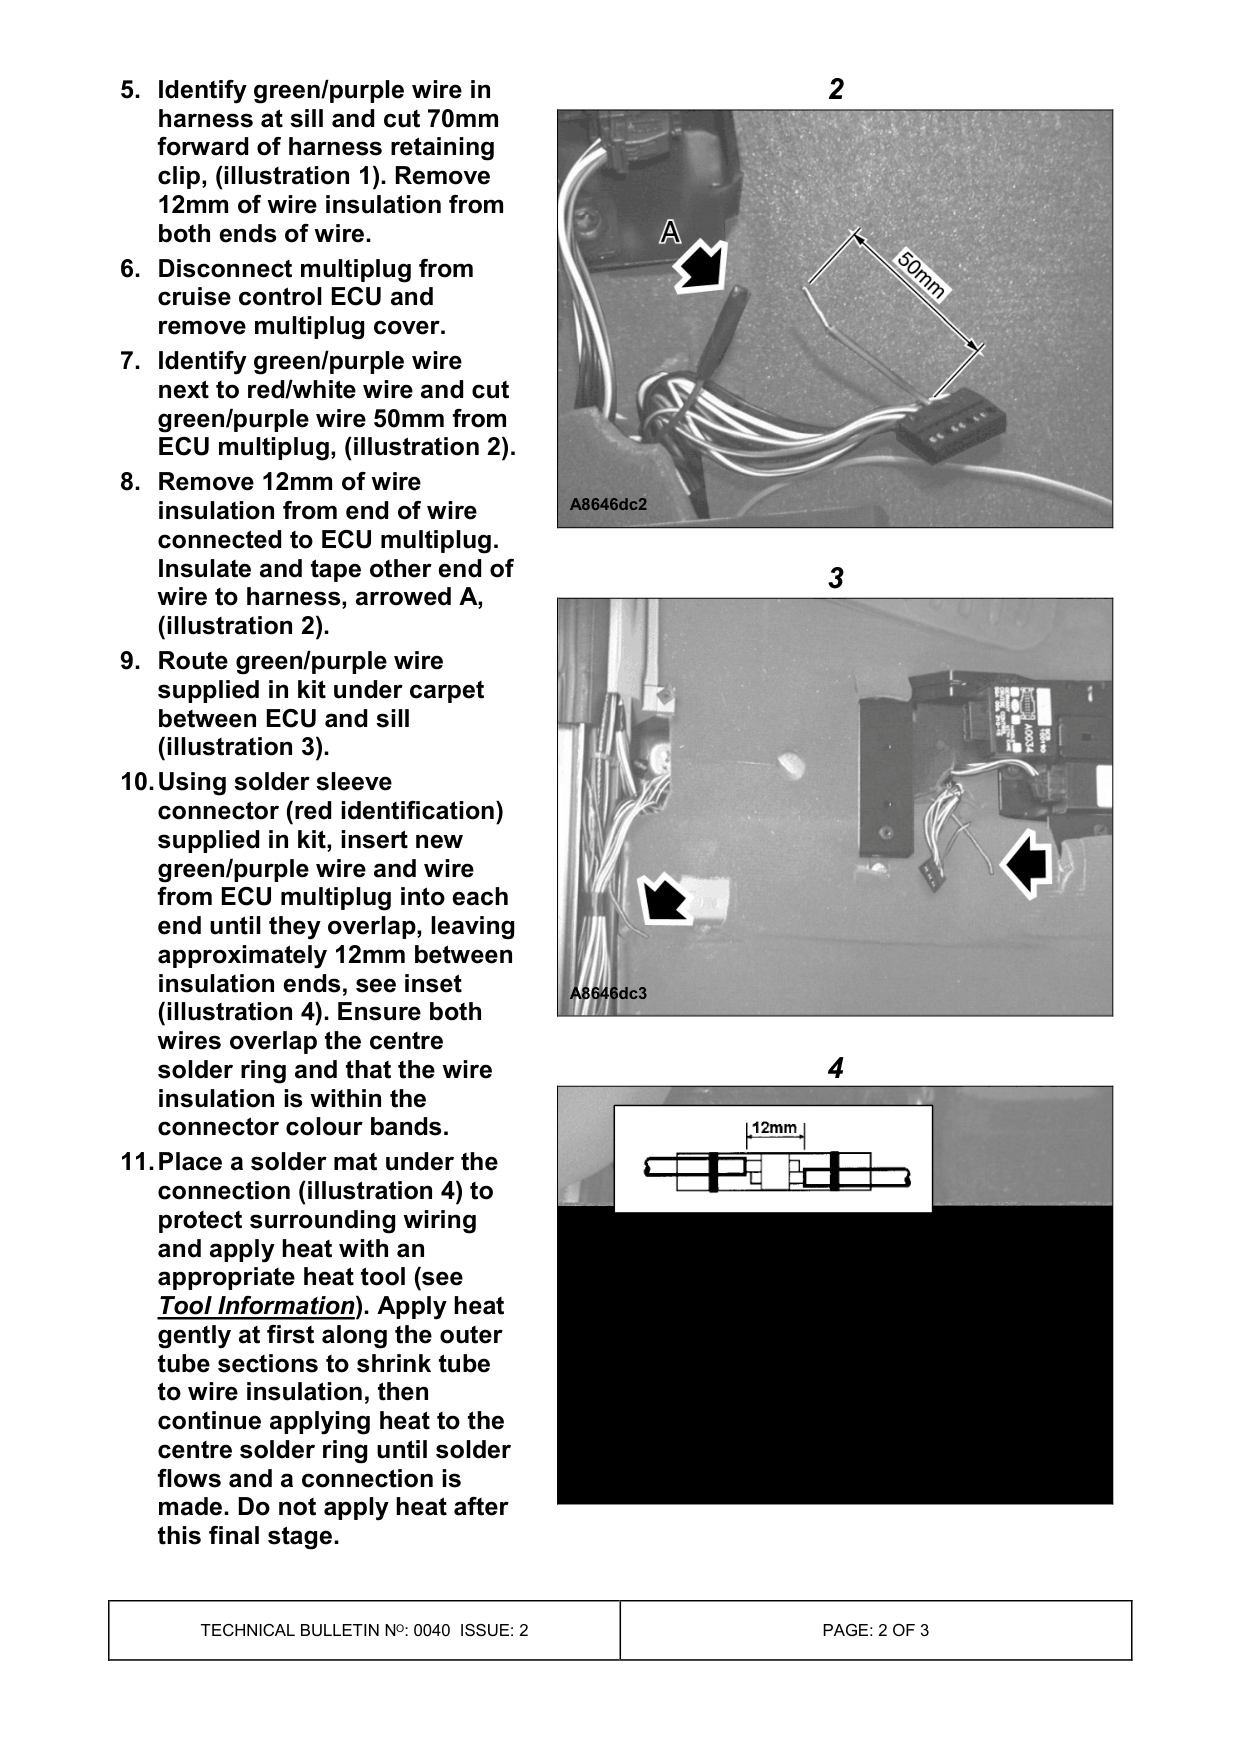
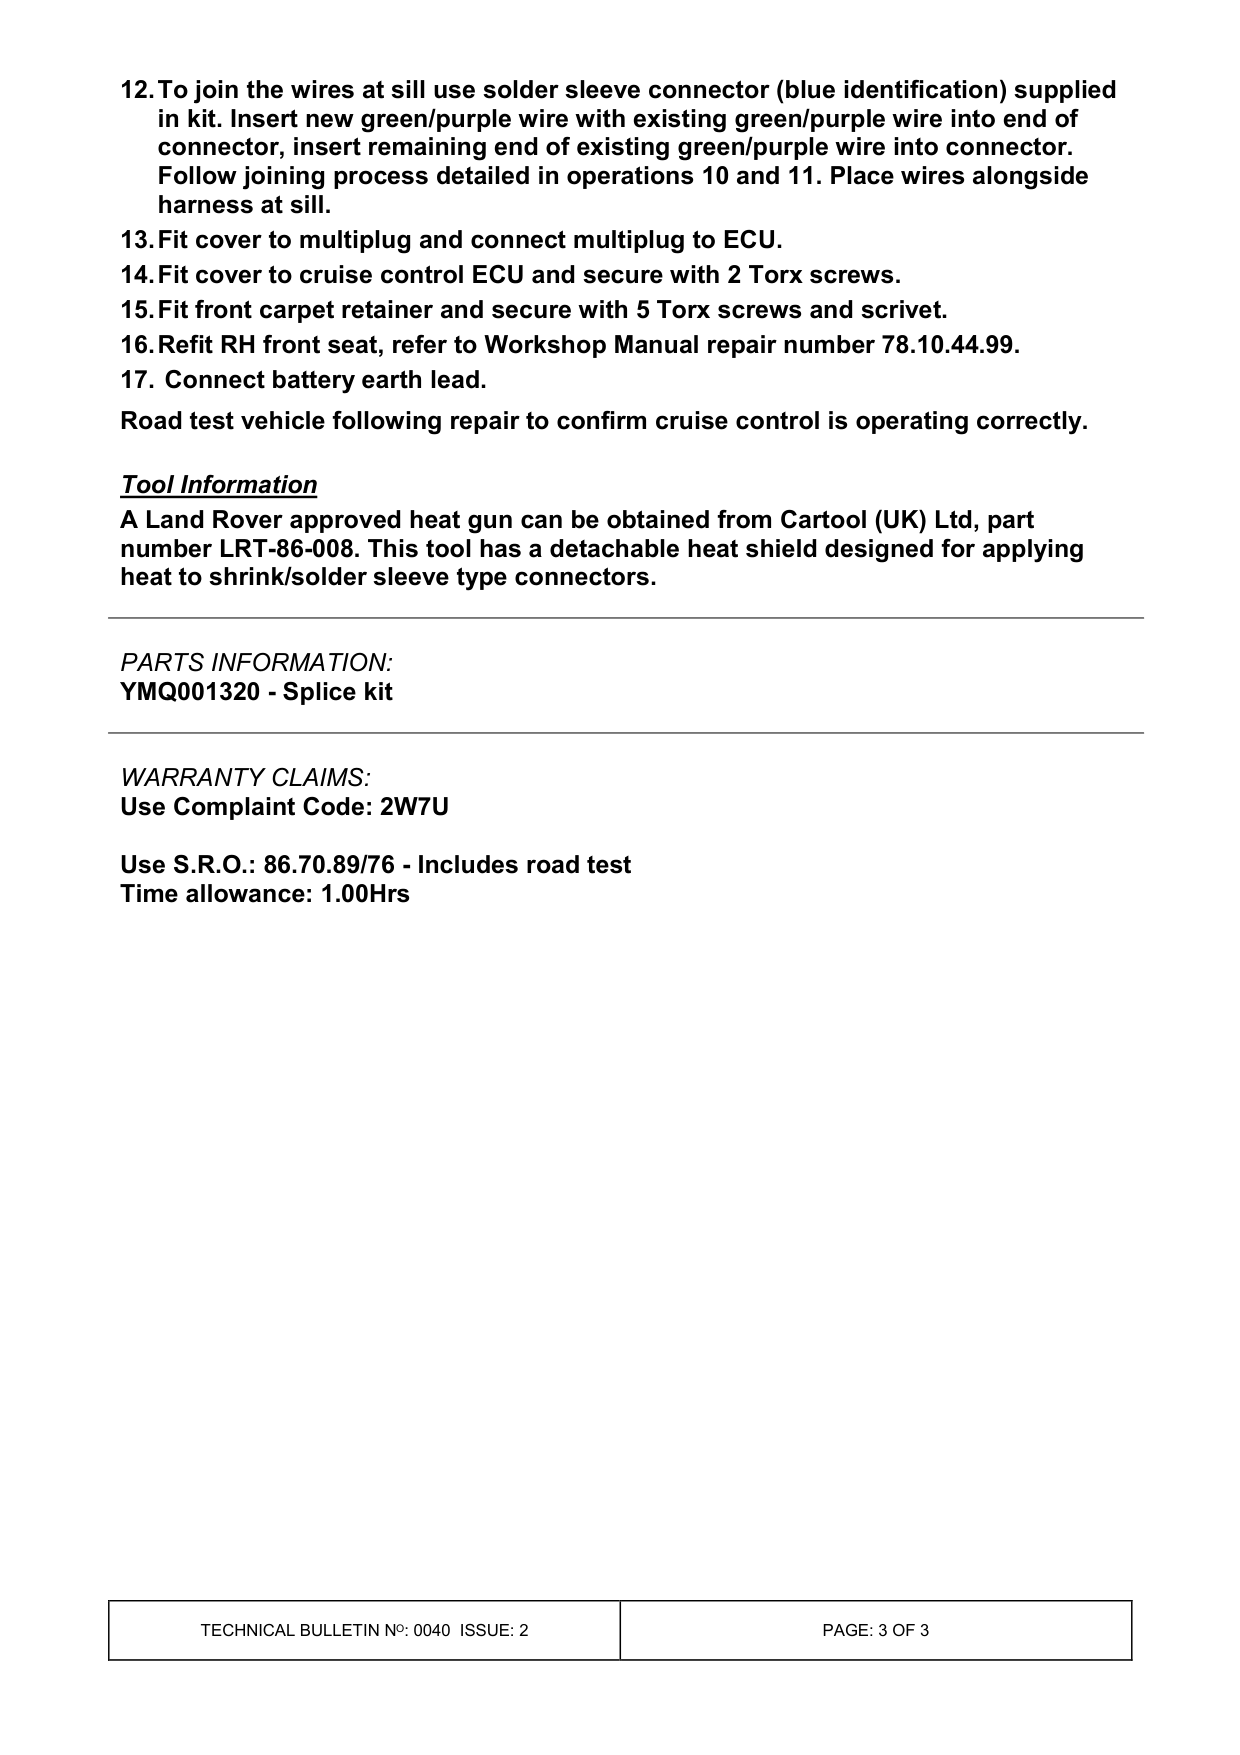
5. Identify green/purple wire in harness at sill and cut 70mm forward of harness retaining clip, (illustration 1). Remove 12mm of wire insulation from both ends of wire. 6. Disconnect multiplug from cruise control ECU and remove multiplug cover. 7. Identify green/purple wire next to red/white wire and cut green/purple wire 50mm from ECU multiplug, (illustration 2). 8. Remove 12mm of wire insulation from end of wire connected to ECU multiplug. Insulate and tape other end of wire to harness, arrowed A, (illustration 2). 9. Route green/purple wire supplied in kit under carpet between ECU and sill (illustration 3). 10. Using solder sleeve connector (red identification) supplied in kit, insert new green/purple wire and wire from ECU multiplug into each end until they overlap, leaving approximately 12mm between insulation ends, see inset (illustration 4). Ensure both wires overlap the centre solder ring and that the wire insulation is within the connector colour bands. 11. Place a solder mat under the connection (illustration 4) to protect surrounding wiring and apply heat with an appropriate heat tool (see Tool Information ). Apply heat gently at first along the outer tube sections to shrink tube to wire insulation, then continue applying heat to the centre solder ring until solder flows and a connection is made. Do not apply heat after this final stage.
2
A8646dc2
3
A8646dc3
4
A8646dc4
12. To join the wires at sill use solder sleeve connector (blue identification) supplied in kit. Insert new green/purple wire with existing green/purple wire into end of connector, insert remaining end of existing green/purple wire into connector. Follow joining process detailed in operations 10 and 11. Place wires alongside harness at sill. 13. Fit cover to multiplug and connect multiplug to ECU. 14. Fit cover to cruise control ECU and secure with 2 Torx screws. 15. Fit front carpet retainer and secure with 5 Torx screws and scrivet. 16. Refit RH front seat, refer to Workshop Manual repair number 78.10.44.99. 17. Connect battery earth lead. Road test vehicle following repair to confirm cruise control is operating correctly.
Tool Information A Land Rover approved heat gun can be obtained from Cartool (UK) Ltd, part number LRT-86-008. This tool has a detachable heat shield designed for applying heat to shrink/solder sleeve type connectors.
PARTS INFORMATION:
YMQ001320 - Splice kit
WARRANTY CLAIMS: Use Complaint Code: 2W7U
Use S.R.O.: 86.70.89/76 - Includes road test Time allowance: 1.00Hrs
Parts & tools for this job For Land Rover Freelander
- PARTBrake padsSearch: Land Rover Freelander brake pads
- TOOLBrake bleeder kitSearch: one man brake bleeder kit
- FLUIDBrake fluidSearch: brake fluid
Links open Amazon search results in a new tab. As an Amazon Associate I earn from qualifying purchases.