
L322 Range Rover Service Procedures
ENGINE - V8
12-2-46 REPAIRS
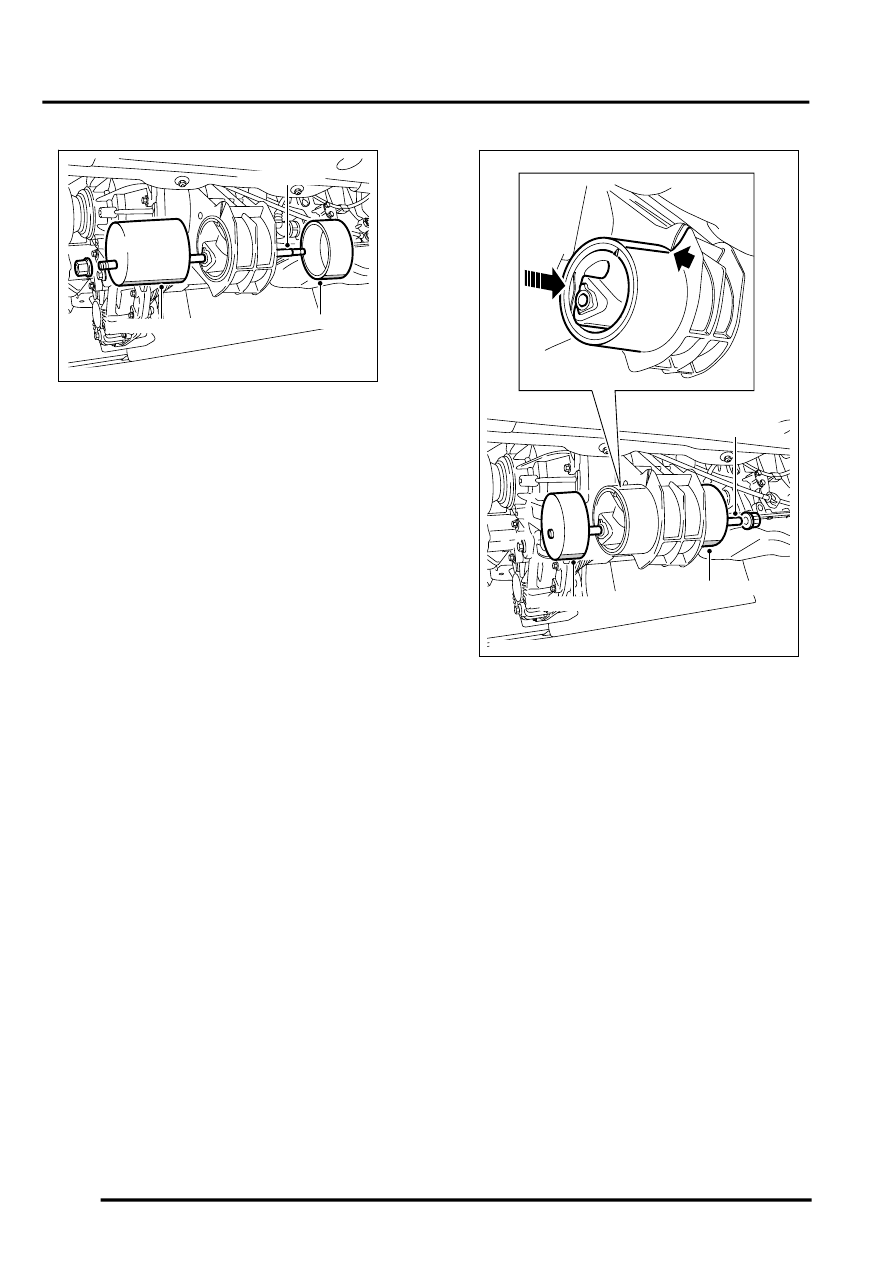
12. Lubricate centre screw LRT-41-018/4 with
Molybdenum Disulphide grease and assemble
tool as shown to remove mounting from
transfer gearbox.
CAUTION: Ensure tool alignment indicator
is at the 6 o'clock position. The tool
alignment indicator is a machined flat, on
LRT-41-018/1 and LRT-41-018/2.
Refit
1. Clean mounting and mating faces.
2. Lubricate new mounting and bore in transfer
gearbox casing to aid assembly.
3. Position new mounting to rear face of transfer
gearbox, and start entry. Mounting to be
parallel, with timing marks aligned.
NOTE: Transfer timing mark to side of
mounting to assist with alignment.
4. Lubricate centre screw LRT-41-018/4 with
Molybdenum Disulphide grease and assemble
tool as shown to fit mounting to transfer
gearbox. Start with the centre screw at full
length and when the mounting is approximately
75 percent fitted, reduce the length of the
centre screw by screwing it fully into the base
plate LRT-41-018/1. This will ensure the centre
screw LRT-41-018/4, does not foul on the
gearbox fluid pan.
CAUTION: Ensure tool alignment indicator
is at the 6 o'clock position.
5. Ensure the mounting is fitted parallel. If
necessary, use a mallet and tap the base plate
to maintain a parallel fit.
6. Fit snubbers.
7. Fit cross member to mounting, fit nut and bolt
but do not tighten at this stage.
8. Raise gearbox on jack.
M12 7539A
LRT-41-018/2
LRT-41-018/1
LRT-41-018/4
M12 7540A
LRT-41-018/4
LRT-41-018/3
LRT-41-018/1