L322 Range Rover Service Procedures

MANIFOLD AND EXHAUST SYSTEM - V8
30-2-2
REPAIRS
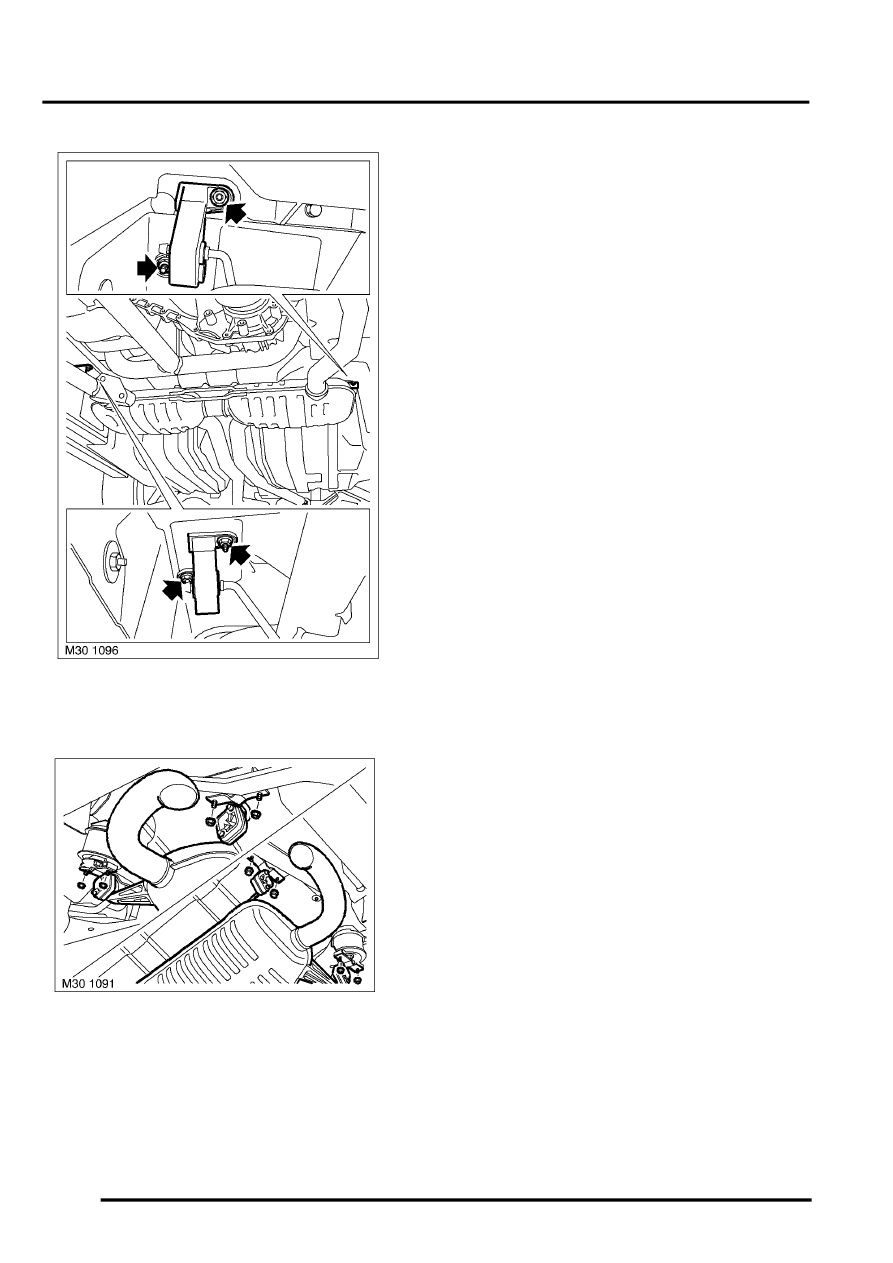
6. Remove and discard the 4 nuts securing
intermediate silencer mountings to body.
7. Remove 8 nuts securing rear silencer rubber
mountings to body and with assistance remove
exhaust assembly from vehicle.
NOTE: Do not carry out further dismantling if
component is removed for access only.
8. Remove 2 nuts and collect mass damper.
9. Remove 6 mounting rubbers from main
assembly, remove rubbers from body mounting
brackets.
10. Remove HO2S sensors from exhaust
assembly and discard sealing washers.
Refit
1. Fit mass damper and tighten bolts to 25 Nm (18
lbf.ft).
2. Fit exhaust mountings.
3. Clean exhaust pipe and exhaust manifold down
pipe flanges.
4. Clean HO2S, sealing washer and mating faces.
5. Fit new sealing washers and apply anti seize
compound to threads of HO2S sensors. Fit and
tighten sensors to 50 Nm (37 lbf.ft).
CAUTION: Ensure anti seize compound
does not contact the tip of the HO2S sensor.
6. Fit rubbers to exhaust mounting brackets and
main assembly.
7. With assistance fit exhaust system to vehicle,
align flanges to manifolds, fit and lightly tighten
bolts. Fit one pair of rear silencer brackets to
body and lightly tighten bolts.
8. Align remaining mounting brackets to body, fit
nuts and tighten to 25 Nm (18 lbf.ft).
9. Check exhaust for correct alignment.
10. Align exhaust flange and tighten new nuts
evenly to 45 Nm (33 lbf.ft).
11. Connect battery earth lead.
12. Start and run engine to check for leaks.
