
L322 Range Rover Service Procedures
NAVIGATION AND IN CAR ENTERTAINMENT
REPAIRS
86-7-5
7. Remove lower turnbuckle securing load space
LH front trim casing.
8. Remove trim stud securing load space LH front
trim casing to stowage bin.
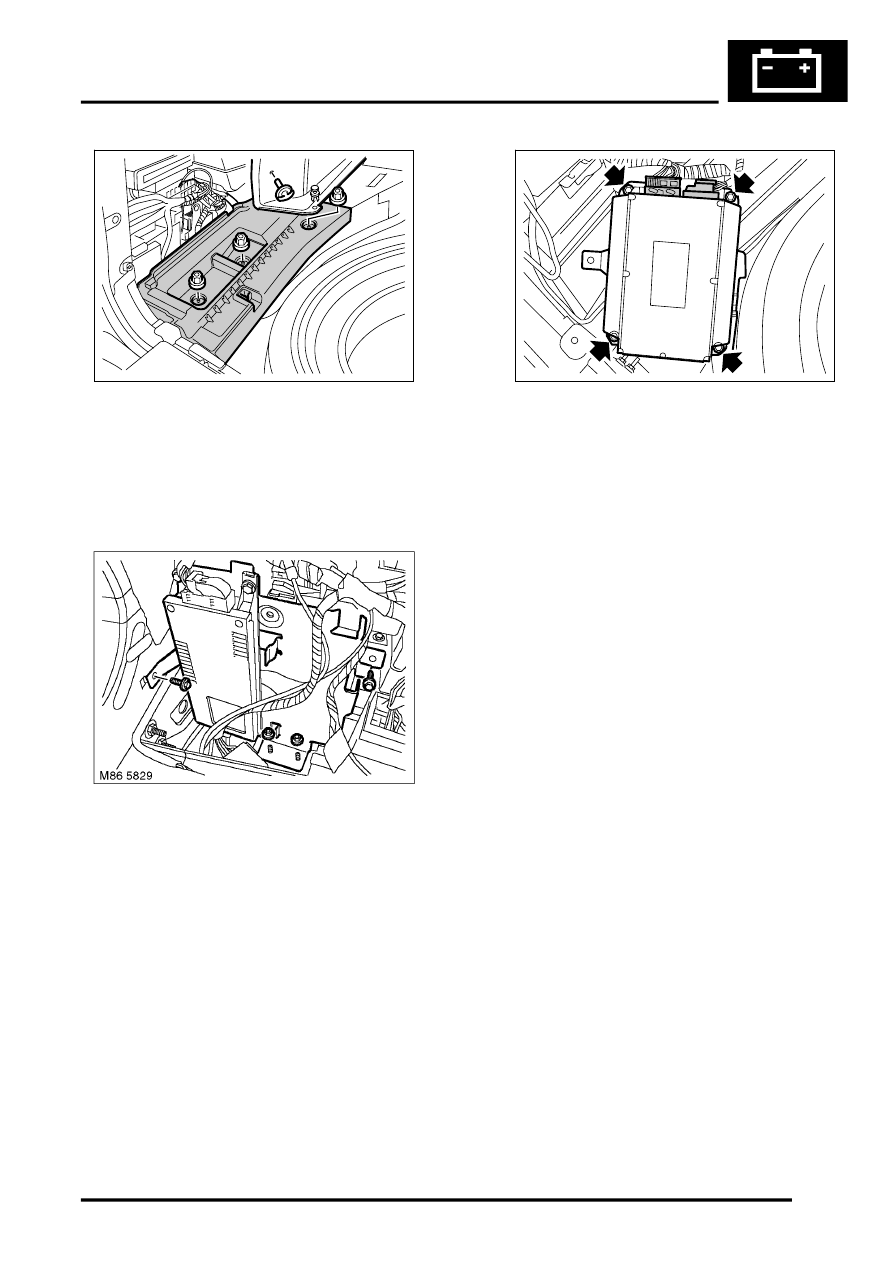
9. Remove 3 nuts securing stowage bin, carefully
release and remove bin.
10. Remove 2 nuts and 2 bolts securing mounting
bracket.
11. Raise mounting bracket assembly for access
and disconnect 3 multiplugs from amplifier.
12. Remove 4 bolts securing amplifier and remove
amplifier.
Refit
1. Fit amplifier and tighten bolts to 6 Nm (4.4
lbf.ft).
2. Connect multiplugs to amplifier.
3. Align amplifier mounting bracket, ensure
harness route is clear and tighten bolts and
nuts to 6 Nm (4.4 lbf.ft).
4. Fit stowage bin and secure with nuts.
5. Fit trim stud securing load space LH front trim
casing to stowage bin.
6. Fit turnbuckle securing load space LH front trim
casing.
7. Fit LH rear trim casing, align to tailgate seal and
fit turnbuckles.
8. Fit lashing eye and tighten Allen bolt to 25 Nm
(18 lbf.ft).
9. Lower and secure spare wheel cover.
10. Fit stowage bin cover.
11. Fit access panel.
M86 5827
M86 5830