
LR3/Disco 3
Air Cleaner (19.10.01)
Removal
Published : Mar 17, 2005
1 .
Disconnect the battery ground cable. For additional information, refer to
Specifications
(Section 414-
00 Charging System - General Information)
2 .
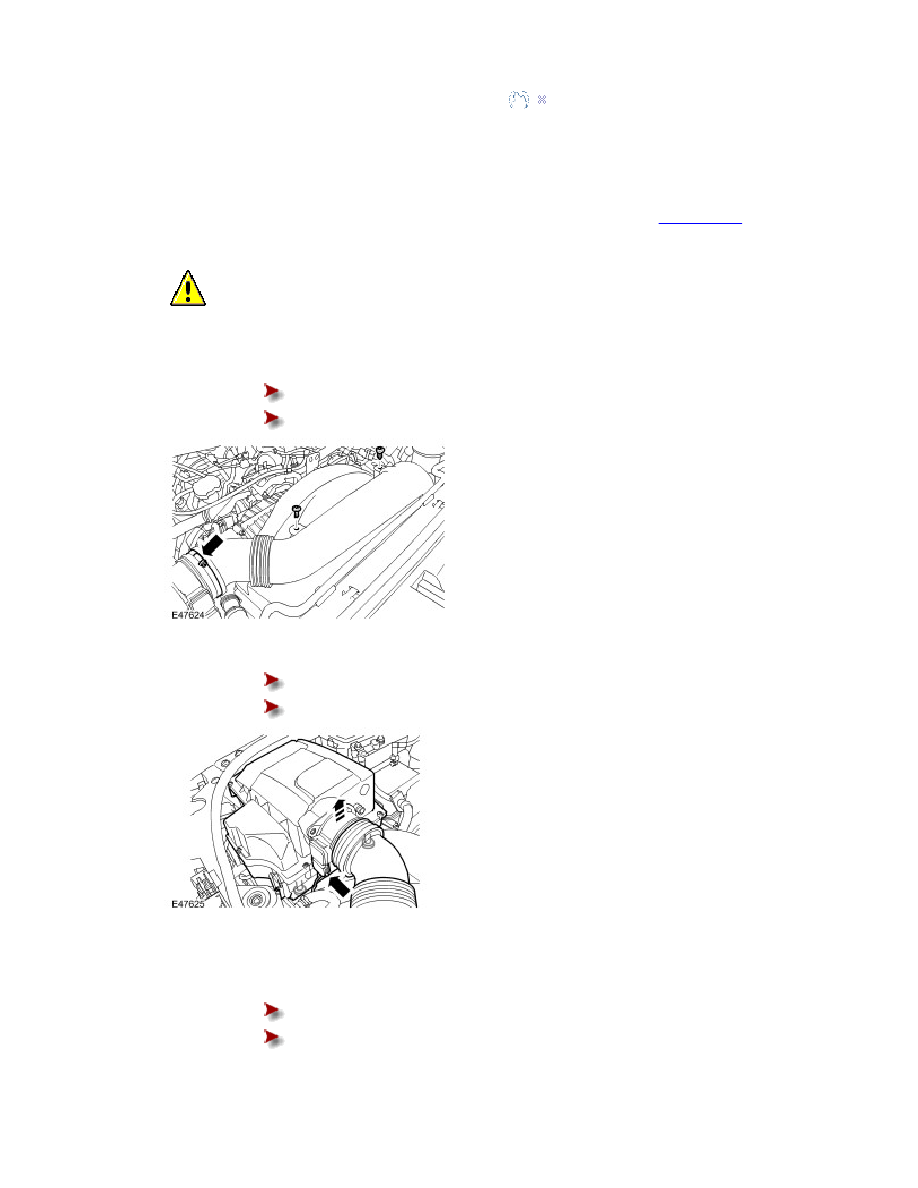
CAUTION: When removing the air cleaner outlet pipe, make sure the rubber seal, on the LH
side lower air pipe, does not become dislodged. Make sure the seal is properly seated onto the lower
pipe.
Remove the air cleaner outlet pipe.
Remove the 2 screws.
Loosen the clip.
3 .
Remove the air cleaner assembly.
Disconnect the electrical connector.
Release the air cleaner from the 2 grommets.
4 .
NOTE :
Do not disassemble further if the component is removed for access only.
Remove the manifold absolute pressure (MAP) sensor.
Remove the 2 Torx screws.
Remove the O-ring seal.