LR3/Disco 3

Thermostatic Expansion Valve (82.25.01)
Removal
Installation
Published : Jul 14, 2004
1 .
Evacuate the A/C system. For additional information, refer to
Air Conditioning (A/C) System
Recovery, Evacuation and Charging (82.30.02)
(Section 412-00)
2 .
Remove the instrument panel upper section. For additional information, refer to
Instrument Panel
Upper Section (76.46.04)
(Section 501-12)
3 .
CAUTION: Immediately cap all refrigerant lines to prevent ingress of dirt and moisture.
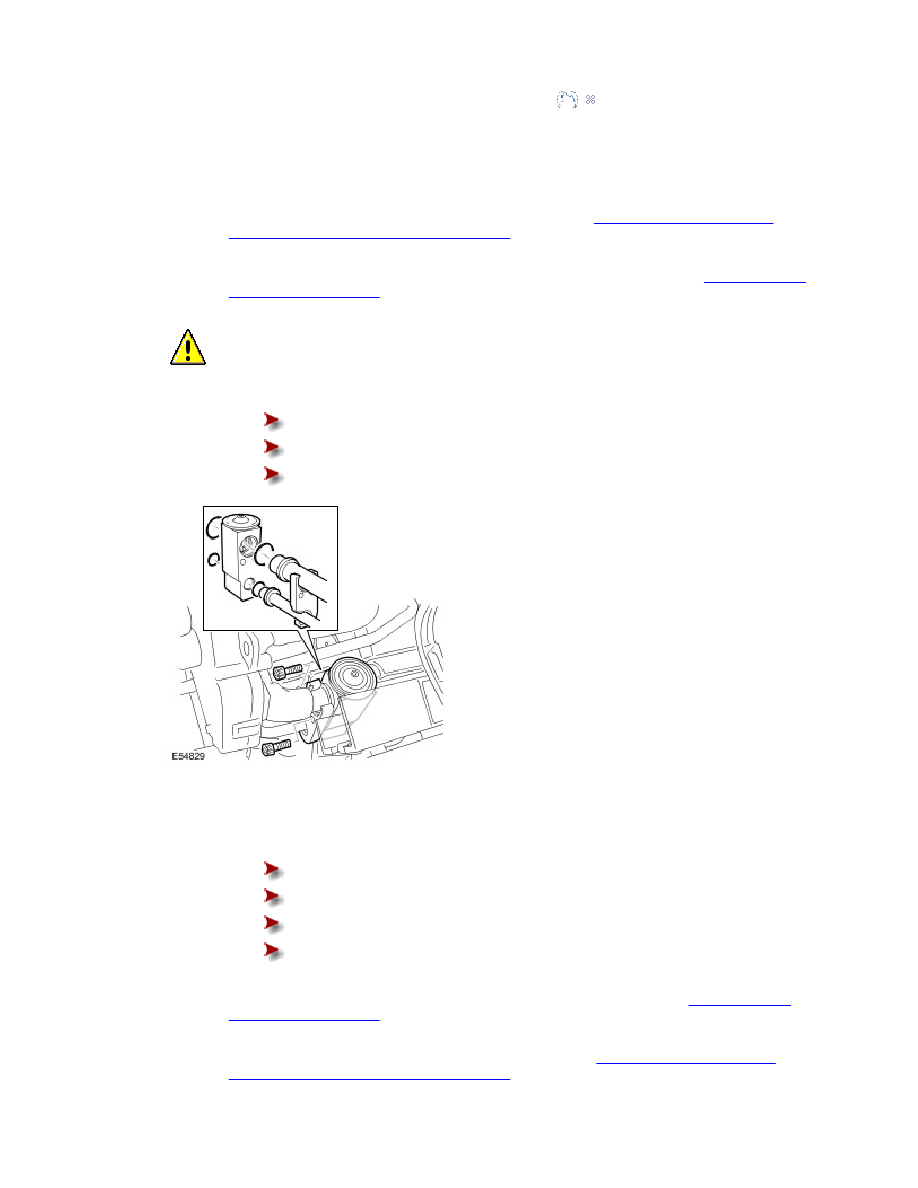
Remove the thermostatic expansion valve.
Remove the cover.
Remove the 2 Allen bolts.
Remove and discard the 4 O-ring seals.
1 .
Install the thermostatic expansion valve.
Clean the components.
Install the new O-ring seals.
Tighten the Allen bolts to 5 Nm (4 lb.ft).
Install the cover.
2 .
Install the instrument panel upper section. For additional information, refer to
Instrument Panel
Upper Section (76.46.04)
(Section 501-12)
3 .
Recharge the A/C system. For additional information, refer to
Air Conditioning (A/C) System
Recovery, Evacuation and Charging (82.30.02)
(Section 412-00)
