
LR3/Disco 3
Front Crossmember (77.20.25)
Removal
Installation
Published : Sep 16, 2004
1 .
Disconnect both battery cables. For additional information, refer to
Specifications
(Section 414-00
Charging System - General Information)
2 .
Remove the hood latch panel. For additional information, refer to
Hood Latch Panel (76.16.22)
(Section 501-27 Front End Sheet Metal Repairs)
3 .
Remove the radiator. For additional information, refer to
Radiator (26.40.01)
(Section 303-03C
Engine Cooling - 2.7L Diesel)
4 .
Remove both front impact sensors. For additional information, refer to
Front Impact Severity Sensor
(76.74.08)
(Section 501-20B Supplemental Restraint System)
5 .
Release wiring harness from crossmember
6 .
Remove the fender moulding. For additional information, refer to
Fender Moulding (76.43.54)
(Section 501-08 Exterior Trim and Ornamentation)
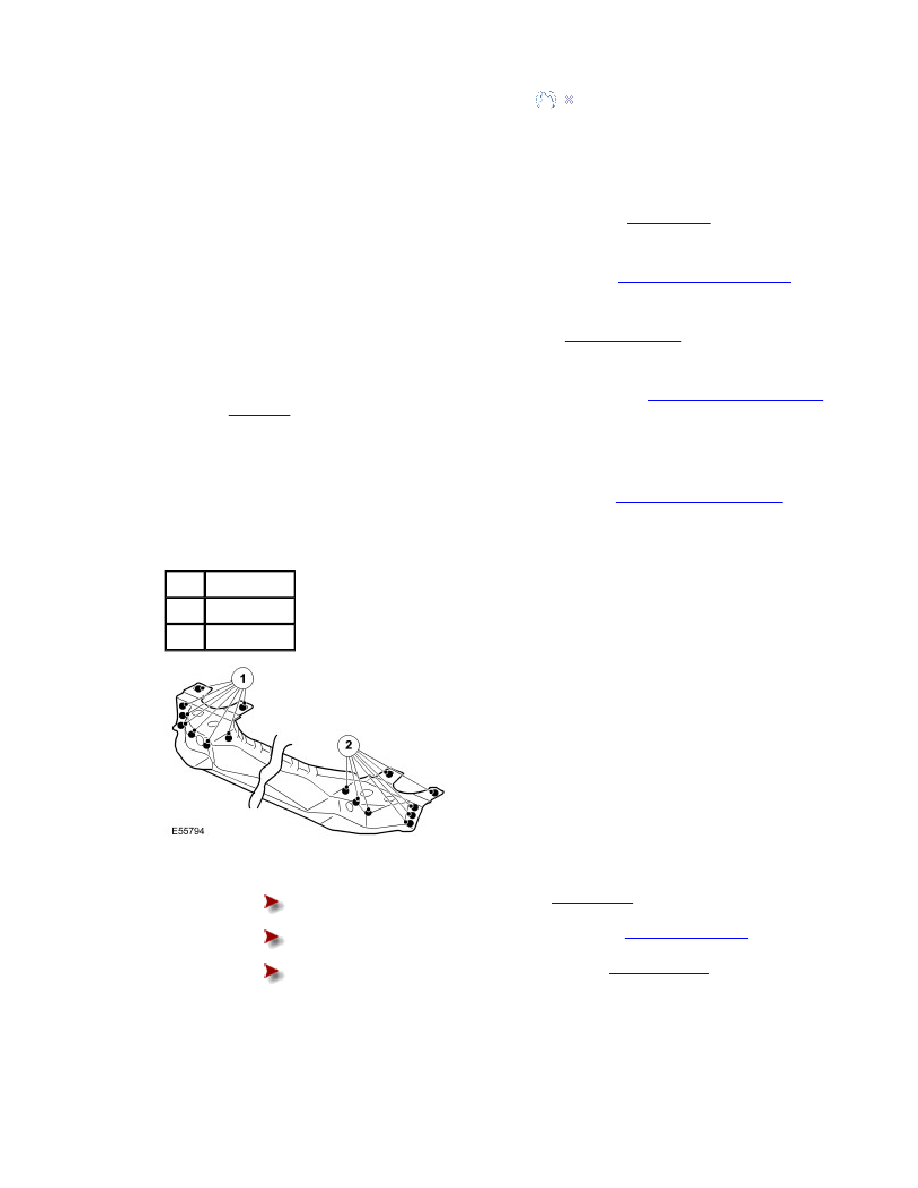
7 .
Item Description
1
8 spot welds.
2
8 spot welds.
8 .
For additional information:
Welding. For additional information, refer to
Body Repairs
(Section 501-25A Body Repairs
- General Information)
Corrosion protection. For additional information, refer to
Corrosion Protection
(Section
501-25B Body Repairs - Corrosion Protection)
Tolerance checks. For additional information, refer to
Body and Frame
(Section 501-26
Body Repairs - Vehicle Specific Information and Tolerance Checks)
1 .
Install is the reversal of removal.